Re-creating Thayaht’s Tuta Part 3: work in progress
Hello! Read the previous posts on this project: Part 1 Introduction and Part 2 where I got started on it.
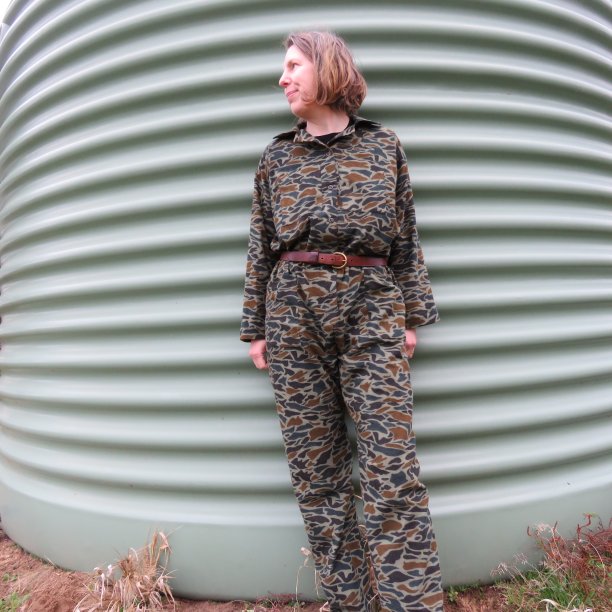
I’ve never worn a jumpsuit in my life and I think I’m a convert.
This week I fitted and finalized the pattern, cut out a navy blue Wear-out-of-the-house Tuta….and haven’t finished it. (It’s school holidays and I’ve been doing other stuff. Also need to get buttons.)
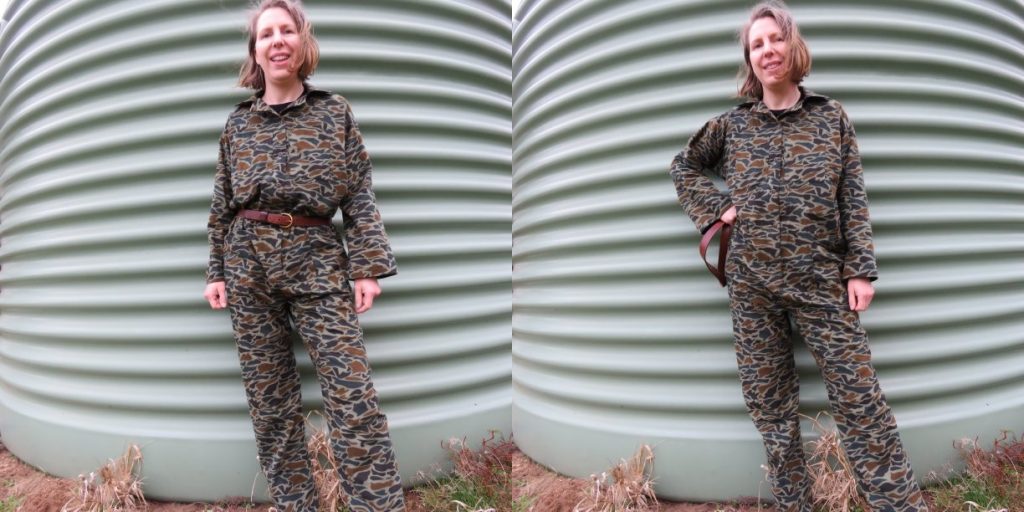
I did, however, finish off the camo flannelette toile to wear as pajamas. I’m actually wearing it as I type this. Wish now that I’d made it in non-pajama fabric, I like it so much.
In keeping with the camo theme, I finished it off with some buttons from my husband’s grandma’s button jar, which I suppose were off his grandpa’s WW2 uniform.
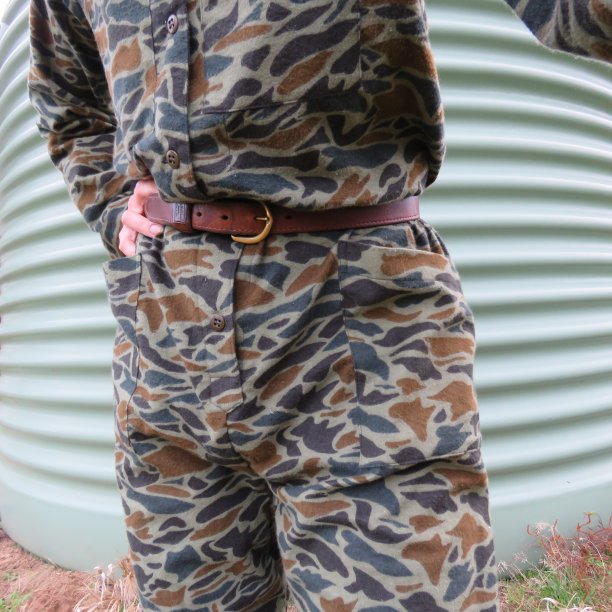
Obviously I won’t be wearing a leather belt to bed, but the Tuta looks so much better with a belt. Also, wearing a belt affects the crotch height – it makes it sit slightly higher because the top part blouses over the belt. This therefore makes the leg length slightly shorter.
In summary, do a fitting with the belt.
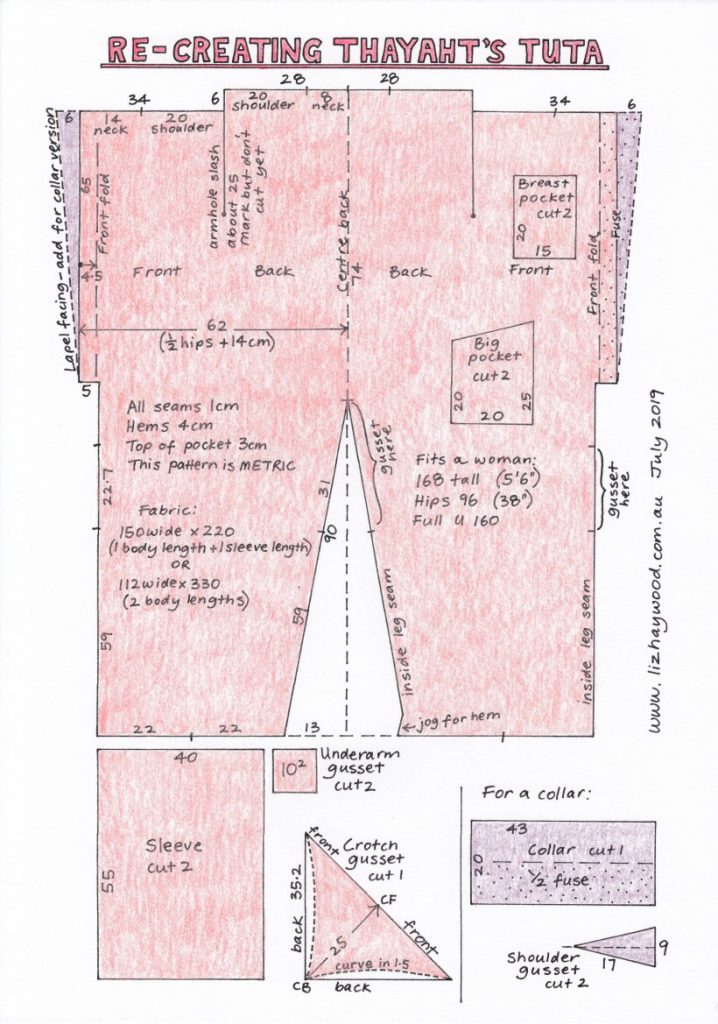
Here’s my pattern:
Are you thinking of making one? This pattern is one size fits all, as long as you’re the same size as me! Haha! Relax. I’ll grade it during the week.
Regarding sewing instructions, The original Tuta had a very helpful sketch explaining the gussets and What goes Where, but not the detailed step-by-steps that we are used to today. It was more of a short visual guide with handy hints.
Here’s a sewing order:
- Iron interfacing onto half of the collar and front facing.
- Sew the shoulder seams/shoulder gussets.
- Construct the sleeves with their underarm gussets.
- Sew the sleeves into the armhole slits.
- Sew the crotch gusset, leg seams and centre front seam.
- Press the front facings in place, lap them over each other and topstitch the bottom.
- Make the collar and attach it to the neck.
- Hem the sleeves and legs.
- Try it on and position the patch pockets.
Next week I’m sure to have finished the navy blue Wear-out-of-the-house Tuta. Might write a gusset tutorial too.
Cheers!
Read the last part in this series here.
Discover more from The Craft of Clothes
Subscribe to get the latest posts sent to your email.
Thank you for saving my eyesight – been squinting at those old reproductions. Then found your blog and this wonderful gift! I have a question about the 5cm length you added to the upper back. The sleeve is a folded rectangle, so front and back sleeve are about 25cm deep each and would fit into a 25cm deep armhole/slit. But doesn’t your added 5cm make the back armhole deeper? I can’t figure out where that 5cm gets worked in. Thanks so much for all the good info here and the history.
Haha! I confess I got out the magnifying glass to look at the original diagram!
With the armhole depth, mark the armhole slash but don’t cut the line yet. Make the gusseted sleeve, then measure its depth and cut the slash to match, before sewing it in. Yes, the back armhole is deeper but the slash is cut to match the whole armhole circumference. Sorry, looking back I didn’t write about it in this post but there’s a little how-to in the sewing notes in the following one: https://lizhaywood.com.au/re-creating-thayahts-tuta-mission-complete/
Thank you thank you! I hate to admit it but I had read the tips in the following entry. I thought, “what a good tip to avoid a hole in the slit fabric where a seam would normally be. Now i see it there in #5 – that added 5cm rolled over the shoulder toward the front. So TWO reasons to pause the slit cutting. Thanks for the helpful and kind response.
Cheers Barb, and best wishes for your Tuta. The navy one I made gets worn LOTS in winter – it always looks smart and always gets compliments – and the camo sample has been commandeered by my daughter for pajamas.
Hi there, I’m somewhat lost. is the length from placket to hem 59+22.7? There’s a space between the 22.7 to placket I can’t figure out. Thank you!
Hi Alexandra,
I’ve just gone back and checked my original paper pattern. The missing space looks to be around 10.3cm. However, if you start drafting at the centre back (74cm), then draw in the triangular space for the leg angle (90cm for the hypotenuse and 13cm for the short side), the missing measurement will reveal itself when you work your way around to it via the other measurements. Best wishes with it:)