Re-creating Thayaht’s Tuta: Part 2
Hello, welcome to my second post following my quest to re-create Thayaht’s Tuta. Read last week’s introduction here.
This week I made a pattern, cut out a toile and ran it up to check the fit.
I kept thinking how glad I was not to be living in post WW1 Italy.
Much as I venerate Italian fashion, in truth I was prepared for this to be the unsexiest thing I’ve ever sewn, not counting the cover I made for the tractor. Happily, it turned out very well with only a few things to resolve. Far better than I thought.
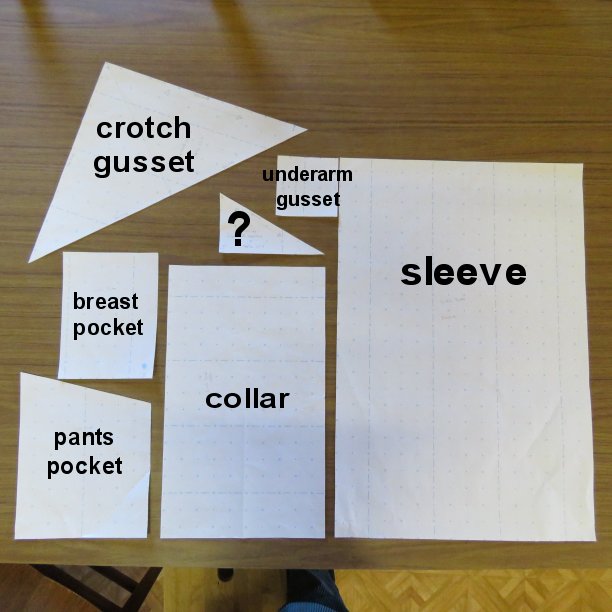
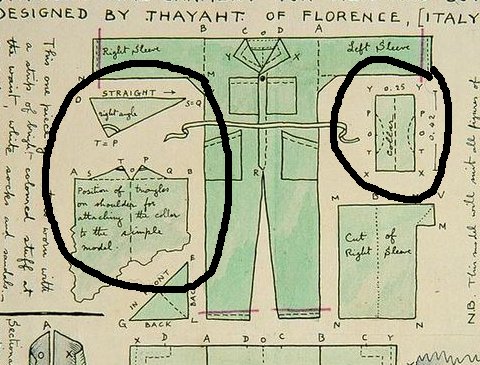
The cutting details are in the newspaper clipping from La Nazione which has measurements but is in Italian, and the coloured drawing which is in English but has no measurements.

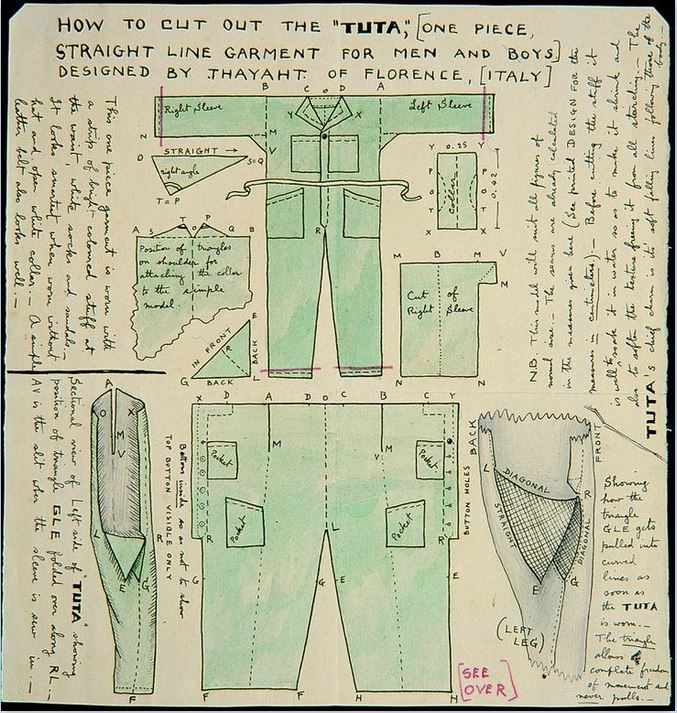
I do like that the entire pattern diagram and instructions are drawn on a single piece of paper.
How faithfully should one follow Thayaht’s instructions? I want a good fit yet I don’t want to start complicating the simplicity of cut. However, at some point, as with any pattern, there’s a departure from the instructions as the maker makes it their own.
The Tuta was designed to be cut with minimal waste. Half a Tuta fits onto fabric 70cm wide with a centre back seam. The toile fabric I used is camo print flannelette from the op shop – when I’m done with it I’ll wear it for winter pajamas. It’s 87cm wide and there’s LOTS of it. There’s enough left to make matching pillowcases and hot water bottle covers if I desire.
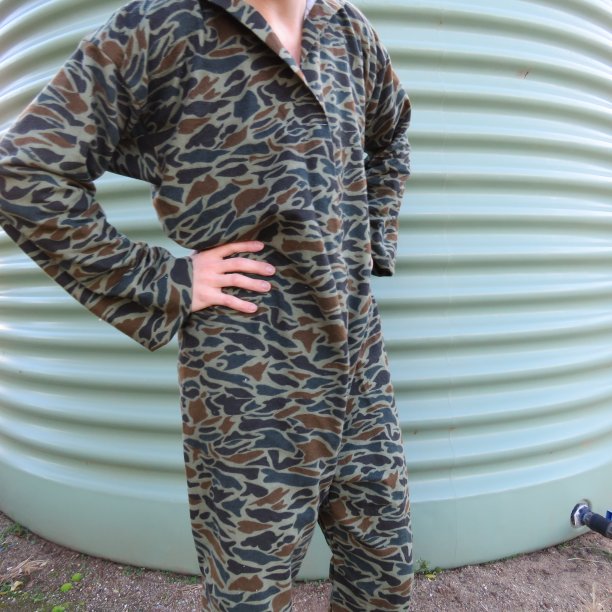
I sewed the sleeves properly because I was confident they would fit, then pinned the rest together using pins without heads. I’m wearing it very carefully!
It looks pretty ordinary without a belt.

Patternmaker-y notes:
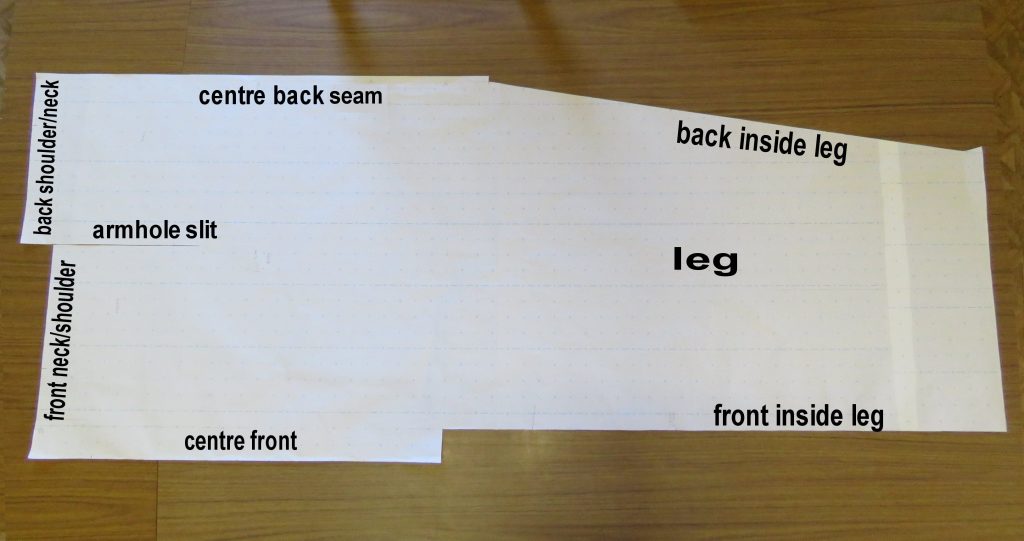
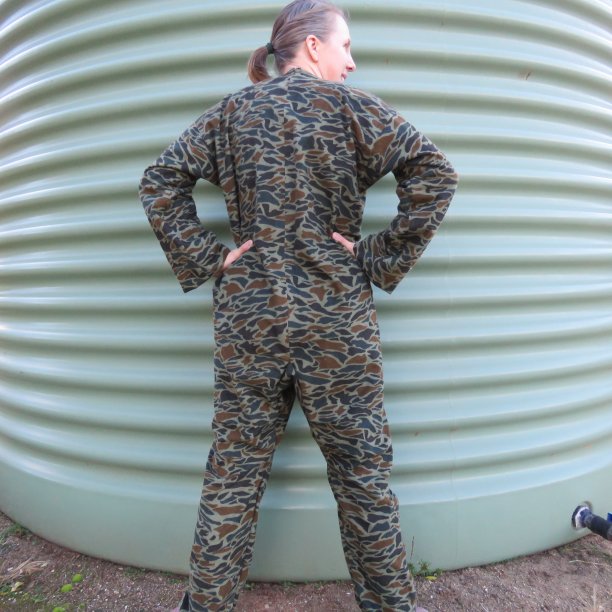
I was unsure about the leg cut: you can see the front is cut on the straight grain and the back is angled – I sort of felt they should both be angled the same. However, it looks fine when worn.
- The original one-size-fits-all dimensions are too big for me so I made it narrower (it’s designed for men). The leg length is okay though.
- Looks like the button front opening goes all the way down, but I made mine only about 50cm long.
- The crotch on my toile is too low, as you can see from the above photo, but fixable (I drafted the pattern conservatively).
- I added 5cm onto the back height to make the back longer than the front (so the front neck didn’t choke when I sat down). Could have added 6cm or even more.
- I cut my 10cm x 10cm underarm gusset separately for a more economical use of fabric – Thayaht joined his to the sleeve.
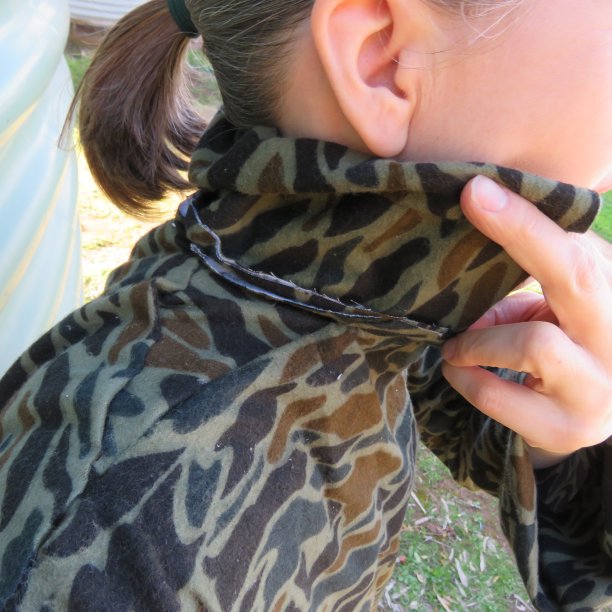
- The sketch shows a Tuta without a collar, yet there’s pattern pieces for a collar and some triangles to go with it. Thayaht had a collar on some of his versions and I liked it. I haven’t quite resolved this but I’d like to have a collar on mine. Looks like the two triangles get sewn to the back neck….and then the collar is attached to them??? The triangles are set next to each other forming a V at the back neck which I could tell wasn’t going to work.
Instead I trimmed the triangles to make them isosceles triangles and pinned them in as shoulder gussets, then pinned the collar on. Will experiment more with this.
So…all fun and interesting. This week’s project is to cut and sew a real Tuta using some fine navy suiting. Join me next week for the Tuta conclusion.
Cheers!
Read Part 3 here.
Read the Part 4 The conclusion here.
I like patterns that don’t waste fabric and are utilitarian. I am saving these posts to make my hubby a tuta for working on our ’68 VW Beetle. I’m wondering if a zipper might be better than buttons for the front closure? Also for a woman’s tuta, I’m thinking back elastic at the waist would improve the fit and look without sacrificing the range of movement. Might try both on a muslin for me before I work up a final.
So pleased you’re planning to make it.
A zip certainly would work for a Tuta (the brown jumpsuit toile last week had one) but my ex-mechanic husband doesn’t recommend. He said mechanics overalls have to be quick to take off in case you spill acid or something on them, so you want press studs/snaps you can rip open quickly. He also said zips can scratch the paint on the car, even if the zip is plastic.
Interested to hear re: back elastic. I considered a variety of “waist pulling in” ideas but I think I’m just going to go with a belt (and beltloops).