Re-creating Thayaht’s Tuta: mission complete
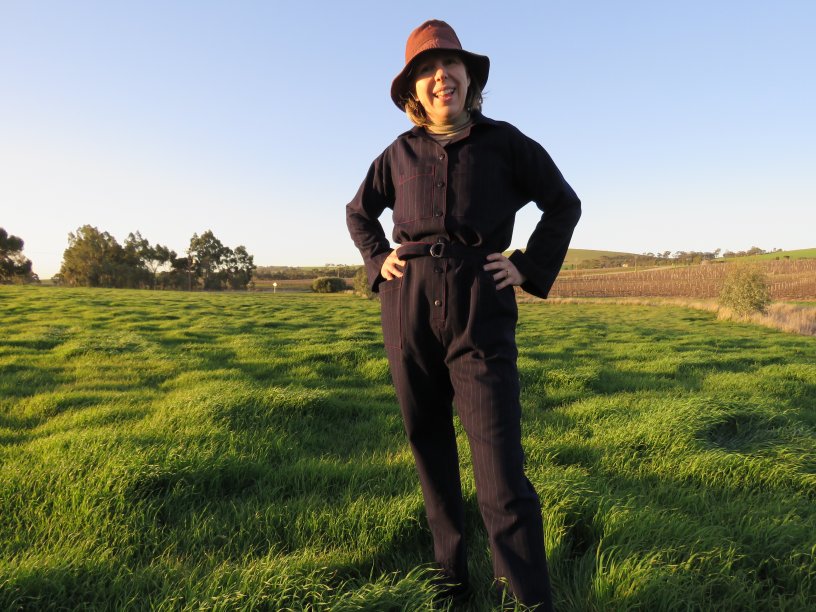
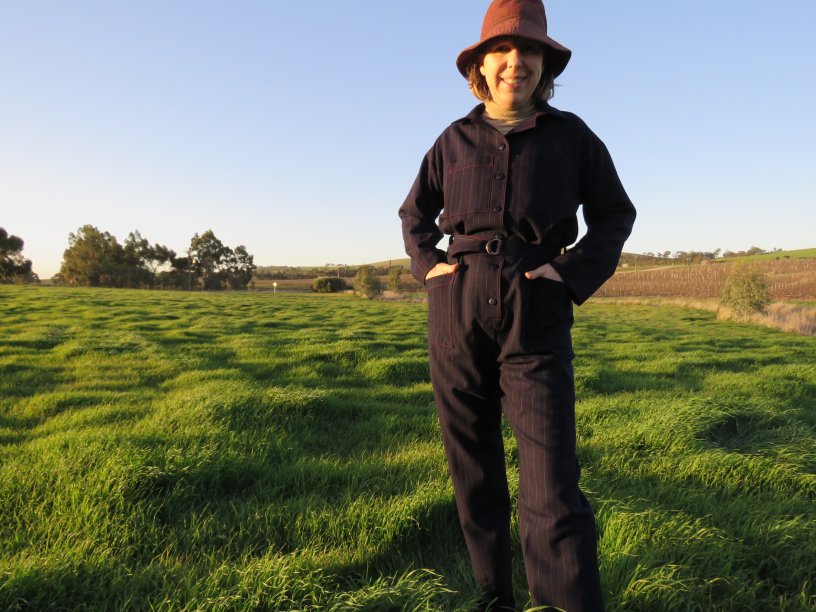
Folks, I’m happy to report that I’ve finished the Tuta and it’s an outstanding success.
Read the previous posts here: Part 1 introduction, Part 2 the toile and Part 3 work in progress.
I love the utility feel of it…..the pockets, the way the top blouses, the leg cut, all those opportunities for topstitching…
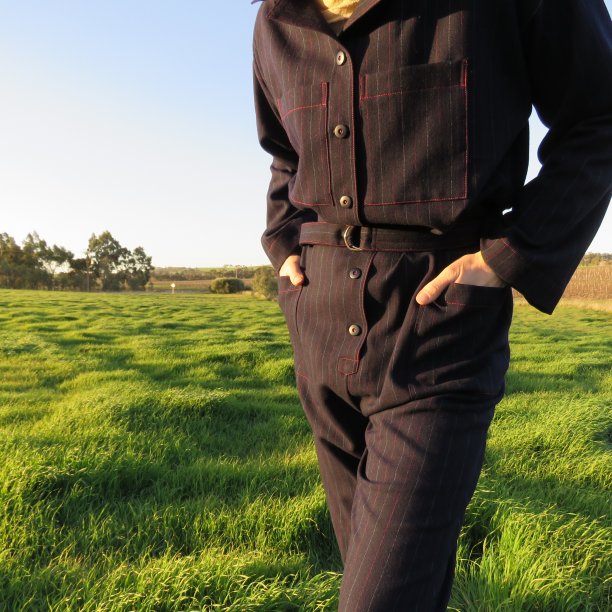
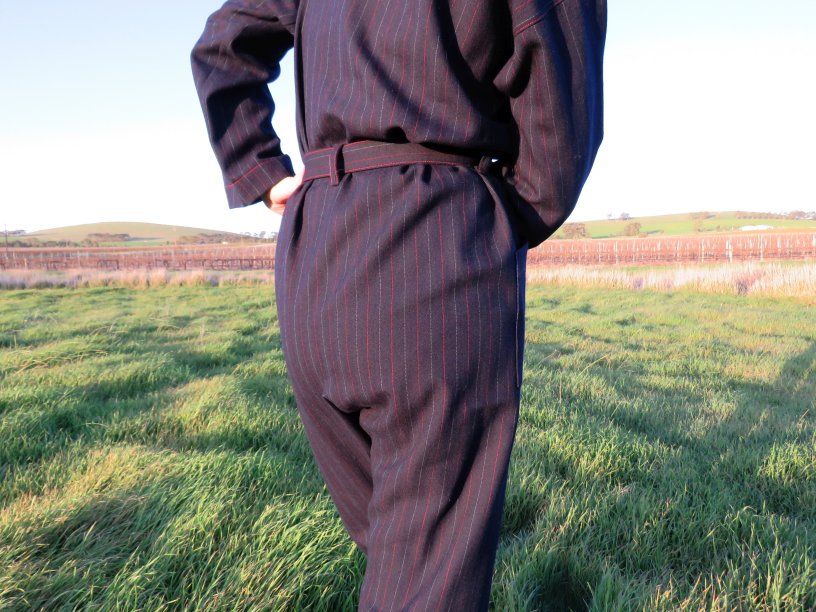
The fabric I used is some old navy blue pinstripe suiting. To be honest it wasn’t very easy to sew; it didn’t press crisply and it’s such a dark navy it was hard to see what I was doing sometimes. I made a belt from the same fabric with two D rings for the buckle.
I haven’t actually worn it yet beyond taking blog photos. I finished it during the week but haven’t had a suitable opportunity for wearing it “out”.
However, I have been wearing the camo Tuta toile to bed – all great until I need to get up in the night, but the wearing enjoyment outweighs the inconvenience.
Although the pattern is simple (well, it is to me), the sewing part takes a reasonable amount of time because you’re essentially making two things -a top and trousers- in one. And, there are five gussets to sew. Here’s a graded version of the pattern:
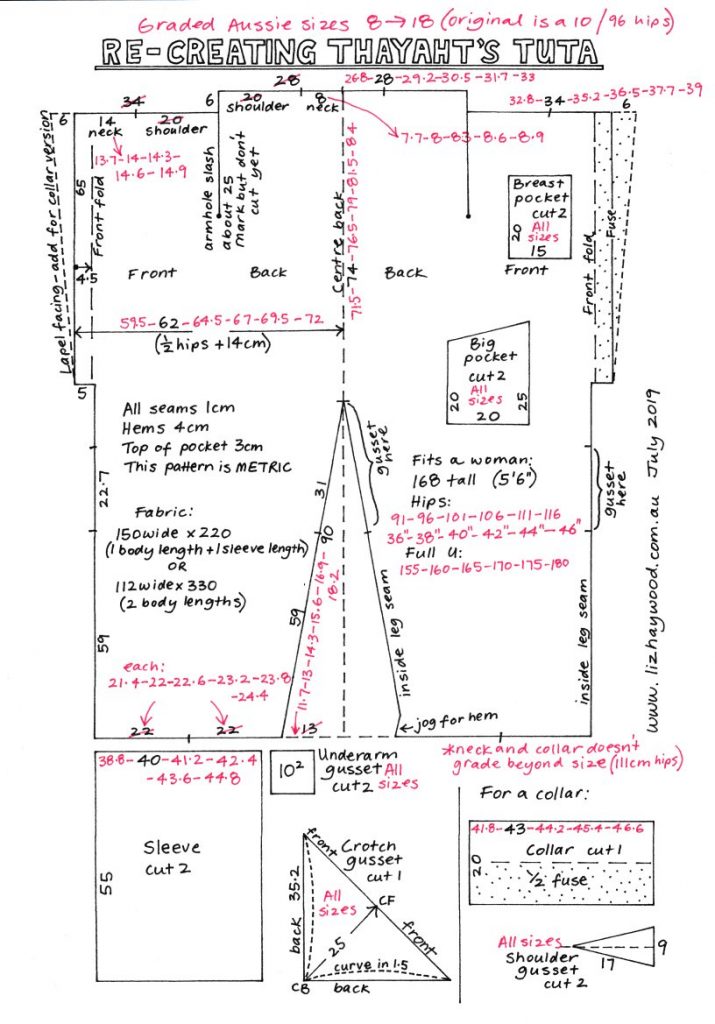
If you’re a bigger size, just increase the grade following the numerical pattern (for example, the sleeve width increases by 1.2cm per size, so the next number would be 46, then 47.2, etc). Note that the neck and collar don’t get any bigger beyond a size 111cm (hips). As with all patterns, although patternmakers do their best to fit the broadest segment of the population based on statistical advice and their own training and experience, there are no guarantees it will fit your particular size, shape or height.
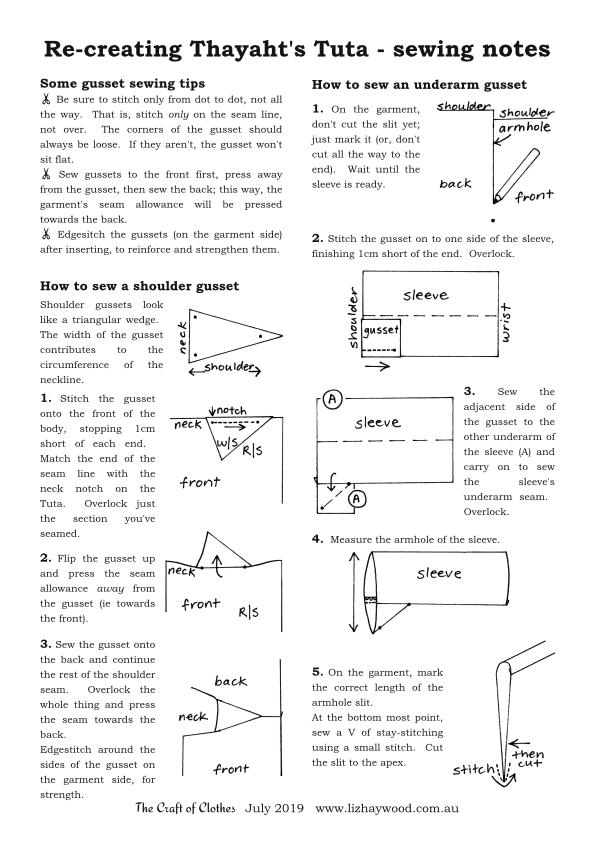
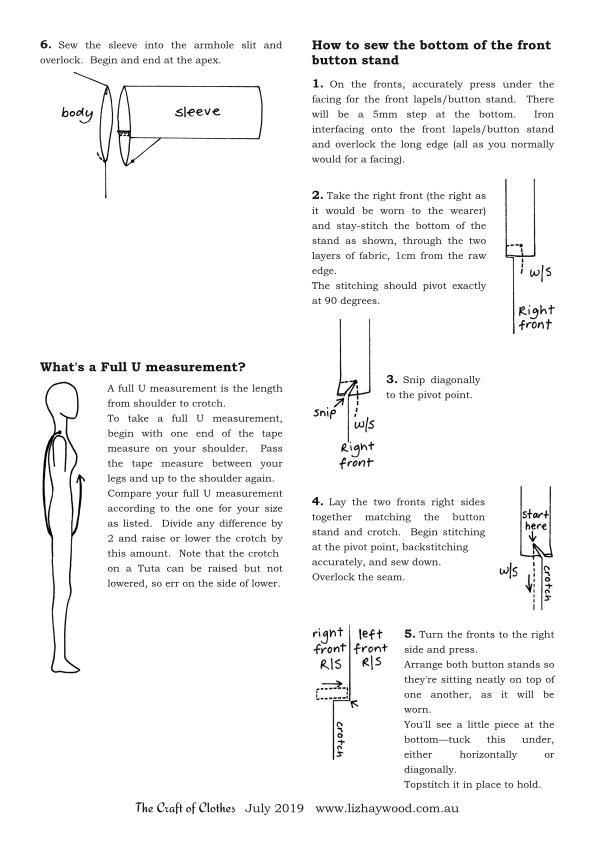
I know some of you have bookmarked these posts to make yourself a Tuta later on. A brief sewing order is in last week’s post and here’s some notes to save in your files:
Many thanks to Riccardo Michahelles from the Thayaht & RAM archive and Timo Rissanen for good ideas and encouragement.
Cheers!
Fabulous Tuta, Liz!
Cheers, Mary – another historical pattern for you.
This is fantastic, I was just re-reading your posts as inspiration for making my own – or actually, a child-sized version. I have a couple of questions about the cutting – was there a lay plan somewhere that I missed, either in your pattern or the original Tuta? Was it meant to be cut zero-waste? You said somewhere, maybe in the first post, that you had experimented with a zero-waste cutting layout for a jumpsuit; how did it work out? Thanks for any insights!
Hi Emily, there isn’t a lay plan. The original Tuta just had the pattern sketch as you saw in the blog post. I imagine it was made to fit the (narrow – 70cm-80cm?) fabric widths of the time, so there was minimal waste (as you would want in post-WW1 Italy). Because the pieces are mostly square shapes, you should be able to fit them on whatever width fabric you have without much waste – spare spaces could be used for extra pockets, for example.
Yes, before I made a Tuta I tried a zero waste jumpsuit, which is the brown toile in the first post. My jumpsuit was for Zero Waste Sewing, but in the end it didn’t go in the book. By co-incidence I wore the sample today for Me-Made-May – here’s a picture. I achieved zero waste but the pattern got overly-complicated with multiple sizes – every size had different sized details (pockets, ties etc) so I didn’t use it in the end. Really like it though! All the best for yours. Feel free to email if you have more questions.
Great project! It is suitable for men? Regards!!
Hi! Yes; the original pattern was for men, in one size only. I started with the original measurements in this post and the changes I made are in this post. The original was a bit big for me and the sleeves were too long. Best wishes 🙂
Great resource, thank you for publishing this!