Making a zero waste pattern Part 4: just keep drawing, just keep drawing…
Welcome to the next installment of the zero waste hoodie top pattern, which is unfolding week-by-week on this blog. If you’d like to catch up on the back story,
Part 1 Where I tested out the initial idea from a tiny sketch.
Part 2 Where a sample is sewn and some thought given to multiple sizes.
Part 3 shows some samples in different sizes and fabrics, after a frenzied week of sewing.
The pattern’s cutting layout had an overhaul during the week. After trying the samples on men, I saw it could be a great unisex pattern, however, it was too short on all of the men (but it’s a good length for women). Therefore I decided to give the top a generous 7.5cm (3″) hem for flexibility length-wise. Adding length is no big deal for regular patterns – one simply makes it longer and adjusts the fabric requirements – but adding length in zero waste gets complicated because it affects other pieces.
This means the Drapery Japanese chambray which arrived last week is now 4cm too short to use, but I might be able to wangle it with smaller seam allowances (or something).
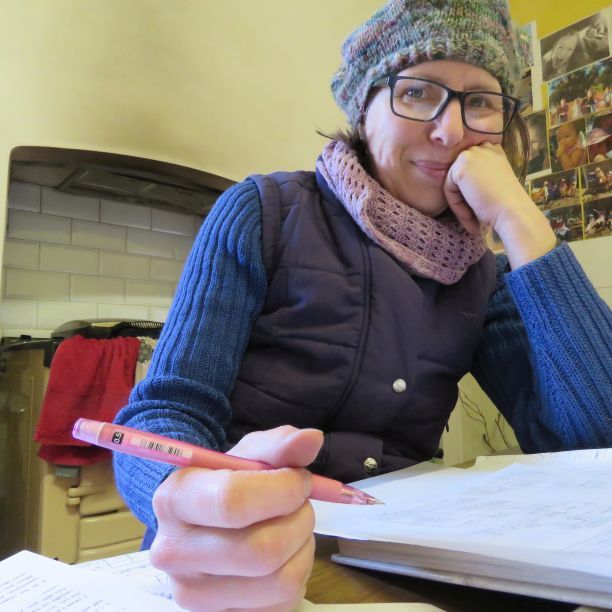
The past week has been spent sitting at the kitchen table, drawing, so there’s not much to show-and-tell in this blog post. (Actually, sitting in front of the stove during one of the coldest weeks this winter hasn’t been a bad way to spend the days.)
Maybe you’d like to settle in and read about the process of writing and illustrating the pattern’s instructions…..
Pattern instructions can be illustrated with drawings or photos. Photos very accurately show how things should look, particularly with proportions, and are handy if the pattern writer doesn’t draw. Drawings, either hand or computer drawn, can be better at communicating an idea because you can take a few liberties with a drawing that you can’t with a photo. Drawings tend to reproduce clearer than photos if the printing is in black and white.
I favour drawings done by hand, partly because I like the look of them – it looks a bit like a journal and you can “see the hand of the artist” – and partly from a practical point because I’m not as good at computer drawing or photography.
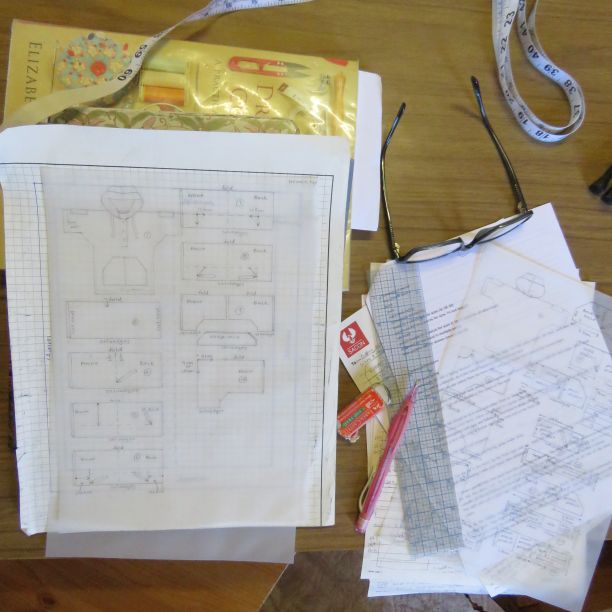
Before starting, I take all the pages of (very detailed) handwritten notes taken during cutting and sewing the samples and type these into the computer as step-by-step instructions to print out.
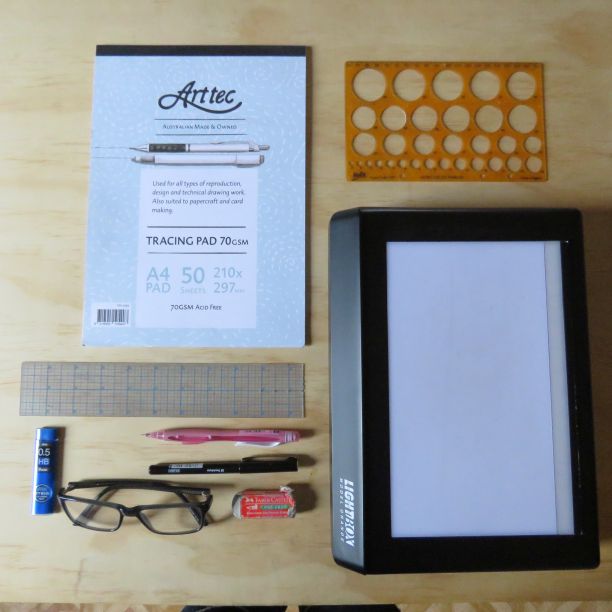
Using the printed-out and handwritten notes, I draw the illustrations needed on tracing paper. I can do about 20-40 in a day (there are currently 74 in this pattern). I like to draw on A4 tracing paper with a .5mm mechanical pencil with HB leads (I’ve tried 2B but everything ended up dirty and smudged). I tape the tracing paper onto graph paper so that all the lines are properly horizontal and vertical. The graph paper has columns drawn on it the same width as the finished document because I draw the pictures actual size – this means I don’t have to resize anything and, importantly, the drawings have consistent line thickness which makes a better-looking set of instructions.
By the way, if you draw, tracing paper is your best friend. You can easily transfer bits of the previous drawing to a new one, which is very useful for step-by-step instructions where a little part changes with each step.
As I do each drawing I number it and number the paragraph in the instructions to match. It’s vital to have systems to keep the drawings organised, both on paper and when they’re in the computer.
Mostly I draw from memory and the notes, but the best drawings I’ve done have been from sewn samples – I do this when I just can’t visualize it.
How did I start learning to draw? We had a fashion drawing module when I was a fashion student, where we learnt figure and flat fashion drawing. I was passable, but not inclined to practice much. At work as a patternmaker, I had daily practice doing flat pattern drawings however, I really saw my drawing improve over the 10 years I spent on The Dressmaker’s Companion, which has (conservatively counted) over 3,100 drawings. I felt far more confident by the end of it and kind of felt like I’d “found my voice” as an illustrator.
Every step in the step-by-steps needs at least one drawing, and while it’s important to avoid ambiguity in sewing instructions, it’s extra so with zero waste patterns, because the pattern pieces are often unusual shapes and the methods different to how we usually make clothes. If I don’t put enough steps in, I get “Sorry, you’ve lost me here Liz” and “I have no idea” from the patterncheckers.
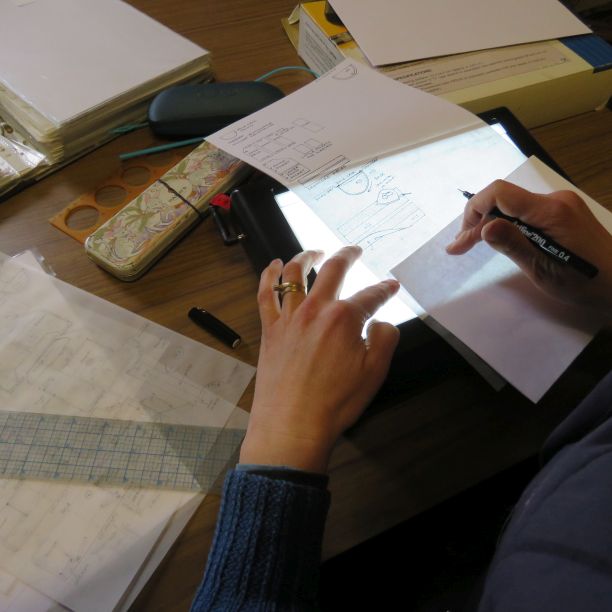
With the tracing paper drawings done, they’re placed on a light box and drawn onto A4 paper, just the kind you use in printers (Reflex ultra white). I use a .4 Artline 200 fibre tipped pen. I rule the straight lines rather than draw them freehand, as it gives the drawings a neater look. To keep everything organised, each A4 page is numbered and I draw the pictures onto the page sequentially, fitting as many as I can onto each page. When the page is full, I start on the next page.
The A4 pages are scanned at 600dpi on a freshly-cleaned scanner. I use Paint Shop Pro 6 to individually crop each picture and tidy them up. It’s quite amazing what a scanned line looks like close up. When I started using Paint Shop 15 years ago I really didn’t know how to use it – I didn’t know how to use the erase function, so I used liquid paper on my originals!
With the drawings scanned, cropped, tidied up and sequentially numbered, I’m ready to import them into the document when I need them.
Come back next week – we’re going on a photo shoot!
Discover more from The Craft of Clothes
Subscribe to get the latest posts sent to your email.
I really hadn’t appreciated what a massive amount of work goes into sharing patterns. I now have much more respect for the time needed, and hope whatever you can charge for the patterns covers the time involved.
I hope everyone else is thinking that too! Yes, it IS a big investment of time which is eventually recouped by the price and number of patterns sold.
The tracing paper, pencil work and then ink all take me back to 6th Form Geography (in Scotland) where we had to produce A1 mapwork sheets. We had to ‘write’ annotations in block capitals, stencil the lettering for headings and we used Rötring pens which had an angled attachment to hold so that the actual pen and nub were kept vertical and therefore the line thickness was consistent! Tricky for a left handed person not to smudge!!! We also used razor blades to scrape away mistakes on the thick tracing paper. I loved doing it but it did eat up an inordinate amount of time! (I still have them in the loft for posterity)
I will look at your drawings even more fondly now!
Ah, so different to school now! Thanks for the reminiscences 🙂
Hi
Mam
I visite your site. I read your introduction blog. Iam so happy. You mainly ladies fashion designer. Good your work.
Thank you so much .
Hi! Thanks very much!