As it happens: part 2 designing a zero waste top
It’s week 2 of Making a Zero Waste Top, and to my relief things are coming along nicely. If you missed Part 1 it’s here.
With the “exciting” bit done (ie seeing if it’s going to work), it’s time to settle down to some sewing and problem solving, which I enjoy too.
During the week I sewed the toile I cut out – I sewed it properly, with overlocked seams and all the finishes I would do if it were the real thing. The purpose is to have a top which can be tried on by fit models to check the fit and styling, and it’s also given me 4 pages of sewing notes which will form the basis of the sewing instructions.
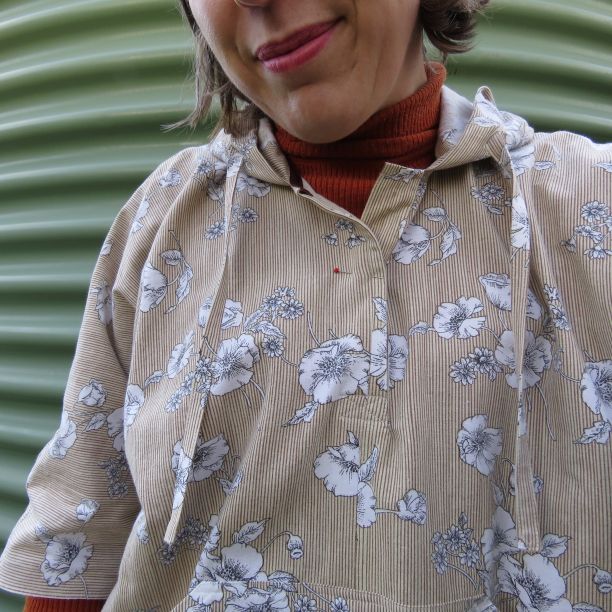
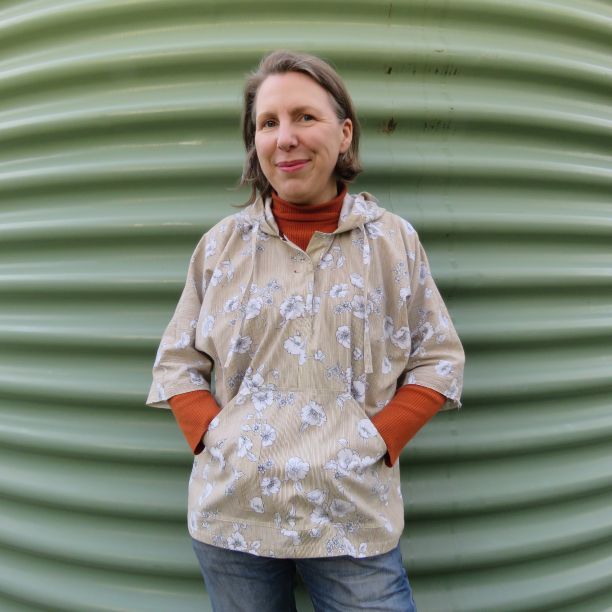
Here’s me wearing it:
This sewing exercise is helpful for making decisions on the type of seam finishes and other sewing minutiae – for example, the neck seam is hidden by ribbon for a very neat finish:
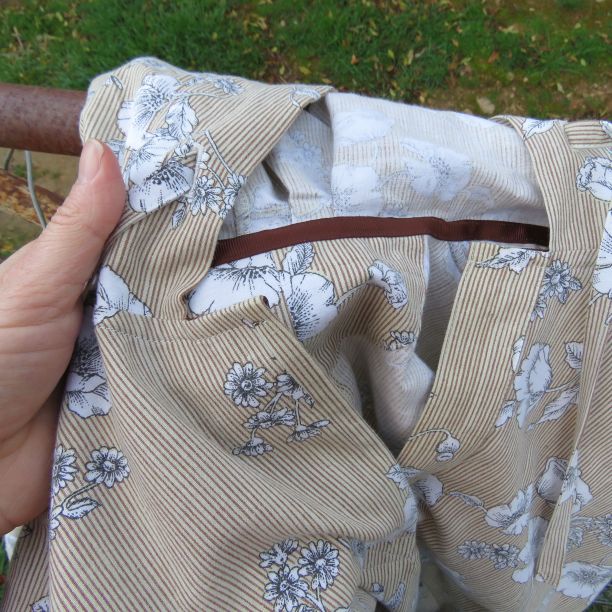
The verdict was that this sample is good.
The next issue to tackle is sizing. I already gave this some thought last week when I started the pattern. Zero waste clothes need to have the sizing sorted out as the pattern is being made, not afterwards like regular patterns.
Size inclusivity is important to me and I would like to offer this top in twelve sizes, which would be sizes 8-30 (bust 87cm/34″ – 142cm/56″)
Multiple sizes are tricky with zero waste and it would be far easier to just do one size. However, this is one of the challenges that we need to confront and solve with zero waste.
At the moment the pattern looks like this:
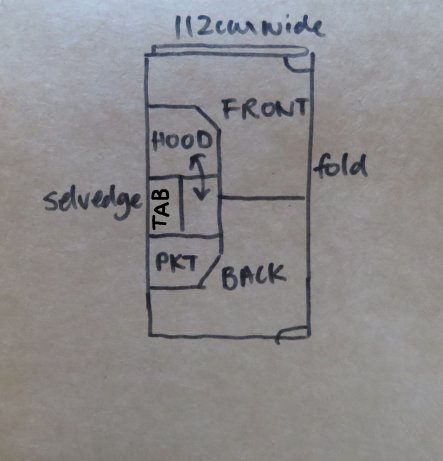
If we increase the body size, it will grow to the size in red:
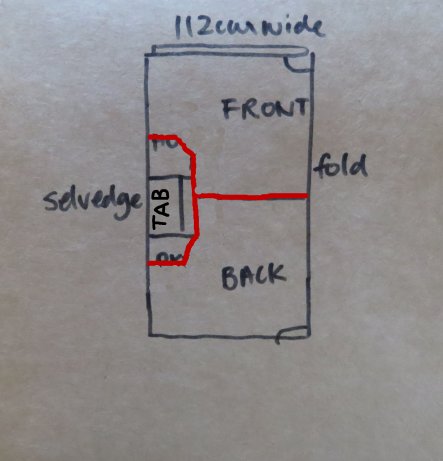
You can see that we would kiss goodbye to most of the hood and pocket.
But, we could specify extra fabric and use some of that. The cutting plan and sewing would therefore be slightly different for the bigger sizes:
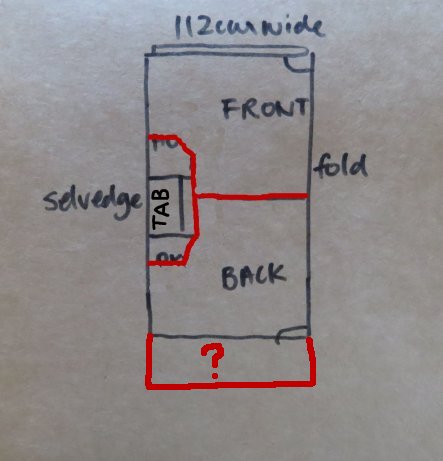
I’d also probably make the bigger sizes a bit longer in the body too, say 5cm-10cm/2″-4″, to keep the proportions looking good.
Another option I considered but rejected would be to use a wider fabric for the larger sizes (eg 130cm/51″ wide instead of 112cm/44″). The sleeves would get longer by about 8cm/3″ and there would be enough fabric for the details. However, I would prefer to keep using 112cm wide because it’s easier to come by and there’s a bigger range of colours and prints in that width (anything you can find in a quilting shop, really).
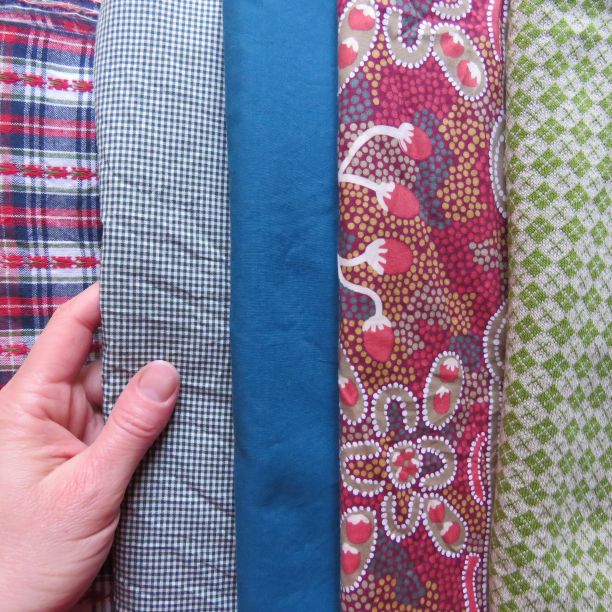
Thinking ahead, I’ve chosen some possible fabrics to use for photography samples. There’s a criteria:
- no black or dark navy (hard to photograph successfully – it just ends up looking like a silhouette).
- colours must flatter the model.
- plain fabrics show the construction better especially if there’s contrast stitching but often prints look more “wow”.
- it’s good to show the same garment in a variety of fabrics.
From left to right: plaid (to see how it looks in checks), tiny gingham, blue poplin (love this colour), indigenous print by Audrey Napanangka (not enough of this for sizes bigger than the sample) and a vintage argyle knit (thanks for the suggestion, Donna-in-last-week’s-comments). I’ve also ordered some Japanese work-wear style indigo chambray from The Drapery which should hopefully be here by the end of the week.
So the task this week is to sew several tops in a range of sizes to check how the other sizes are going to work out, then try them on bodies of the appropriate size. These may or may not become the photography samples. At the same time, I’ll write the cutting instructions for all the sizes.
If time, I’ll investigate whether this top would suit men.
See you next week!
Cheers!
Discover more from The Craft of Clothes
Subscribe to get the latest posts sent to your email.
Oo, I got a shout out! How exciting – can’t wait to see how that beautiful knit works out! Shame I’m on the other side of the planet or I’d come and steal it! xx
I’ve had this lovely knit for years, waiting for the right project. Unfortunately it has a golfball-sized hole in it but it might work out okay, I hope 🙂