Tessellating is a concept I use sometimes when making zero waste patterns. It’s one way to add curves to a pattern. In this post I’m going to show you how I do this, and some examples of tessellated sewing patterns. This is a fairly long post, so settle in 🙂
Tessellations are shapes that fit perfectly into one another, with no gaps, and the interlocking pattern is designed to continue infinitely. You probably have examples in your home, such as patchwork quilts, honeycomb, jigsaw puzzles, brickwork and floor tiles.
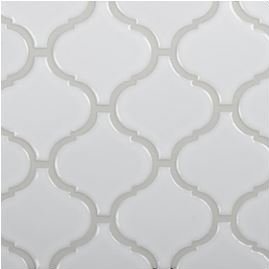
Tessellating tiles. My grandparents had the same ones in their bathroom, but green.
The same concept can be used to make zero waste patterns.
Basic tessellation
Let’s start with a square (or rectangle).
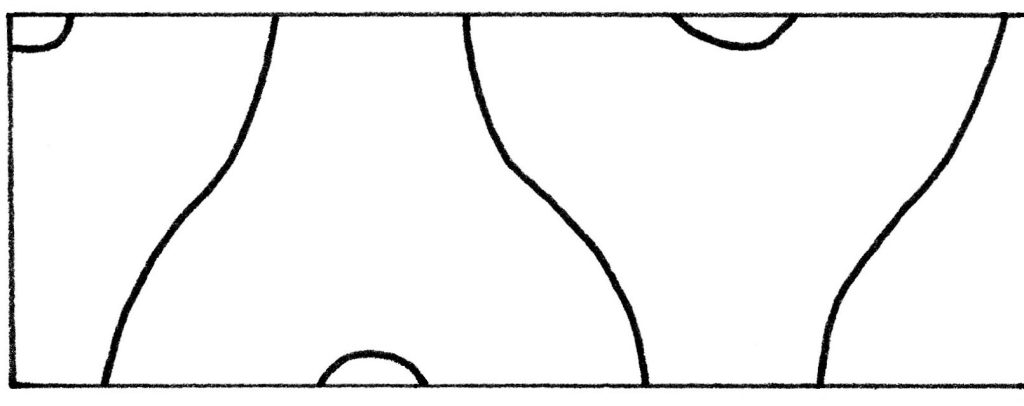
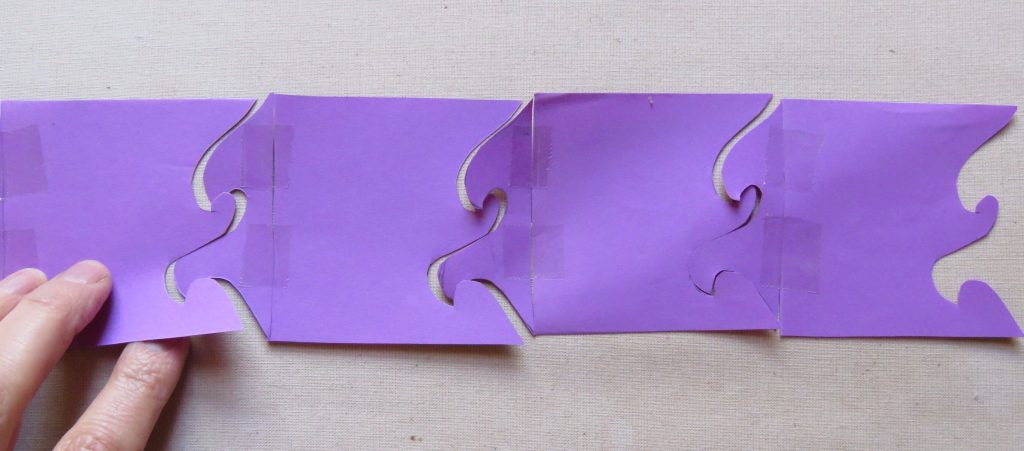
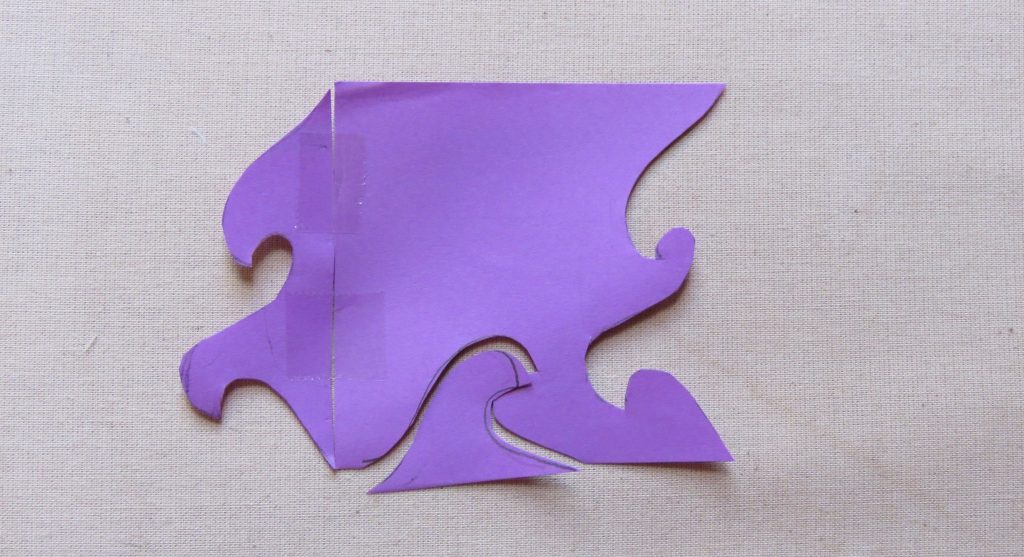
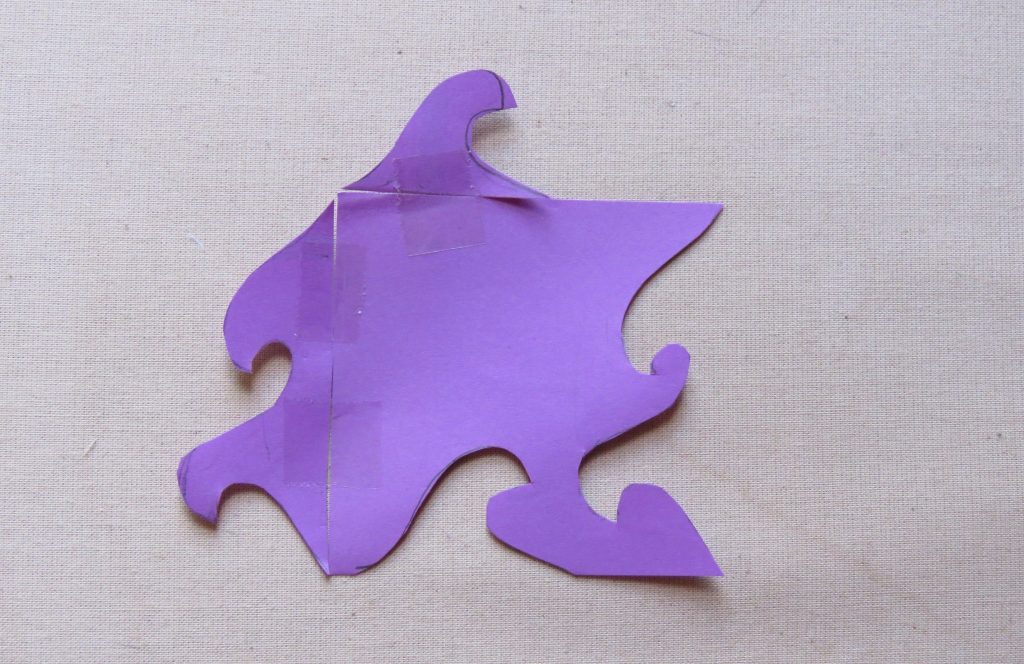
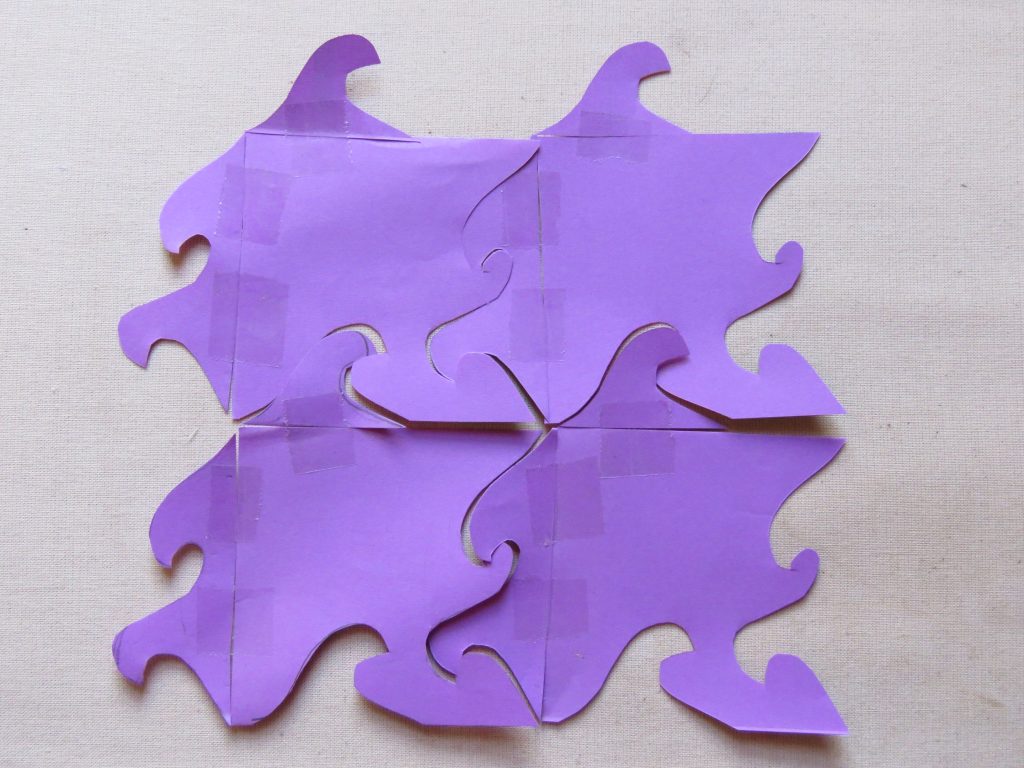
Cut a shape out of one side, as fancy as you like. It can be curved or straight.Tape the cutout to the opposite side. Don’t flip or rotate it, just move it across.You now have a shape that interlocks with itself.You can take this a step further by cutting out another shape on one of the remaining sides.Tape it onto the opposite side.The piece will fit with itself side-to-side and top-and-bottom. This is called a translation tessellation, because you only have to slide the shape along to make the tessellated design, rather than having to flip or rotate it.
You can see that this can give a very complex looking shape, with curves, with no great effort.
Tessellation for garment pattern pieces
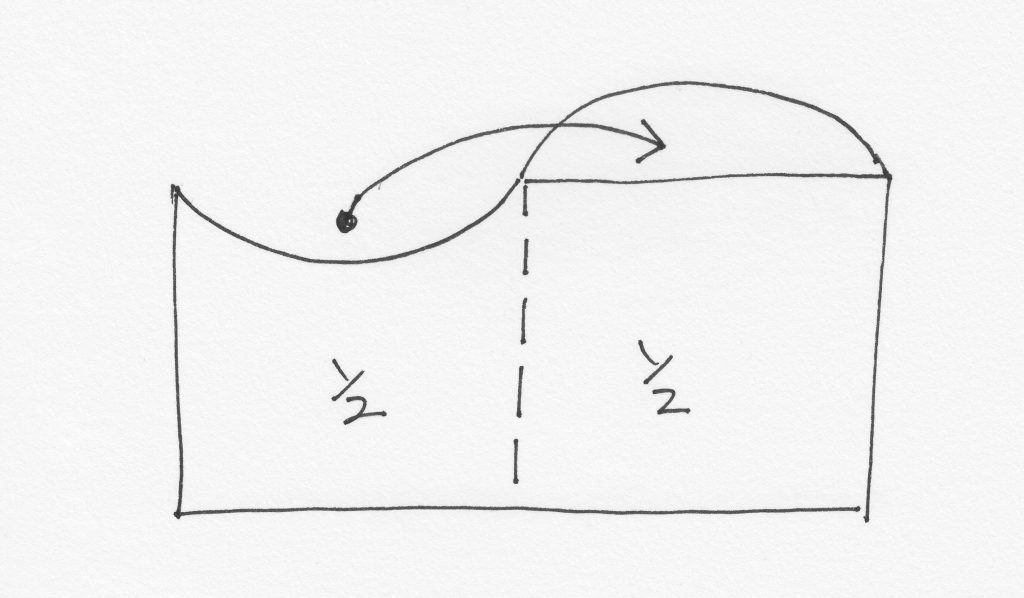
When I use tessellation for zero waste patterns, I usually tessellate only one side of a shape.
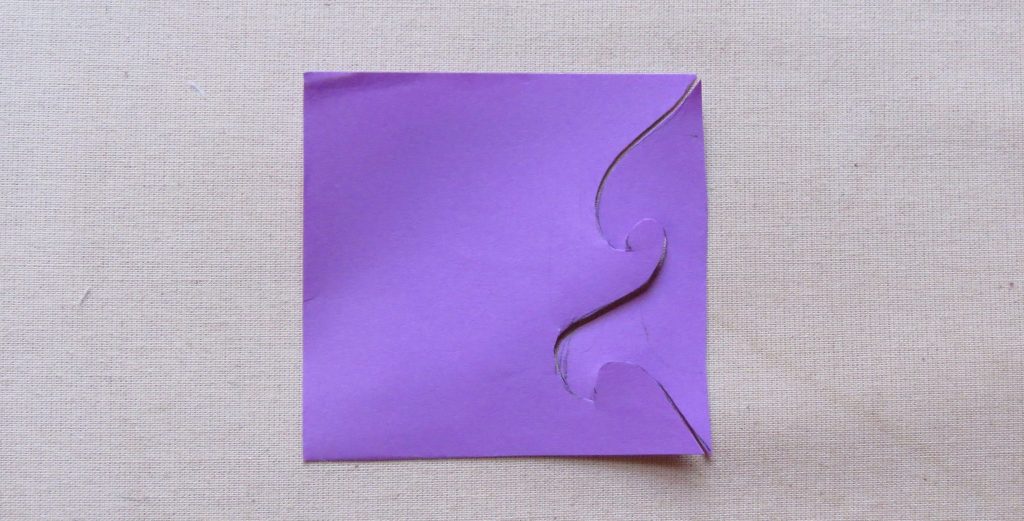
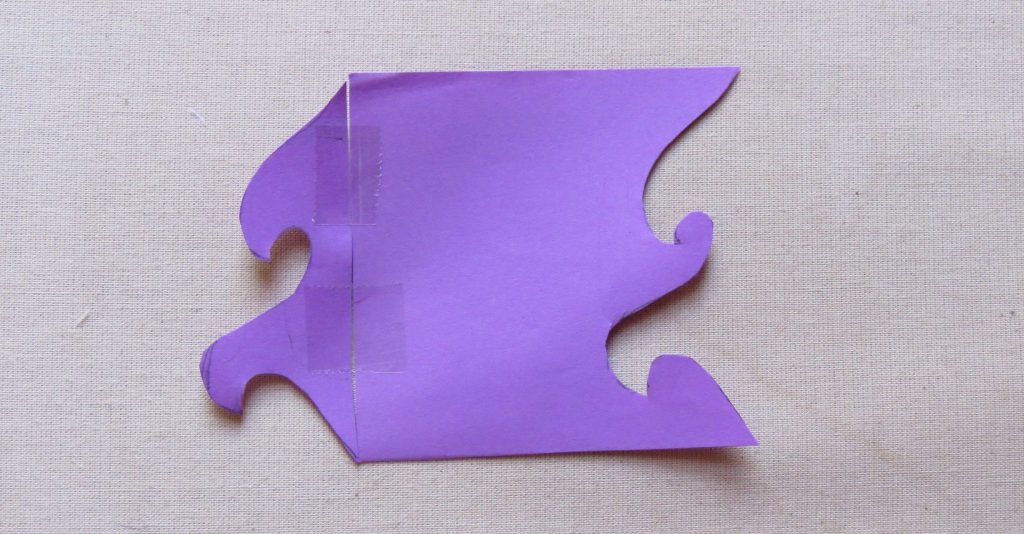
On one side, I determine the half-way point, and cut out a shape which is added onto the other half. This quickly sketched shaped could potentially be a sleeve, with the scooped out part as the underarm and the raised dome as the sleeve head.
You don’t have to use squares or rectangles as the primary shape; there are other shapes which tessellate on their own and can be used as the basis for a garment piece.
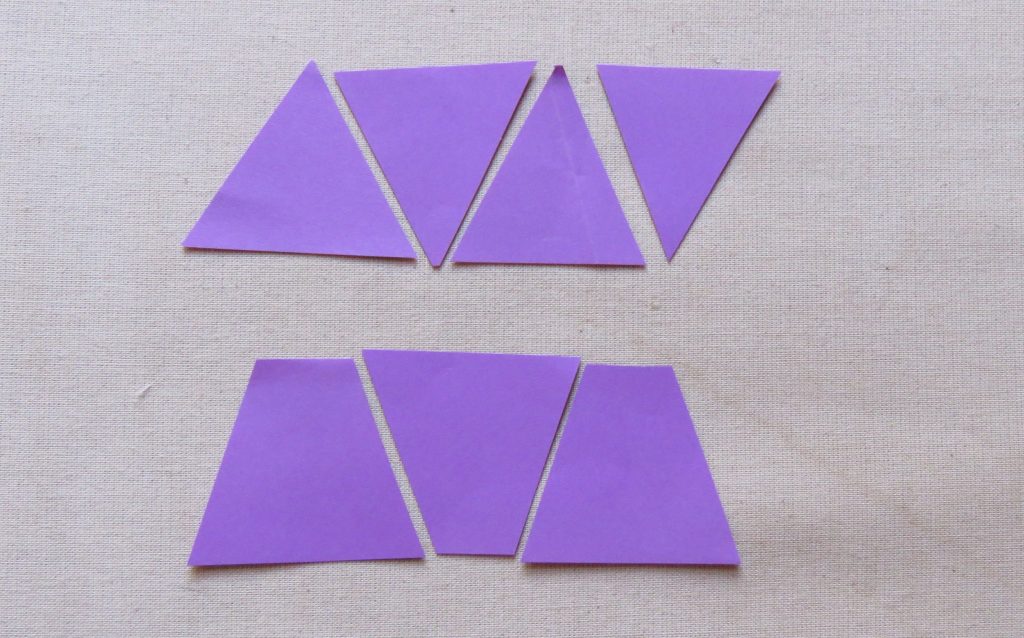
Squares and rectangles are easy to use, because of course the fabric has straight sides and the pieces fit easily next to each other. Parallelograms also fit next to each other in a row, but there will be a triangle-y shape left at each end.Triangles and trapeziums fit neatly top-and-tailed with each other. Again, there will be half shapes at each end when the pieces are laid on the cloth. Trapeziums are one of my favourite shapes to use. They can form the gores of a skirt, or the basis of a tapered sleeve.Hexagons, diamonds and lozenge shapes will tessellate with a half-drop. I don’t use these shapes much, because it leaves half shapes all around the edges when the pieces are placed on the fabric.
Not all fabrics suit tessellated patterns. It is not always easy to match checks or stripes. If the pieces are top-and-tailed, then directional prints and napped fabrics will run the wrong way for half the pieces.
Also, note that the seam allowances need to be on the piece before doing the tessellation. You need the finished shape. You can’t add seam allowances afterwards or the tessellation won’t fit together properly anymore.
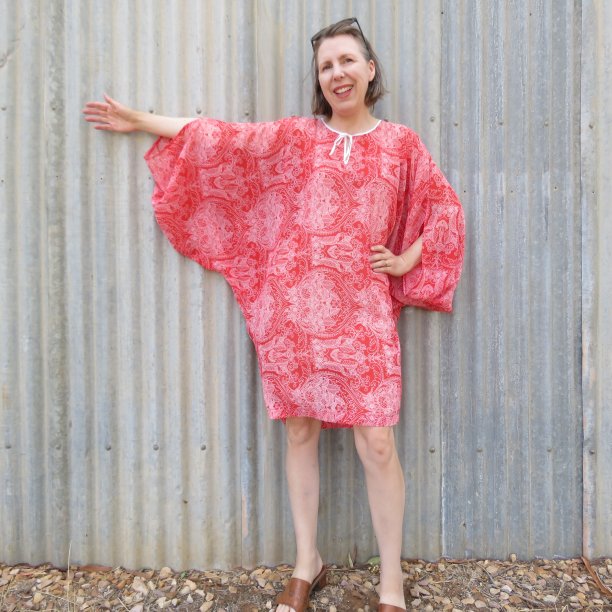
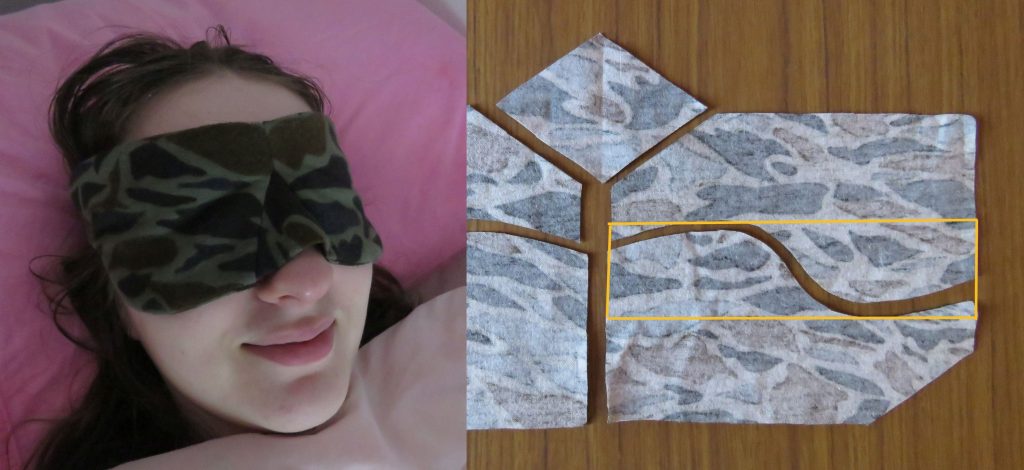
This is me in 2020 wearing the first sample, showing you the sleeve shape.
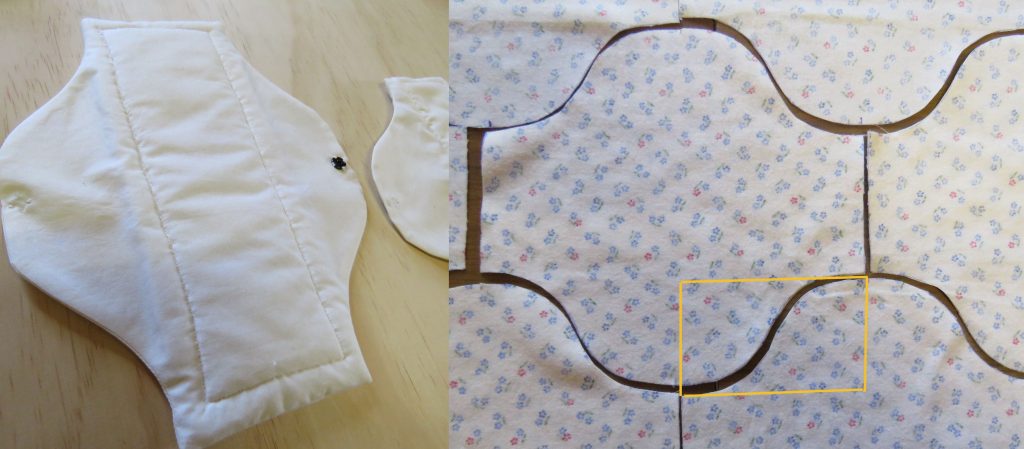
The cutting layout has the front and back nested together, top-and-tailed. As you can see, tessellating the pieces makes it very economical on fabric.
Here’s a step-by-step of how the curved shape was tessellated. You can use this method for tessellating other patterns. Some examples are shown at the end.
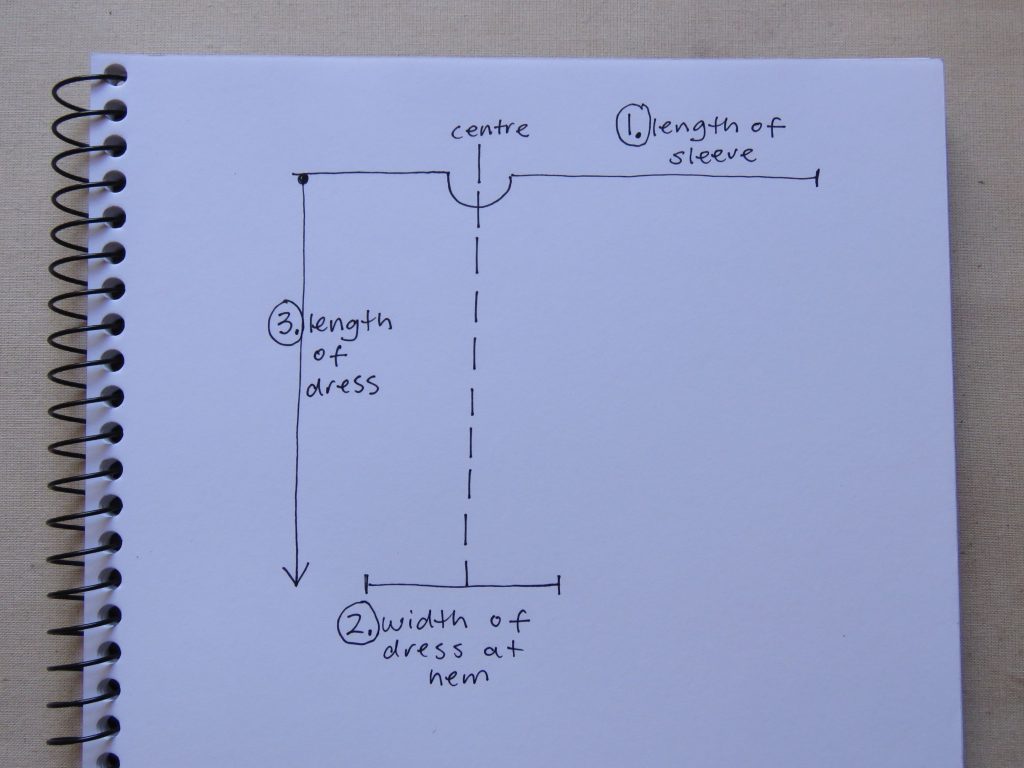
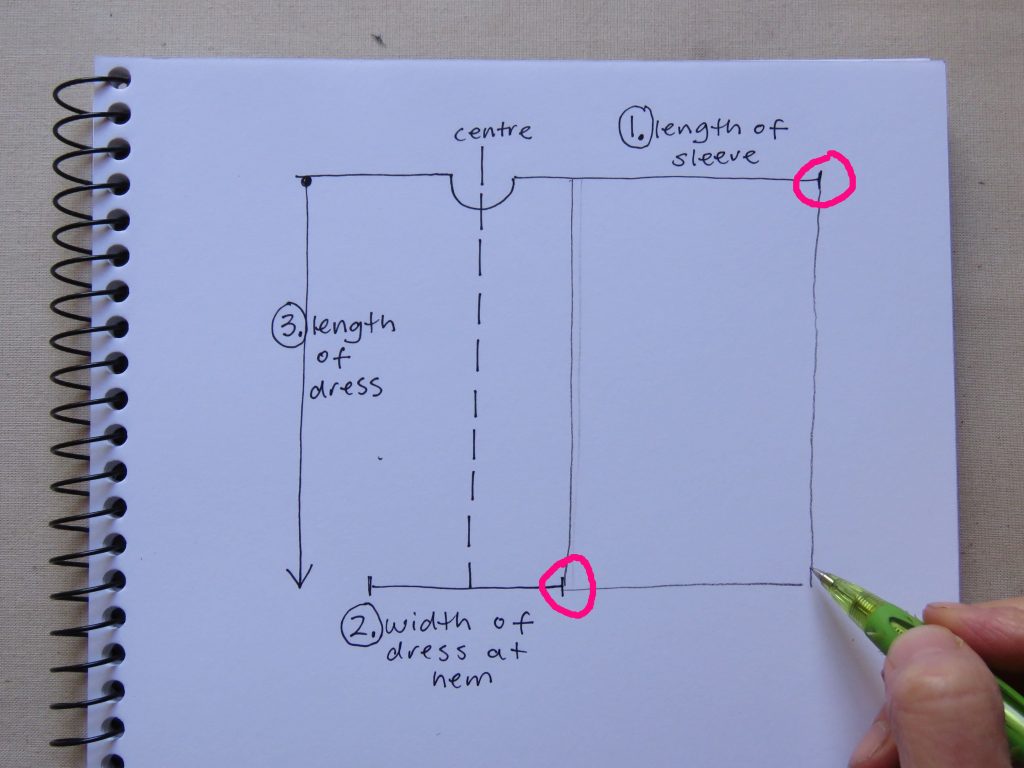
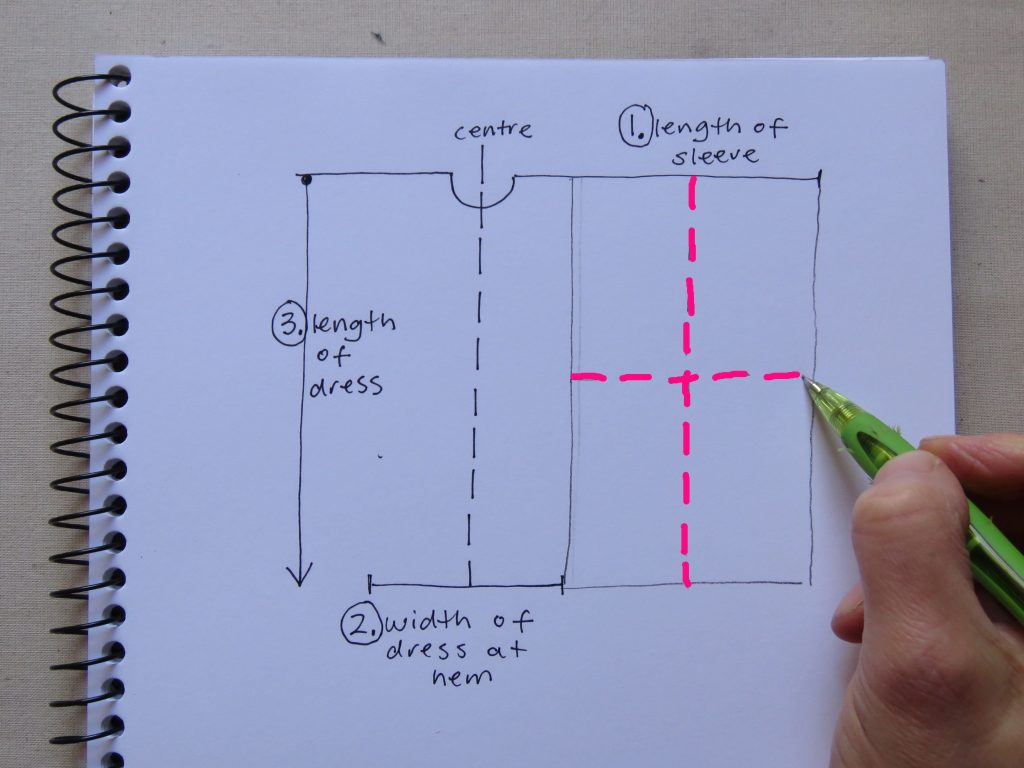
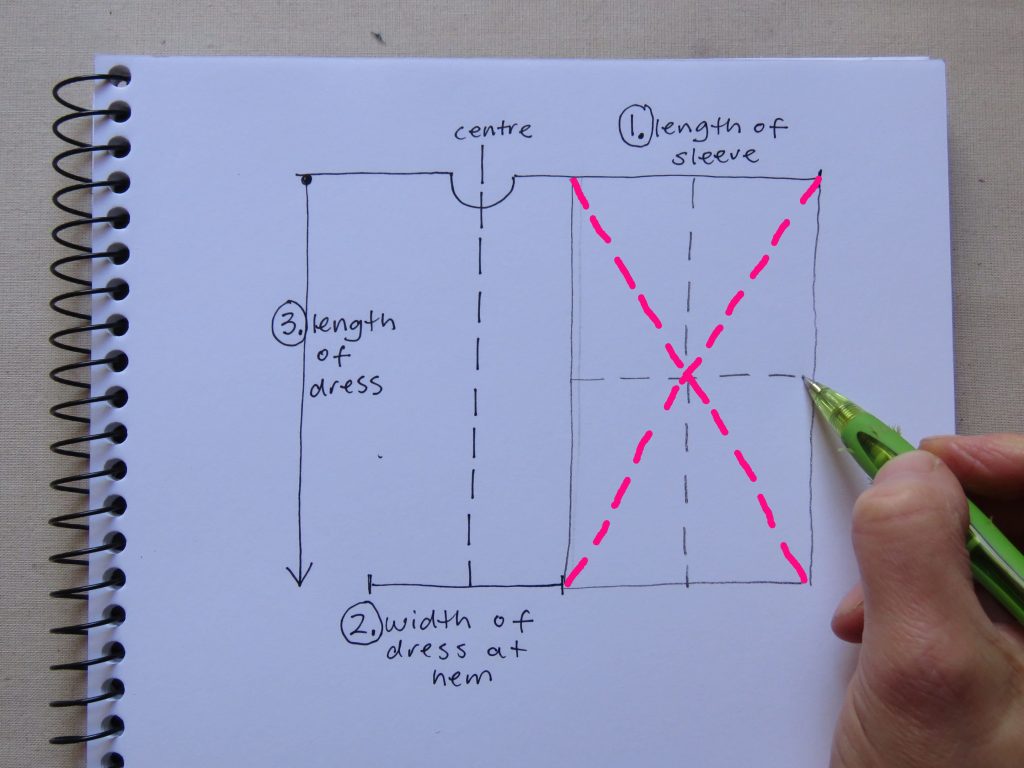
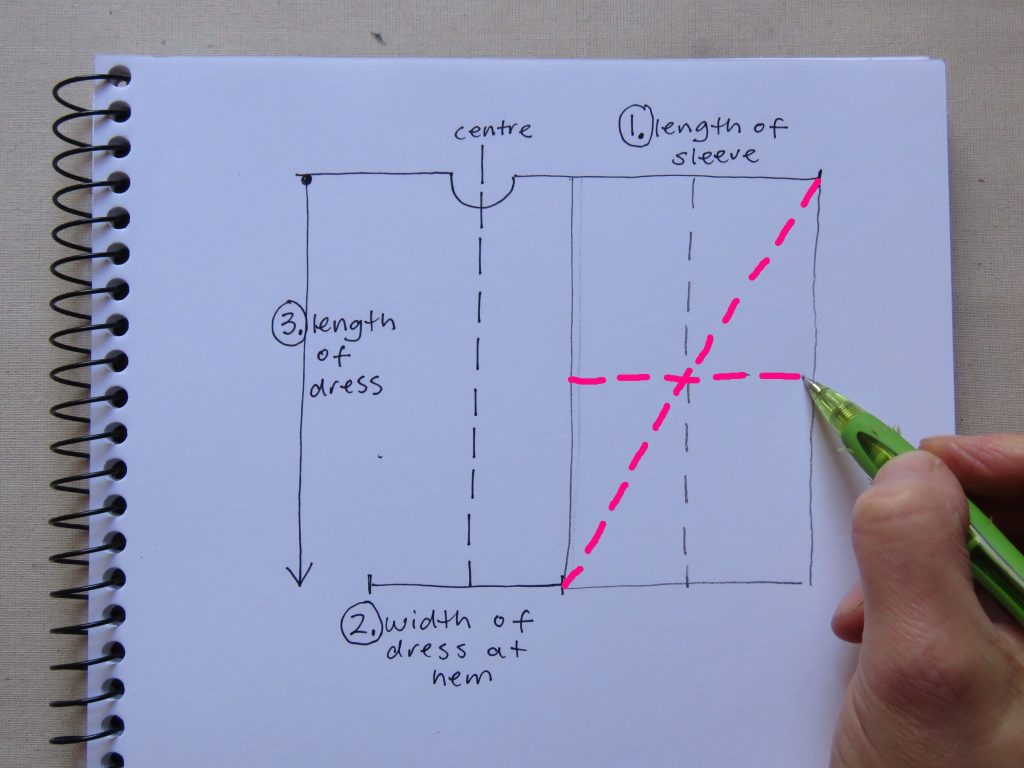
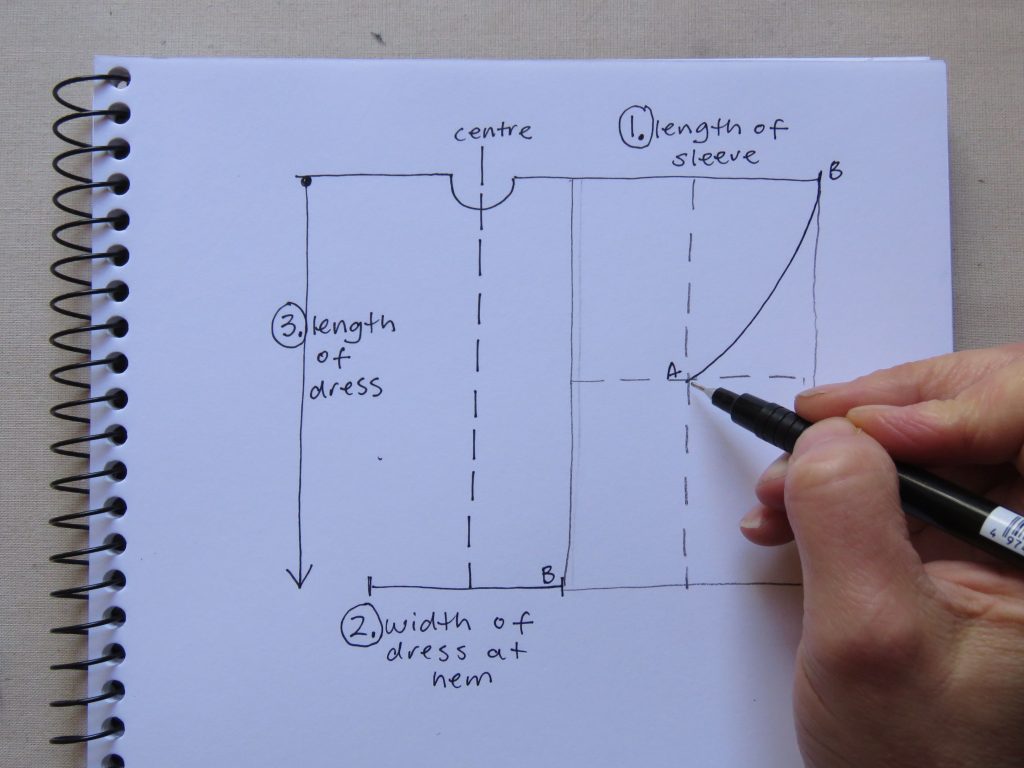
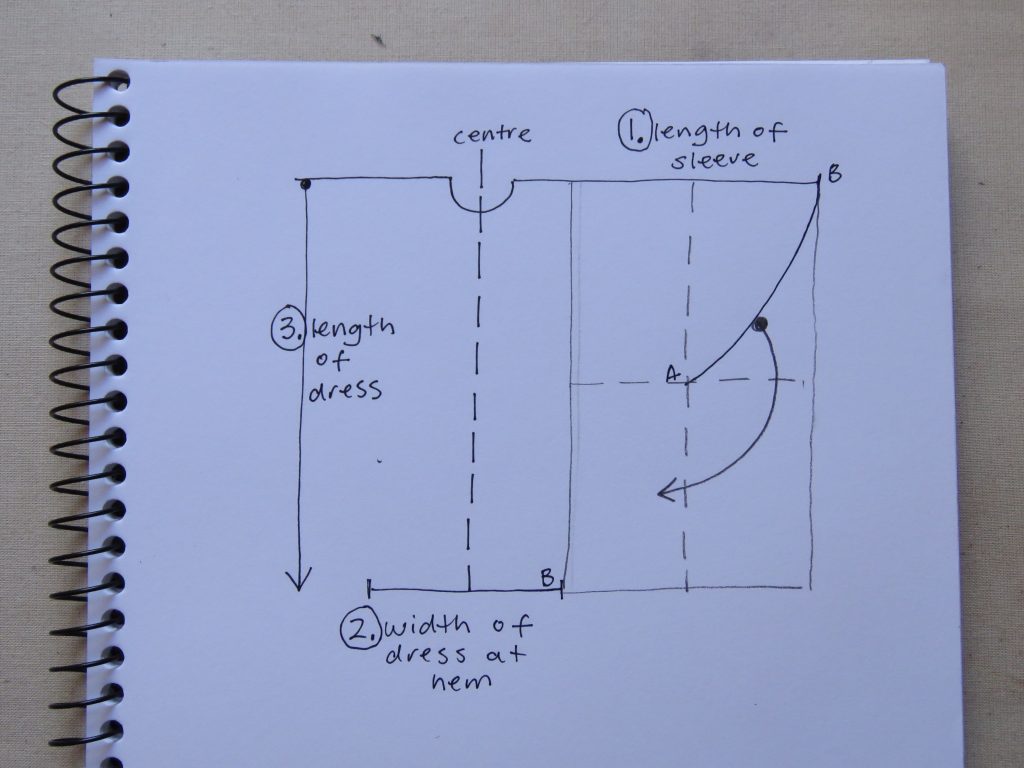
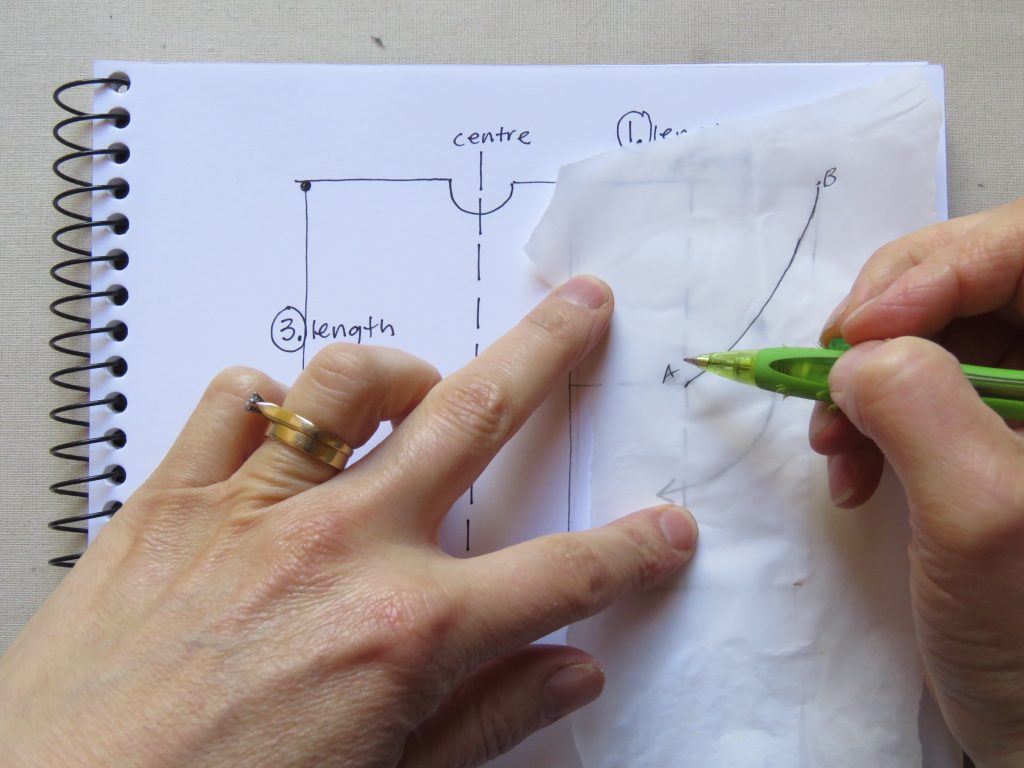
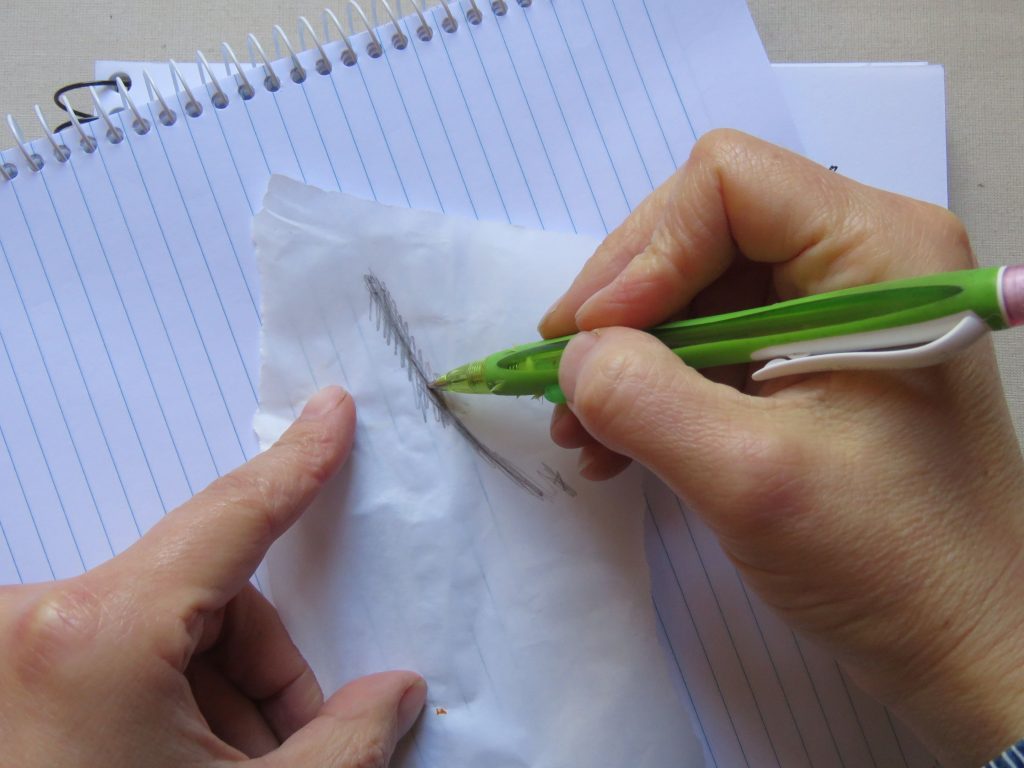
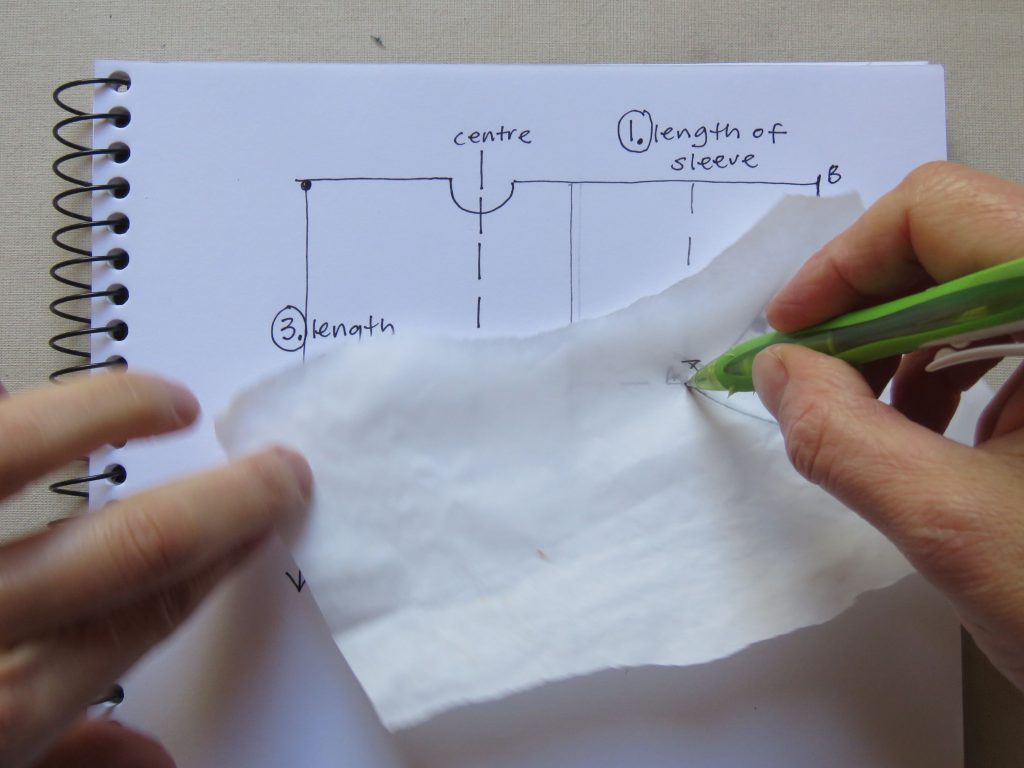
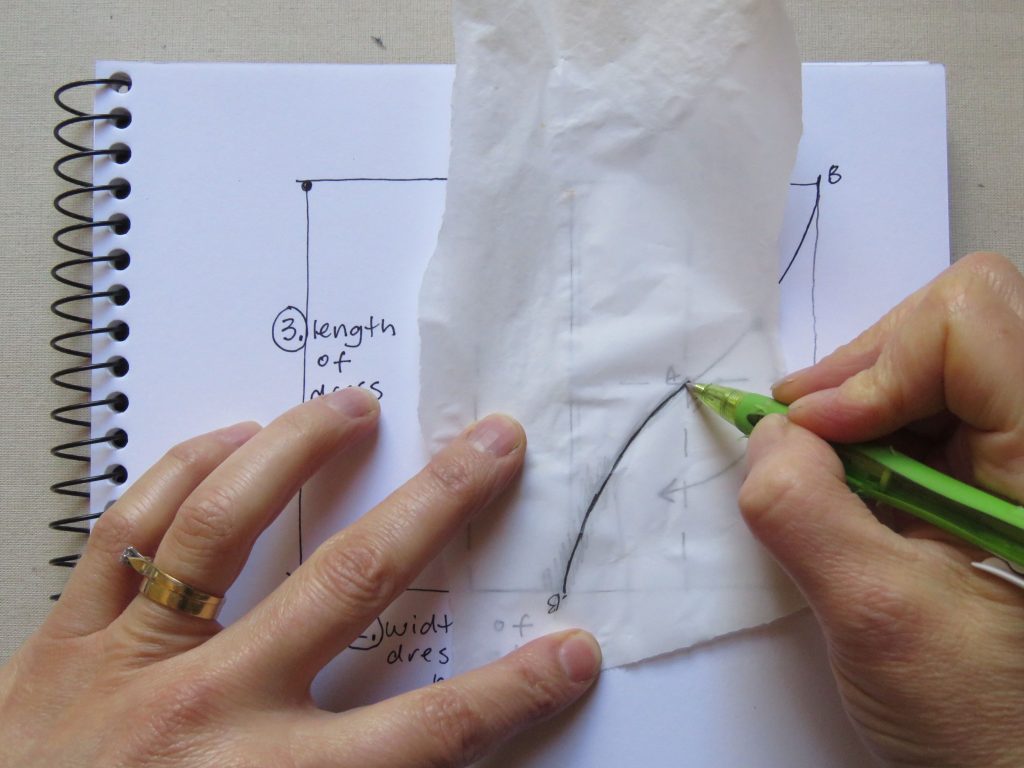
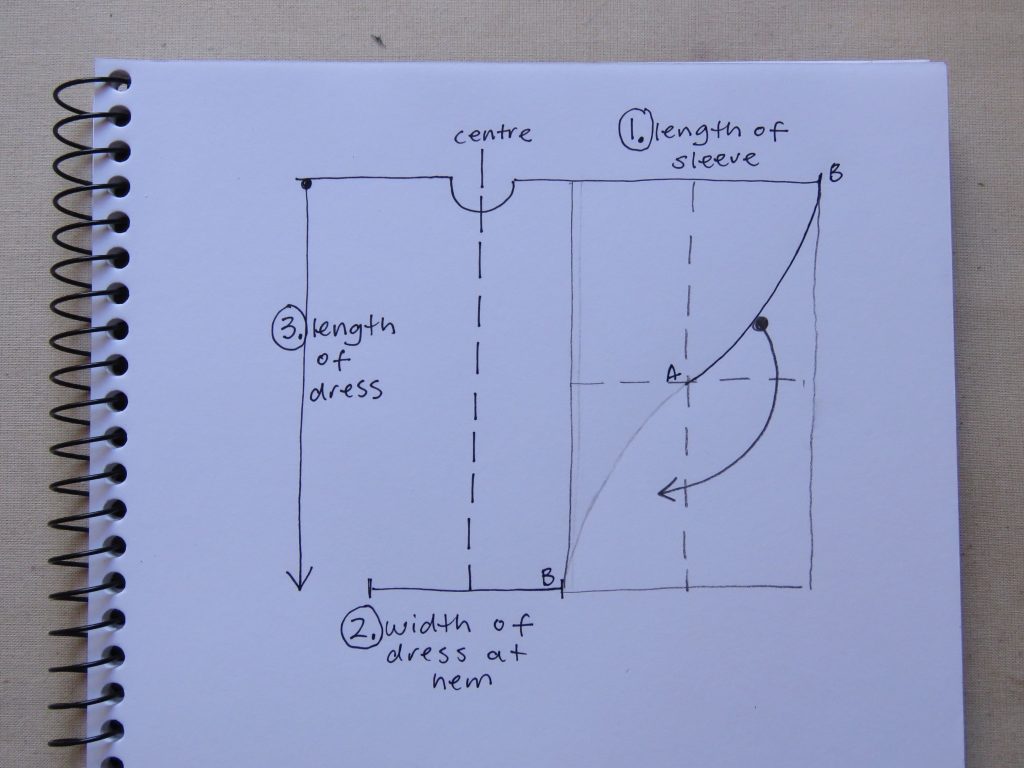
1. First, draw in the parts of the pattern that we already know. In this case, 1. The length of the sleeve. 2. The width of the hemline. 3. The length of the dress. I arrived at these by measuring the body (eg standing in front a mirror with a tape measure) or the body measurements on the size chart + ease. Make sure the seam allowances are added.2. Identify the widest and the narrowest parts of the area to tessellate, and connect them with a box.3. Find the centre of the box.You can also do this by ruling diagonal lines.Or, as the instructions in the book suggest, a diagonal line intersecting with a horizontal one. In this case, this arrangement makes it easiest to draw in the curved shape to tessellate. Do whichever of these makes it easiest for the shape you plan to draw.4. Draw in the first half of the tessellation. Note I’ve labelled A and B, and I’ve drawn a curved shape.5. At this point, if you’re making the pattern on a computer, you can copy the line A-B and rotate it on point A until the two B points match. Note that the line isn’t flipped or mirrored, it’s simply swung around. But if you’re making the pattern manually, read on…6. Take some tracing paper, and trace the line. Label A and B.7. Flip the tracing paper over, and colour in the reverse side. Remember doing this at school? You’re making your own carbon paper.8. Put the tracing back on the pattern, matching A and B. Then, put your pencil point at A and rotate the tracing paper 180 degrees so that point B lines up with the other point B.9. Draw the line in, imprinting it onto the pattern.10. You now have the second part of the line drawn in. Hopefully you have a smooth flowing intersection at point A. If not, you can now see where to adjust the line and repeat the process to get it right.
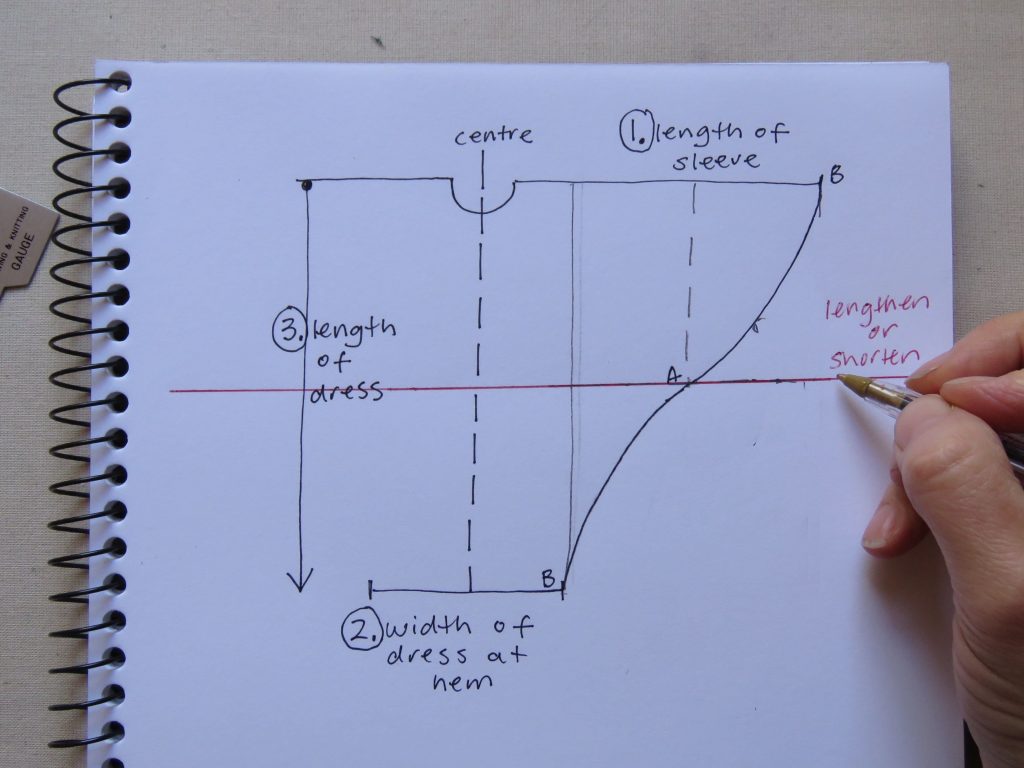
What if you wanted to shorten the garment?
Simply cutting off length at the bottom would make the tessellation not fit together. Instead, it’s possible to shorten or lengthen a small amount by cutting or folding through the middle, through point A, and re-drawing the line.
Some examples of tessellating patterns
For some of them, I’ve drawn around the tessellating part.
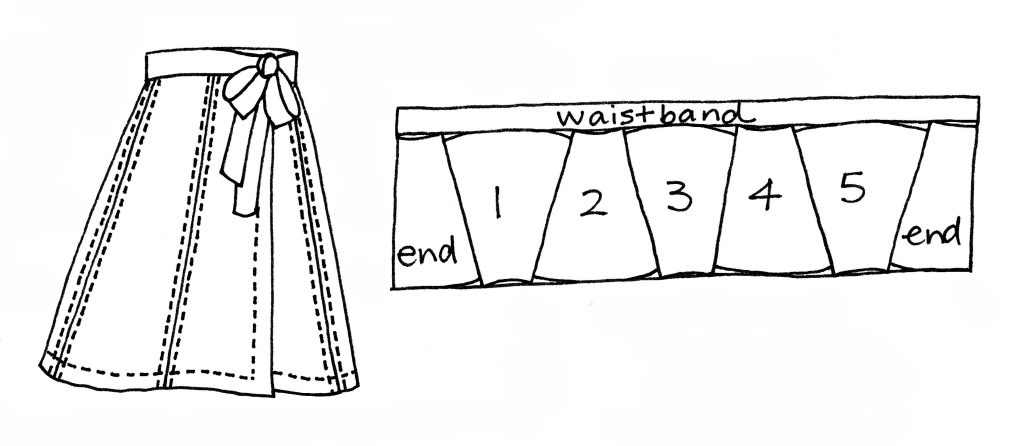
Last week’s free eyemask pattern, which lead to this discussion on tessellation.A maxi pad pattern, which you can read about here. Here’s another example (not mine) of a tessellating pad pattern on Etsy.A wrap around skirt, a free pattern on this website. It uses top-and-tailed trapeziums, and the ends of the skirt are convenient half-shapes. Note the skirt needs an odd number of gores, otherwise the end shapes would be the same instead of a pair.A coat and dress made using the same pattern piece for both, from the Zero Waste Sewing book. One of the quirks of this pattern is that the sleeves get longer as the sizes get bigger. I used a similar layout for the Optimatium dress/coat some years later.
Resources
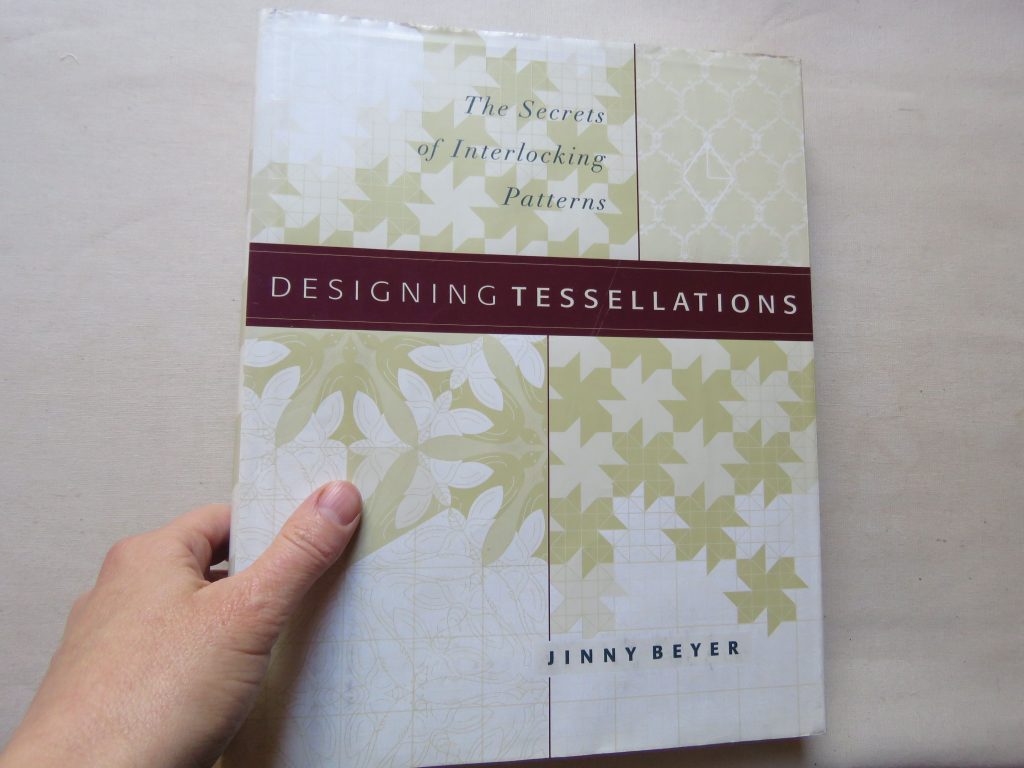
The best book I’ve read on tessellations is this one, alas now out of print. It’s written for quilters and surface pattern designers.Zero Waste Sewing has five garments to make which use tessellations. A Year of Zero Waste Sewing discusses using tessellations for clothes a bit more in-depth than this blog post, and the chapter on tessellations (April) is still available as a zine.
This is a fun peek behind the pattern-design curtain! I always find tessellation pleasing to look at, and this is the first time I’ve seen that trick for creating irregular tessellation pieces.


I love this process – I need to give this a try for myself.
Cheers Bea!
This is a fun peek behind the pattern-design curtain! I always find tessellation pleasing to look at, and this is the first time I’ve seen that trick for creating irregular tessellation pieces.
Thanks Cindy 🙂