How Not to Make Avocado Buttons

Or: “It all looked better on Instagram”.
Sometimes I get nice ideas for craft sent to me by thoughtful friends. In the past week, both my teen and an Instagram friend sent me this reel, showing how to make buttons from avocado seeds.

With avocados in the house, plentiful and cheap, I took this as a sign!
The instructions essentially are:
- Wash the avocado seeds and let them dry so you can peel off the thin skin.
- Cut the seeds in half longways through their natural line with a very sharp knife, then cut slices.
- Trim the slices to make smaller buttons or perfectly round ones, if desired.
- Make holes (the demonstrator used a Phillips head screwdriver for this).
- Let the buttons dry for a week. They will shrink a bit.
- Sand and oil. The buttons look and feel like wood.
So that’s how I found myself one evening, washing four avocado seeds with the dinner dishes and looking forward to making buttons with them.
The following tale is one of impatience and laziness, combined with low energy.
The next morning I took the seeds and removed some of the thin dark skin on them. Possibly they needed to dry longer than overnight because the skin was hard to get off. I sort of thought it would rub off in my hands like the Instagram ones. The seeds have a natural “fault line” running through them – it’s the way it splits when the seed germinates. You can only see this when the skin is removed.
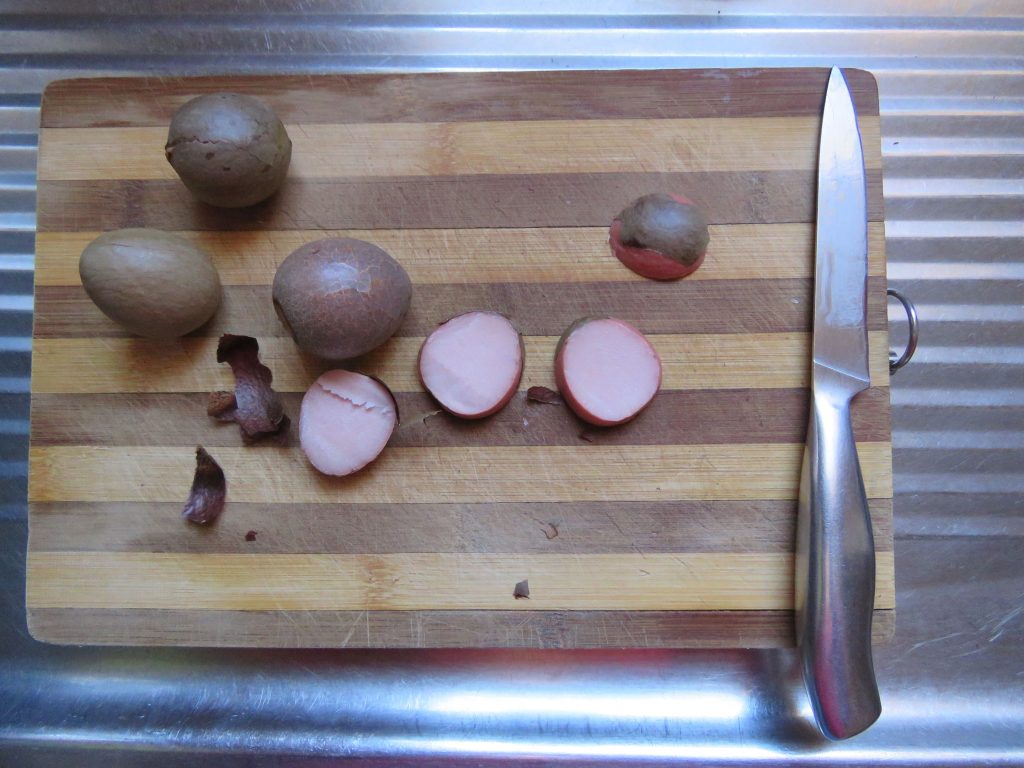
As I was slack with removing all the skin, some of the seeds split naturally (not where I was cutting them) because I couldn’t see the fault line. One ended up in quarter segments.
Then I cut the half seeds into rounds, which wasn’t as hard as I thought. Each seed yielded two rounds and two half-domes from the ends. The Instagramer didn’t use the ends but I thought domed buttons could be good.

To put the holes in the buttons, I used an awl although I didn’t think it was wide enough. I didn’t feel like going to the shed to get a Phillips head screwdriver for the holes, but I thought that when the buttons were dry I could drill the holes perfectly round.
One needs to be slow and careful when making the holes; some of mine split. Ideally I think a hand drill would be best for making the holes, or maybe a 3mm punch.
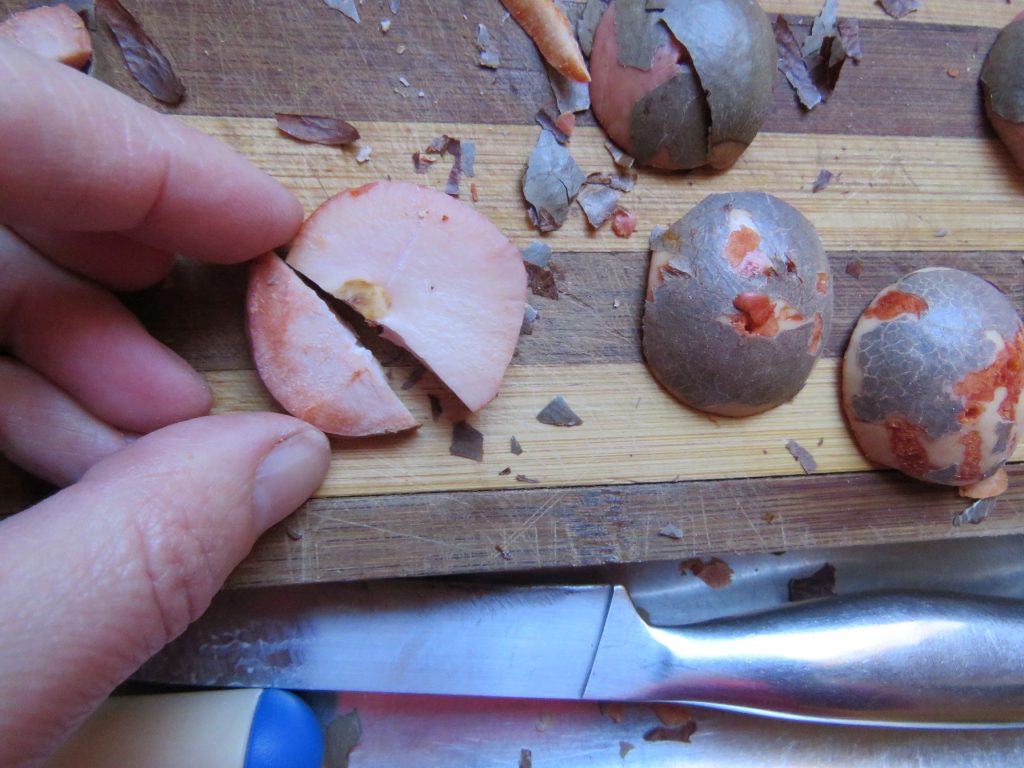
The buttons were supposed to be left to dry (naturally, I now realise) for a week, but I was too impatient. I put them on a baking sheet and left them in the warming bay of the wood stove for a day. This was a bad idea. The buttons curled and some of them went deep brown on one side. Also, I didn’t remove some of the skin on some pieces, and now it’s irremovably baked on.

The verdict:
Mine look very…erm…rustic! Will they clean up with sandpaper? My teen saw them and thinks she could do much better, so I will put her onto the job.
If you have easy access to avocado seeds, do give this a go and learn from my mistakes. Where I have failed, you will succeed!
Discover more from The Craft of Clothes
Subscribe to get the latest posts sent to your email.
i have got a dozen buttons drying and a growing pile of seeds waiting. I found peeling them before they dried was pretty good. I used a small metal straw to make holes and this was perfect. a few split, but i think i was too close to the edge. I am ready to sandpaper them!
Your comment gives me hope! Thank you for the tips – we are already collecting seeds to try again.
Hi Liz,
Gosh! I would have made aaaall of these mistakes! I am also hesitant to use a drill to make holes because I am afraid it seems difficult to hold the pieces while being drilled. I hope your teen (or one of your readers!) takes a crack at this: it‘d be super cool to know how make these buttons. best, Giuls
In hindsight, I can see they’re fairly simple to make, as long as one is patient and follows the instructions! I think my teen will make the next lot.
I enjoy your humor:) Instagram, Pinterest, and Tik Tok always makes these DIYs look so easy. There used to be a blog called Pinterest Fails or something like that. That’s probably where mine would go if I tried this. I do hope your daughter gives these another try for posterity. Good luck!
Yes, everything looks better on Instagram! I remember seeing Pinterest fails and laughing my head off.
This morning my teen read this post and vowed to do better.
Very smart of you to find so many things that did not work perfectly, so that your young adult can show you up. What else can you stop doing well so she can take over more tasks… dishes maybe? Laundry? I might have to try your clever technique…Chris in Florida (wink wink)
Totally accidental haha! If only it worked for chores too!
I saw that same video and had to try it as well (and thought of you and your zero- waste buttons). Guess I didn’t notice the part about letting them dry, because I peeled and cut them right after we ate the avocado! My challenge was getting smooth slices without injuring myself. I liked the idea of the curved-end buttons, too — and I like the bits of skin for color. I used a combo of bamboo skewer and nut pick to make the holes. Mine are… rustic, to say the least. I think I will be trying again, maybe use a Dremel tool to sand the edges smooth. I rarely get caught by the online viral craft stuff, but this had a very low barrier to entry so I figured, why not give it a go?
Thanks for sharing your experience. Sorry yours didn’t turn out as expected too, but it makes me feel a little better to be not the only one with rustic buttons! We plan to try it again soon – there are 5 seeds on the kitchen windowsill waiting…
I made some yesterday, rinsed the seed then using a sharp butcher knife I sliced the seed into 6 pieces , then I used the tip of a serrated steak knife for the button holes using a turning motion then turned the button to the back side and finished making the hole, removed the skin right away it peeled off easily, I put 4 holes in the avocado slices, now to just wait for them to dry .
Yours sound very successful! Thanks for your comment; you have made me want to try these again.
I used a thin knife to cut and also carve the holes. Its not perfect, but none of them split. I made little charms with the spare pieces, the scraps will go to my friend who wants to try natural dyes. Hopefully they turn out well. Next time im making a fish charm
Thanks for sharing, Lake. Maybe a knife is the key to making the holes, as Robin did elsewhere in the comments – mine split when I did the holes.
I hope yours turn out great, and good idea to use them for charms rather than buttons.
A thousand ways how not to make a light bulb.. I use an apple corer and that gives a perfect button size .. although I have been using a yarn needle to put holes and widen with a sharp pencil.. it kinda works.
Hmm..apple corer. Good idea. Thanks Victoria 🙂
I have heard you have to let it dry for at least 3 days before cutting/carving.