Free pattern: Oven Mitt (minimal waste)
Finally!
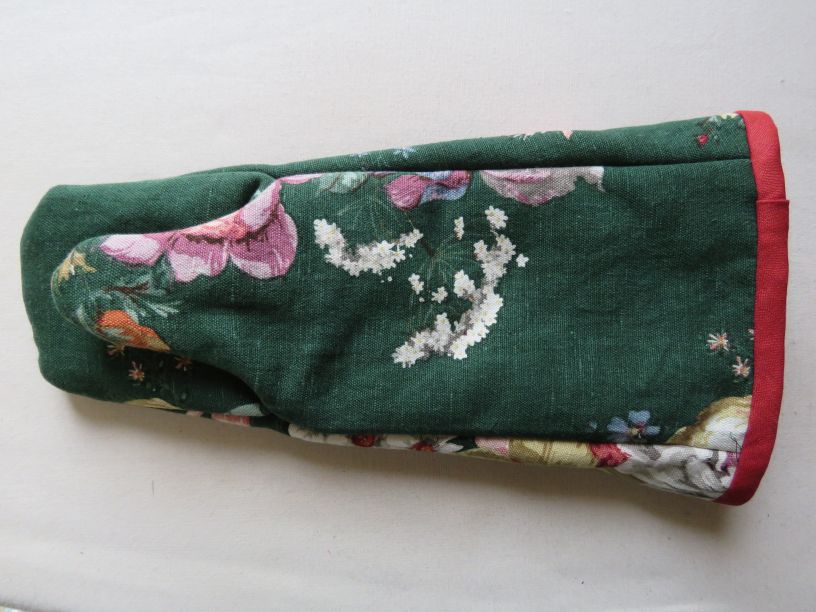
Allow me to unveil the pattern for the kitchen accessory of the year. Presenting…the minimal waste oven mitt.
Streamlined, glamorous, modern and yet functional, it has restored domestic harmony to the Haywood kitchen and could do the same for you. I’ve been using it for the past week and I think I’ve found my favourite oven mitt.
For those who missed the earlier episodes, this pattern has been a journey of highs and lows.
Episode I Fresh faced optimism, with a design brief and several promising ideas.
Episode II Failure on all ideas.
Episode III Light at the end of the tunnel! But is it a train?
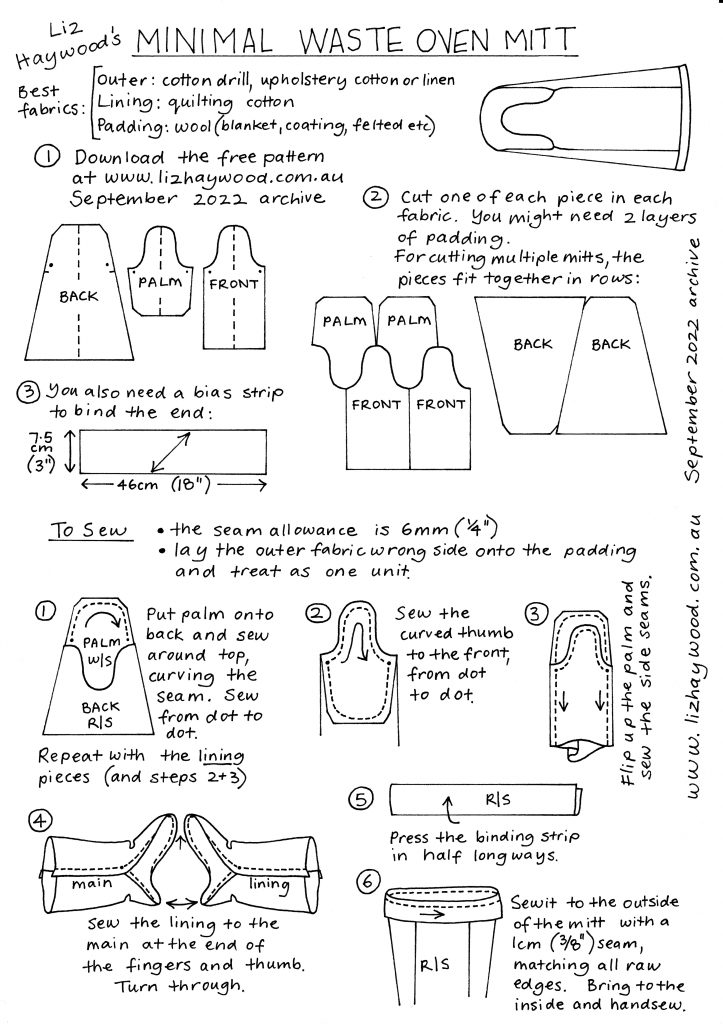
Best fabrics to use: for the outer layer, use something durable such as cotton drill. I used vintage Sanderson upholstery fabric from the opshop (later spotted on Ebay for $100 per metre!). Quilting cotton isn’t durable enough, but is good to use for the lining. For the padding layer, use 1 or 2 layers of wool (I used 2) maybe from an old blanket, a felted jumper, offcuts from making a coat, etc.
As well, you’ll need a bias strip to bind the edge of the mitt. I used linen for mine. The binding is a double layer, so it should last longer.
I forgot to write on the instructions, the mitt fits neatly on my hand which measures 20cm/8″ around the base of my fingers. The gauntlet part is nice and wide.
Below is the pdf pattern. Click on the arrowheads at the top right to download. It prints on 2 x A4 paper, landscape orientation. I recommend making whole pattern pieces (not cut on the fold) and transferring them to light cardboard (cereal box weight) so you can trace around them.
While this pattern isn’t zero waste, the pieces are designed to fit into each other to minimize waste. The more mitts that are cut from the fabric, the lower the % of waste.


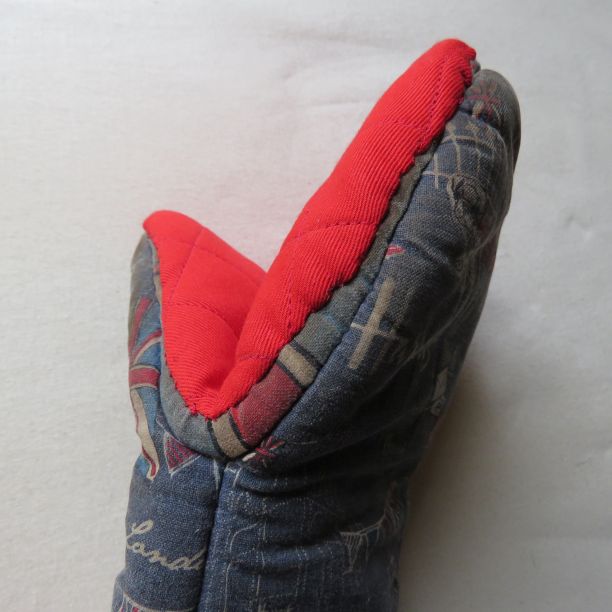
To make your mitt last longer, the palm part (which will wear out first since it comes in contact with the hot stuff) could have an extra padding layer applique’d on top, a bit like the repair I did on the Harrods mitt. An extra layer would probably be too thick to sew if you tried to sew it in with the palm when you make the mitt.
If you would like a bigger oven mitt, here’s the earlier mitt which fits Mr H’s hand. The sewing instructions are the same.


The pattern prints out on 3 x A4 landscape paper.
Here are the two mitts side by side, so you can see the size difference:

Both of these patterns have a Creative Commons license: Attribution – ShareAlike, which means you can adapt, build upon, copy and share, as long as derivations acknowledge the original source and have the same license. The pattern can be used to make items to sell. Maybe you’ll be able to nail a zero waste mitt!
Cheers!
Discover more from The Craft of Clothes
Subscribe to get the latest posts sent to your email.
I have enjoyed this series to no end! Yet another pattern to put in the queue. I typically use pot holders myself but an oven mitt would prevent the occasionally burn on the inside of my wrist. Thanks Liz!
Thanks for following along, Michelle. Got there in the end!
Great pattern, Liz. I made it from samples of upholstery linen that I got from a commercial fabric wholesaler. I quilted the double layer woolen batting to the linen, after I had cut the pieces, in hindsight, I should have done this first. I think my mitt needs a couple of button eyes.
Thanks for giving it a whirl, Hayley, it sounds very good and should last a long time. Button eyes? Great idea!
Thaks Liz, my mitts are in tatters!
You’re welcome, Shirley. Tattered mitts are a thing of the past in the Haywood Household!
Nice. I’ve been meaning to make new oven mitts for long enough that my husband ended up just buying a pair a few weeks ago. In my opinion, they’re a bit thin, so I’ve still been wanting to make my own, and this looks like a good pattern to do it with!
have been going to for a while but as a lefty and partner is a rightly I didnt want to make just for me or not for them…. this sweetens the deal because its ambi …… THANK YOU for inadvertently designing for lefties for once.
I hadn’t thought about that!
Here in 2026 and happy I found this. My sister just caught one of the potholders I gifted her on fire. It fell onto the heating element in her oven when she was taking dinner out. I have the same fabric it was made from. Going to make her this and another set of pot holders but extend the loop so it goes around her wrist.
It died a noble death!
Such a thoughtful gift for your sister – home made potholders are always nicer than bought ones.
The mitts in this post have been in daily use and are still going strong.