Using an Historical Sewing Pattern
Following on from last week’s Marx-Etzel trousers, I thought it would be fun to discuss historical sewing patterns. These are patterns for clothes that are…
- found by archeologists
- ancestors of the clothes we wear now (eg men’s shirts)
- traditional clothes from some countries which may or may not still be worn
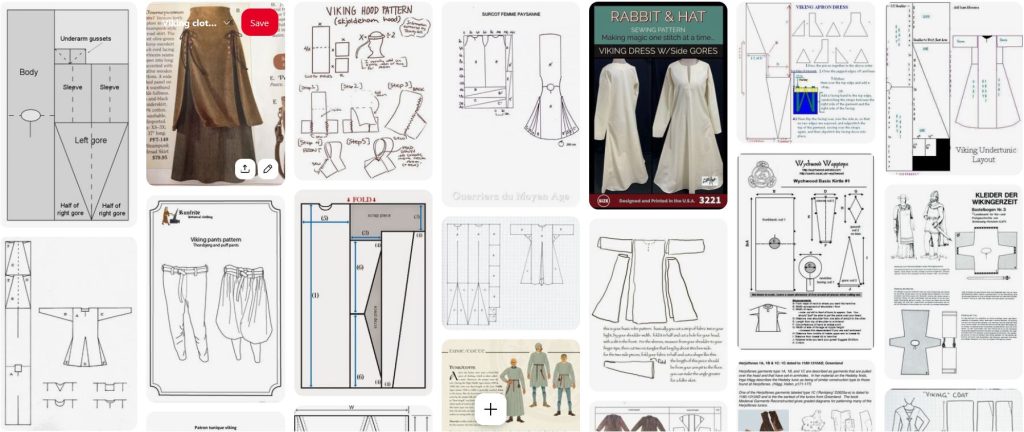
These patterns are almost always zero waste, and a quick search on the Internet will bring up examples.
They can also be found in books:
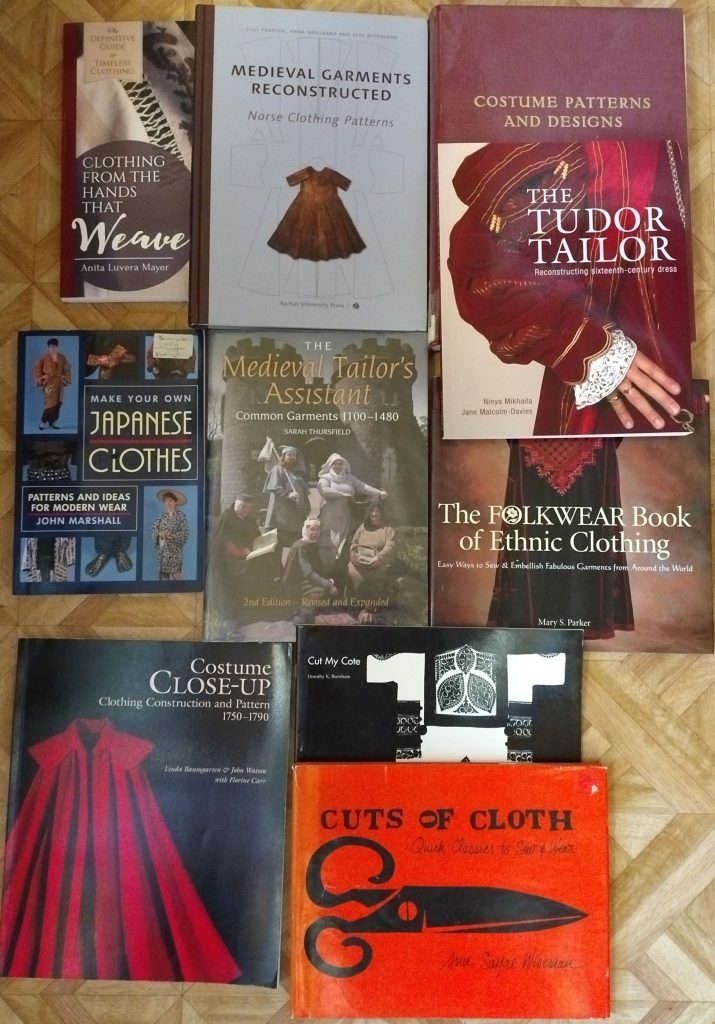
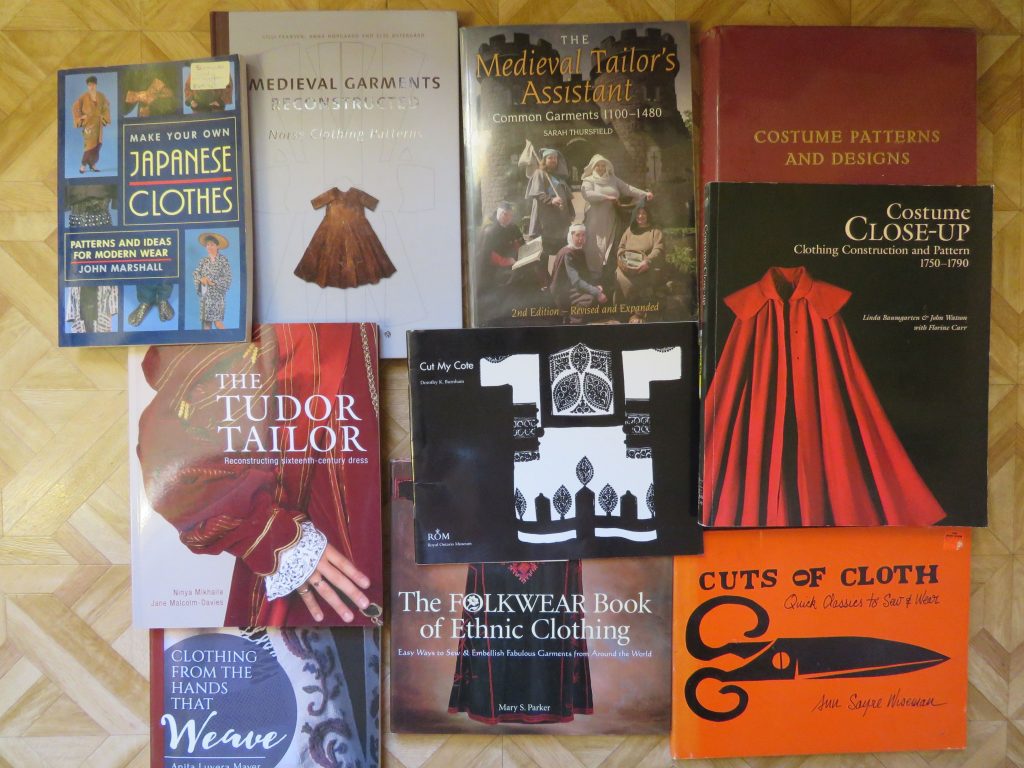
Top row: Clothing from Hands that Weave; Medieval Garments Reconstructed; The Tudor Tailor.
Middle row: Make Your Own Japanese Clothes; The Medieval Tailor’s Assistant; The Folkwear Book of Ethnic Clothing.
Bottom: Costume Close-Up; Cut My Cote; Cuts of Cloth.
They are all really interesting books. Costume Close-Up and Cut My Cote are the ones I’ve used the most.
However, if you’re used to sewing modern patterns, what you get is daunting. It’s usually no more than a sketch of the pattern pieces, sometimes in their cutting layout, and not necessarily to scale. Sometimes there are measurements, but never for more than one size, as often they’re a pattern for an extant garment of the period.
How do you use this to sew a garment? And how do you know what size it’s going to fit? How can you make it fit you?
1. Ascertain what’s what and consider a paper model
Start by naming all the parts on the pattern sketch, so you understand what goes where (eg, leg, neckline, gusset, collar, front/back gore etc).


A paper model will help get your head around how it’s constructed. Often there are no sewing instructions, so you’ll have to decide them yourself.
2. Plug in some measurements
Now write some measurements onto the sketch. Important: take your time with this.
Where do you get measurements from?
- Consider the ones the sketch already has.
- You could use a sewing pattern you already have as a guide.
- You could measure a similar garment you already have.
- You could stand in front of a full length mirror with a tape measure – something I’ve done many times making patterns.
I use all of these combined. Suggestions 2 and 3 are good for discovering things like neckline and armhole depths, and sometimes lengths. The tape measure in front of a mirror is good for lengths and circumferences.
You’ll need to include seam allowances in these measurements.
Many historical patterns were cut to fit a certain fabric width – sometimes the front and back were simply the width of the fabric, with the selvedges as convenient pre-neatened side seams. They were often looser than what we wear today, and adjustable by folding, gathering or belts.
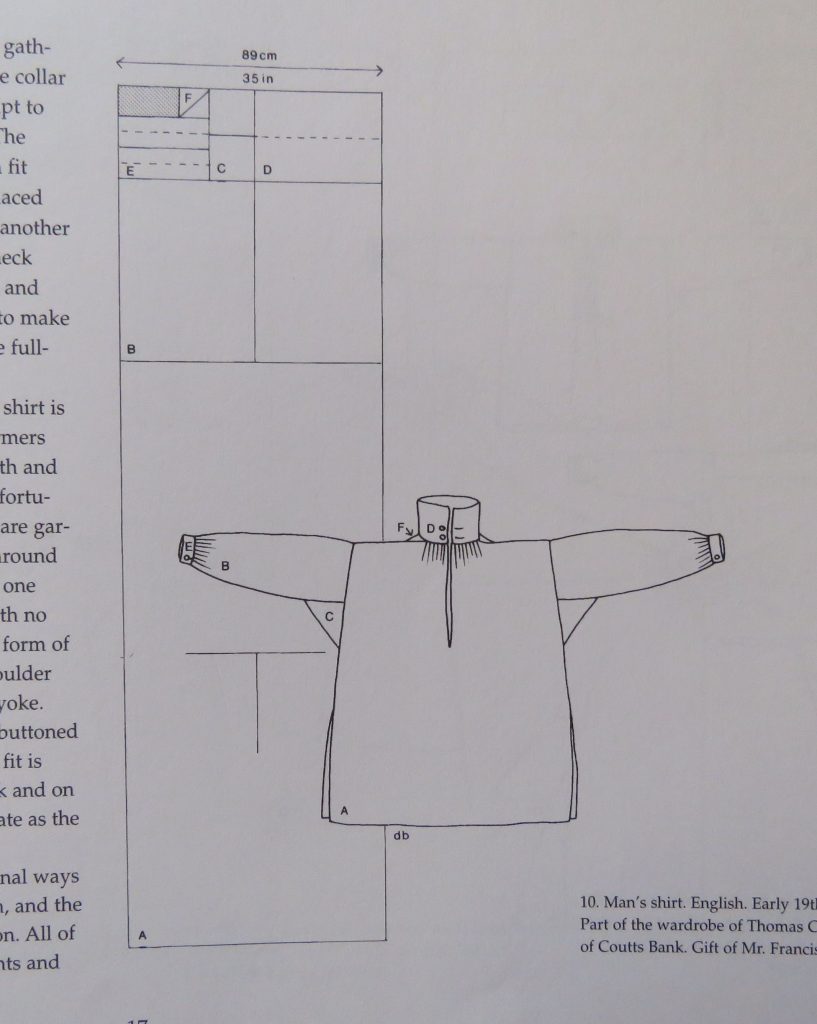
Example:
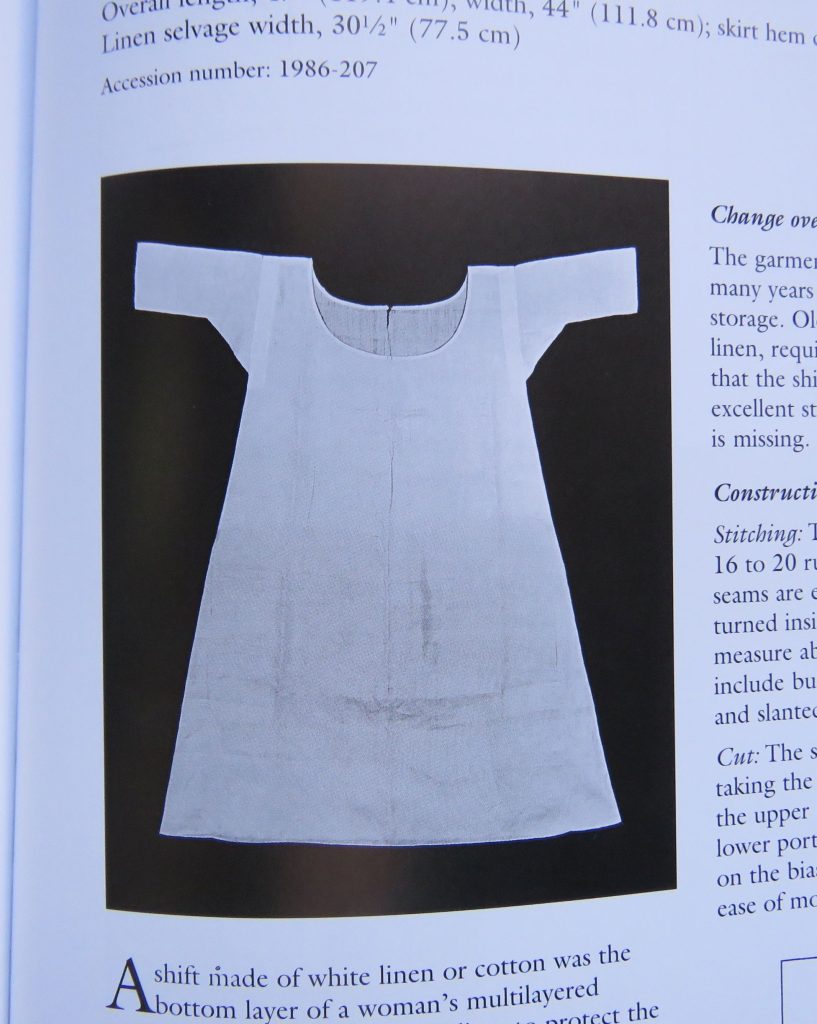
They give a pattern for the garment (one size), cutting layout, photo of the garment it’s taken from, and construction details. It’s cut from a particular width fabric.
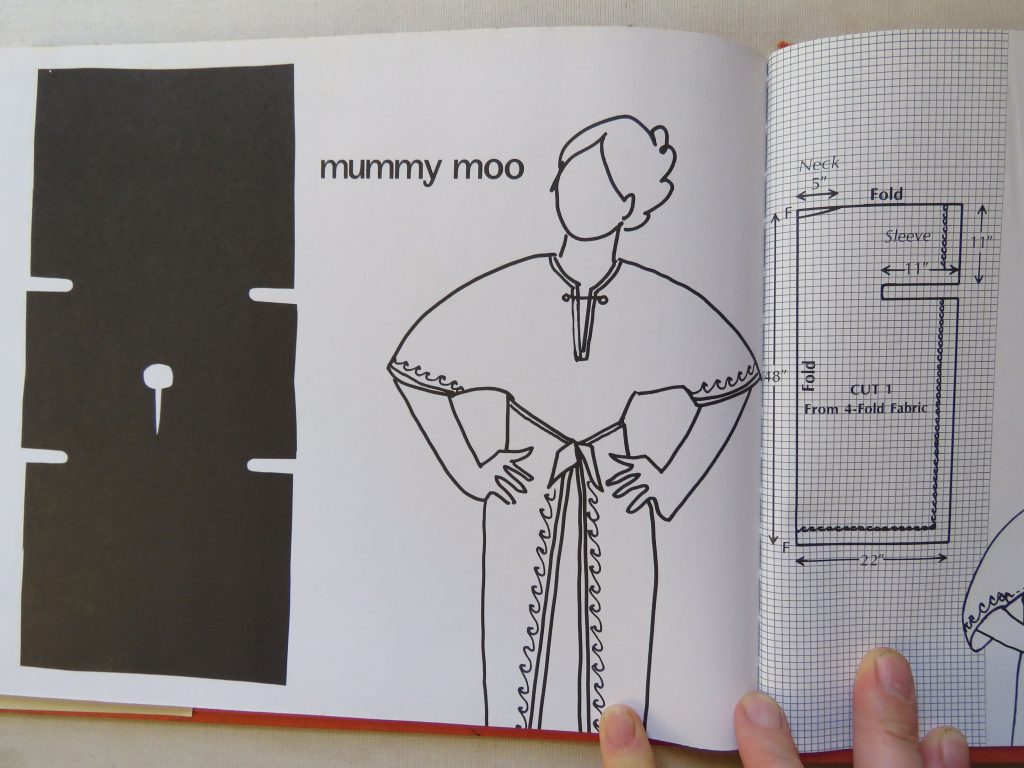
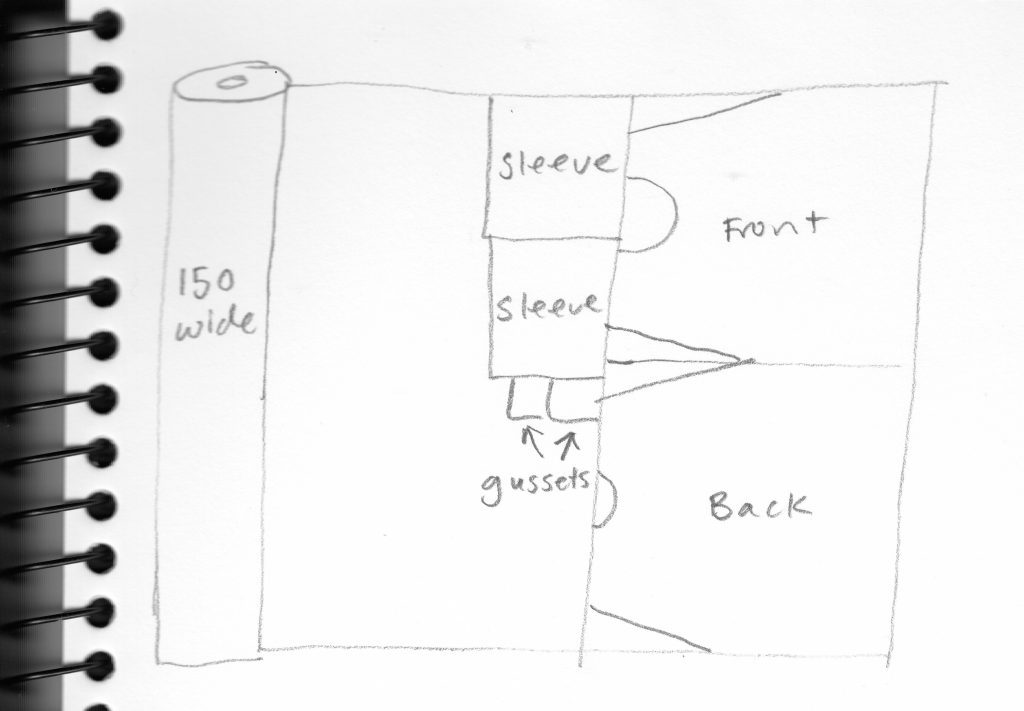
It might make a good nightie pattern for my teen (Bust 37″/94cm). Here’s the sketch, with measurements for her drawn in. I’ve guessed these measurements using a combination of all the suggestions above.
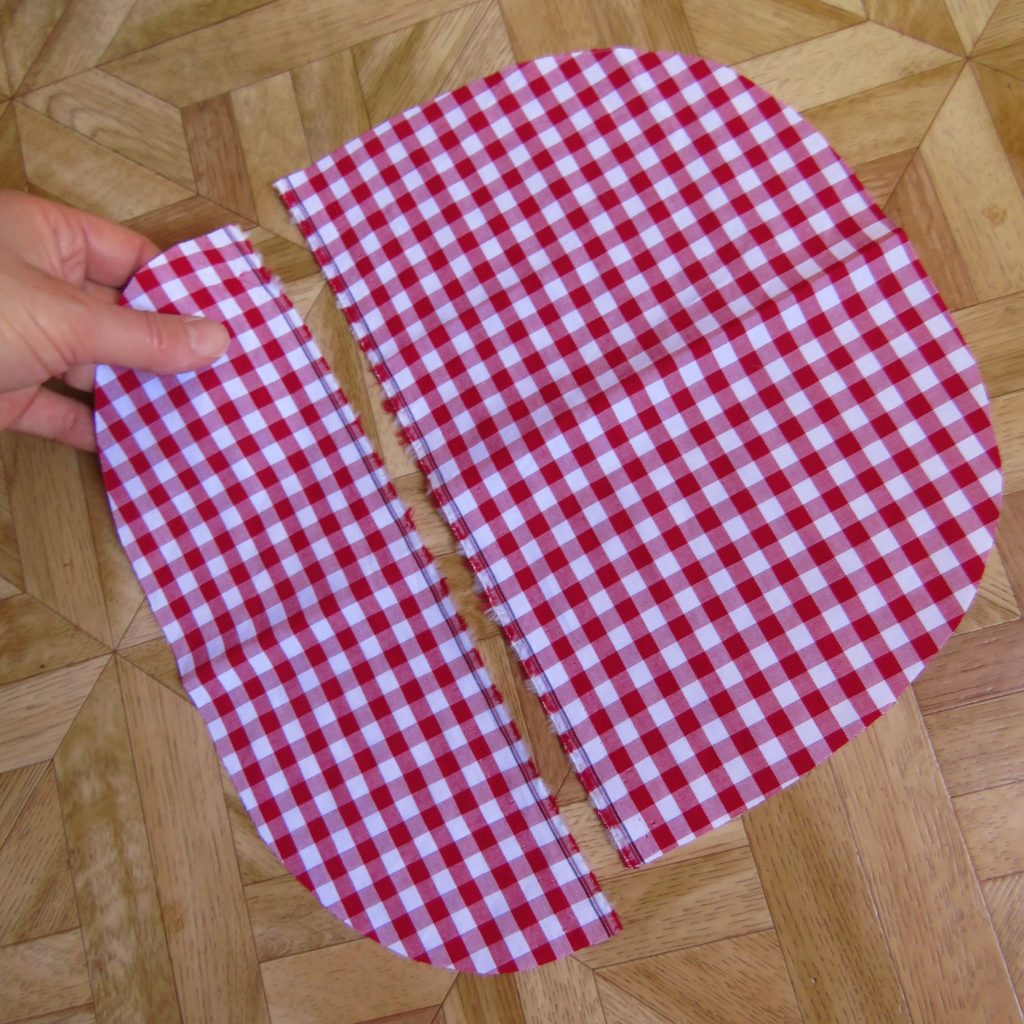
The underarm gusset is a square, folded diagonally to make the armhole deeper.
The triangles on the side of the body are sewn to give an A-line shape to the dress.
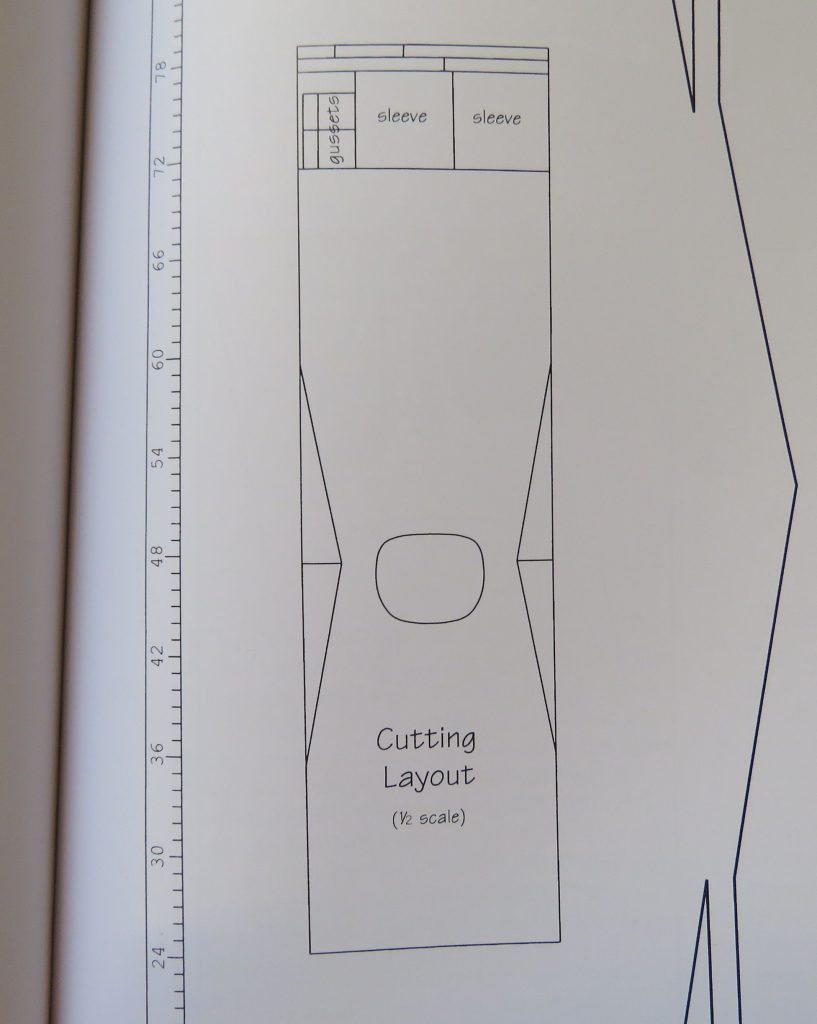
If I added shoulder seams, I could change this around to fit on 150cm wide fabric:
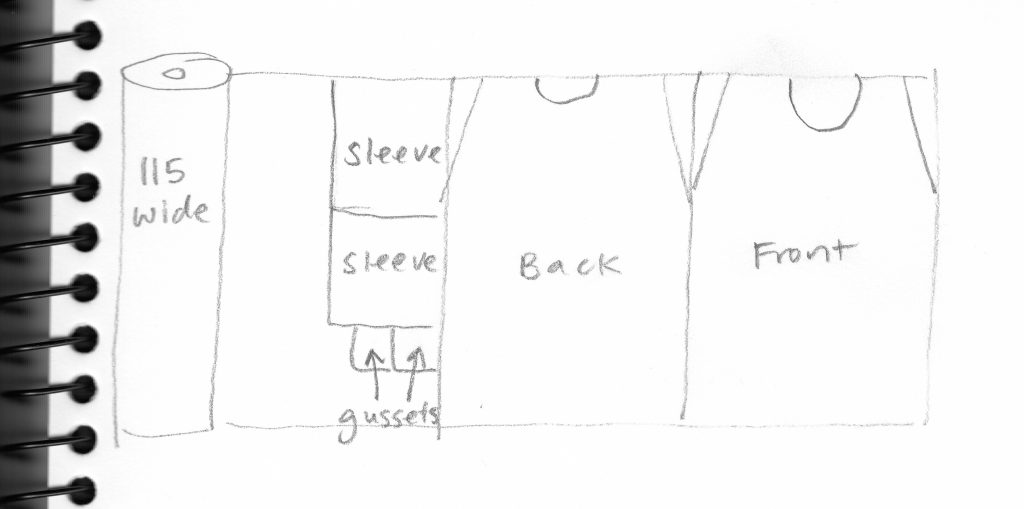
I could also cut it around the other way on 115cm fabric and it would just be a little shorter:
3. Paper pattern or sketch?
If the pattern is very simple with only straight lines, it might be sufficient to draw it straight onto the cloth, referring to the sketch’s measurements. I never really did this until I started making zero waste patterns, and found it very confronting to cut straight into the fabric without a pattern pinned on. What if I’d measured it wrong?!! However, I discovered it brought a new confidence, that grew each time.
If you feel safer, you can make a paper pattern. I think it’s a better way to go if you’ve got curves on the pattern, and you don’t need to think as hard when you cut the fabric. If you need to make adjustments you can put them straight onto the paper pattern. Another advantage is that you can pin the paper together and try it on to check – even if you’re making a toile/muslin first, this is a good preliminary check.
After cutting out, I usually pin it together and check it by carefully trying it on (I did this with the Marx-Etzel trousers).
Example:
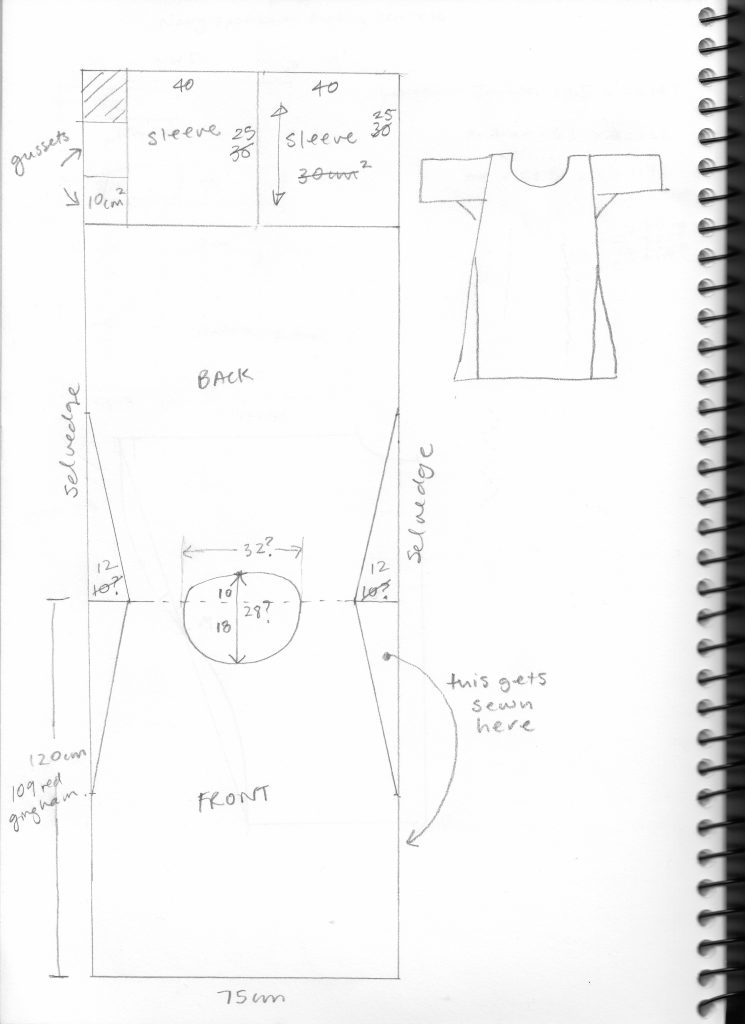
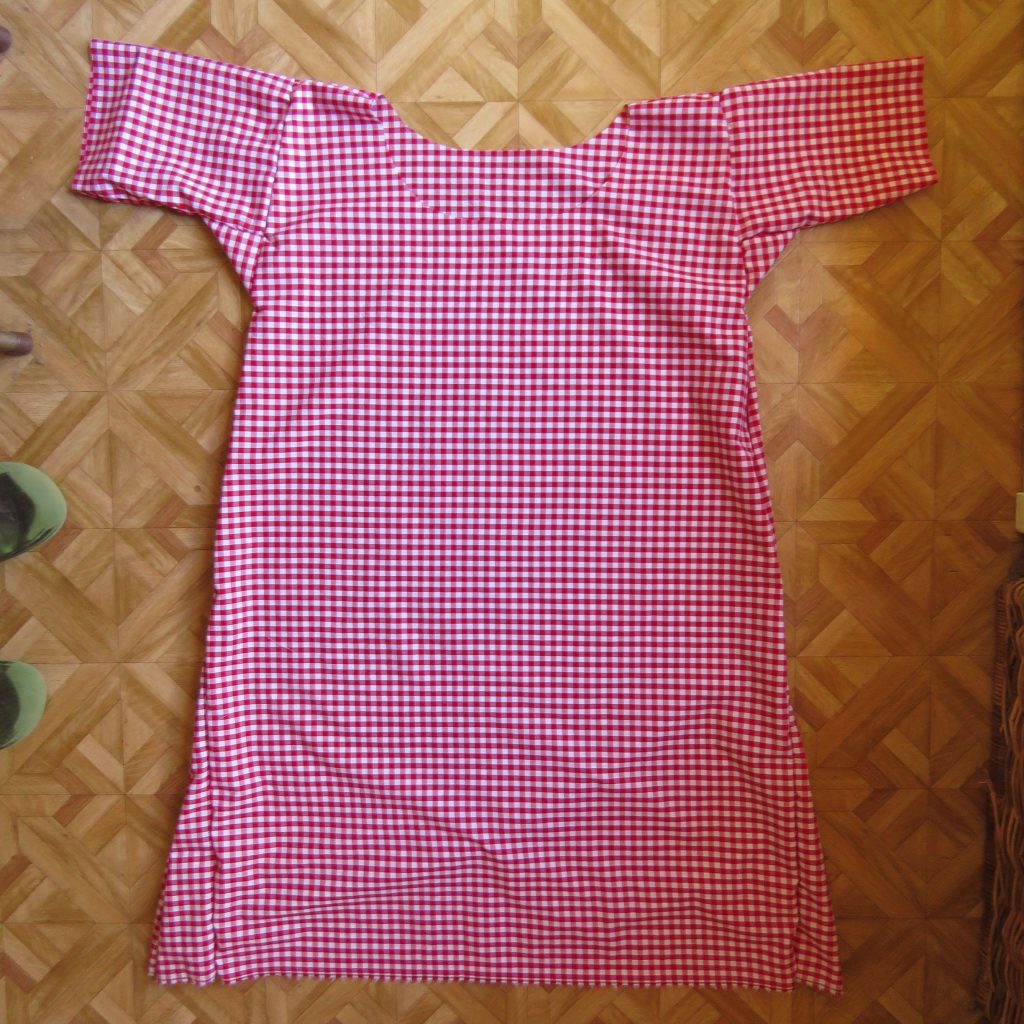
Here’s the shift again, cut out in red gingham and pinned together using every pin in the house.
Mine has little shoulder seams as I cut it across 109cm wide fabric, and I have a selvedge for the hem.
Another approach would be to make a paper template for the neck.
4. The pattern is only a guide
Unless you’re doing historical reproduction, at some point there will be a departure from the original pattern to suit YOU. You live in the modern world, with sewing machines, elastic, fusible interfacing, and modern clothing styles. Don’t be afraid to change things. Make something you’ll love wearing, that fits with your wardrobe.
Cheers!
Discover more from The Craft of Clothes
Subscribe to get the latest posts sent to your email.
An ‘EM Haywood’ with an extensive historical clothing library? Why could this be? 😉
All your prep and paper models remind me of the hours I spent with a scale drawing of my bedroom and scale paper cutouts ( from graph paper) of all the furniture so that I could play with layouts and configurations before committing to shifting actual furniture around. Paper practice is valuable!
The red gingham looks bright, cheerful and very wearable. My husband would call it picnic chic!
Yes, it is a bit like the scale paper cutouts of furniture and room layouts. Both pleasant activities 🙂 And vital to avoid tears later!
EM Haywood has been quietly building a professional home library since her teens.
Huzzah! I lub me some historical patterning. Do you know Dorothy Hartley’s “Medieval Costume and How to Recreate It”? The sketch of how to cut out a 12th-13th century dress — the one with the long, pointed sleeves — is amazing. Completely zero waste, by the way.
Biggest eyeroll of my life was when, in costuming for a college production of The Taming of the Shrew, a student threw a tizzy-fit about being asked to sew a one-seam, elastic-waist skirt.
“I have never in my life been expected to do something that ridiculous. I cannot believe you want me to do that. Unless you provide me a proper, printed [commercial] pattern, I am going to quit this production.” 45 years later, my eyeballs still want to rocket around their sockets.
Thank you, I didn’t know Hartley’s book, but I chanced upon (what I think is) that dress when I looked it up https://www.facebook.com/groups/5762710628/posts/10156255951930629/ Love these type of illustrations.
Your elastic waist skirt story started my day on a high note!
As always, very interesting reading, thanks! Like you, the fact of tracing directly on the fabric gives me a kind of sens of power I really enjoy. But I definitely wouldn’t do it straight on a tresor-fabric without testing it out first! And your last point is sooo true, as well for historical patterns as for ANY other pattern!
Looking forward to see the nightie actually sewn and worn, I wonder how it’ll turn out at the arms (seems tight) and neck (seems super large, therefore maybe bulky after gathering?)
Thanks Liseli. It remains to be seen how the nightie turns out, since no-one has tried it on yet, but I’ll finish it at the weekend. Agree, the original sleeves seemed really narrow and I made them wider, but did I add enough?
On a whim I just bought the cut my cote book from “Shop in the Bush” in remote Tasmania. Imagine my delight when I saw it there in your stash! Gives me confidence to try it out ASAP. And, I only checked your blog today as I was wearing my zero waste scrubs at work which all my patients comment on, and a lady asked to see the website. Serendipitous moments!
I think you got a bargain, Sarah. Cut my Cote is apparently still in print, but copies can go for megabucks.
Thank you for sharing about the comments you get on your on your scrubs:)
This post was so interesting and I love your library. Is there one of the books you like best or find most useful? And why?
Thanks Jeannie. The books I’ve actually made things from are Cut My Cote (the Englishman’s shirt pictured in this post), Costume Patterns and Designs (trousers here, here and here), and Costume Close Up (the gingham nightie in this post, which I’m about to write about another post on). I like these three books a lot, but the others are excellent too. I’ve been slowly building a fashion library since my teens, and I’m now in my 50s.
Over 40 years ago I bought a 2 volume set of fashion from 1800s to early 1900s – it has graphs of patterns and I have made quite a few things out of it including authentic looking costumes as well as every day clothing
It sounds like they were very worthwhile purchases. Were they Janet Arnold’s Patterns of Fashion?
I really need to point out to my daughter which of my books are valuable – I hate to think of her dumping them at an op shop!
Same here!