Three Tips for Tucks
Have you sewn tucks in a garment before? They’re simply a stitched fold of fabric. The stitching might go all the way along the fold or stop part-way.
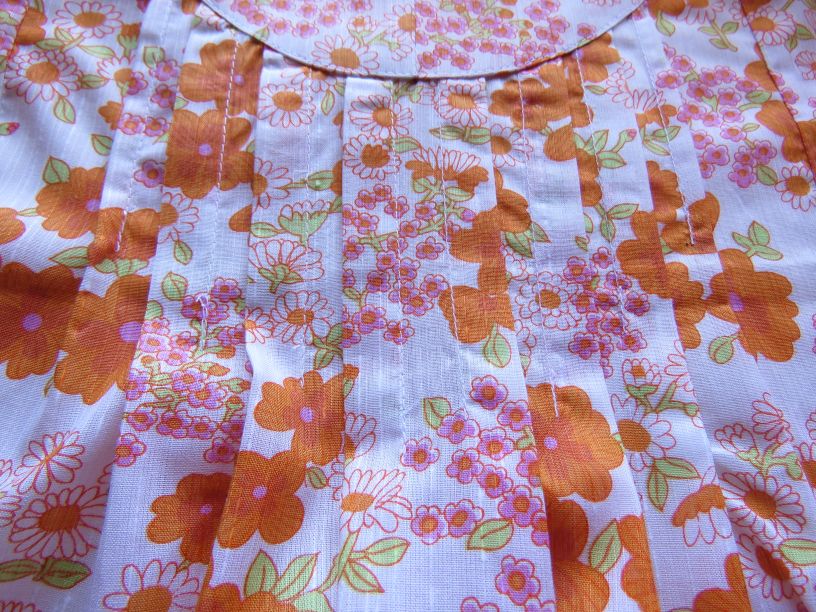
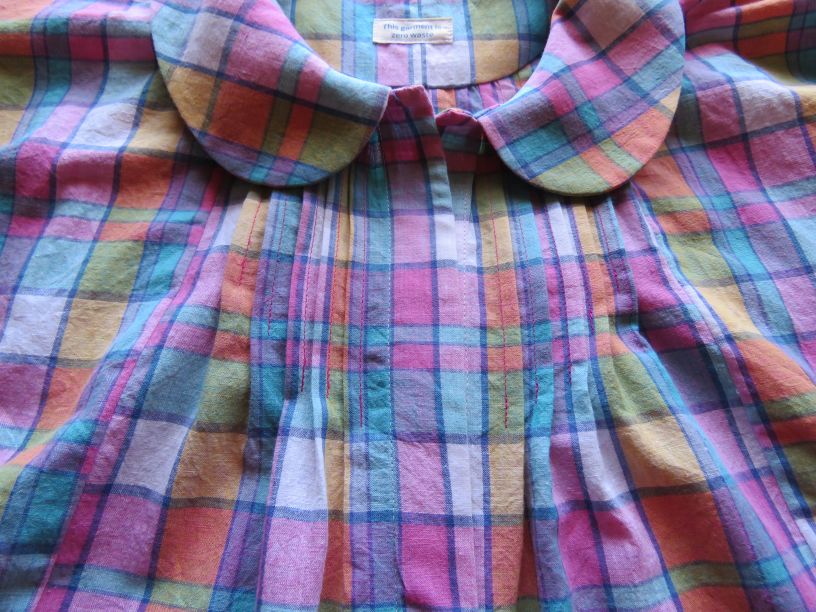
This week’s post is coming to you from my sewing machine, where I’m sewing a zero waste blouse which has tucks front and back (long-time newsletter readers may remember this design – yep, finally!)
I’ve easily sewn more than 100 tucks in the past week, and gleaned a few ideas for making the process easier.
1. Machine foot
If your tucks are 1/4″ (6mm) like mine are, do yourself a favour and get a 1/4″ foot for your machine. Go through your machine accessories and see if there’s a foot to make your life easier.

Alternatively, experiment with moving the needle position so you can line up the edge of the foot with tuck’s fold, or for wide tucks use the machine’s seam allowance guides.
Test sew some tucks, press them, and take a measurement across to see if you’re taking the right amount for each tuck. 1mm extra per tuck can really add up over a distance! Some patterns rely on very precise tuck sewing, and some don’t.
2. Marking tucks
Unlike darts, tucks need to be marked on the right side of the fabric, so you can see what you’re doing when you sew.
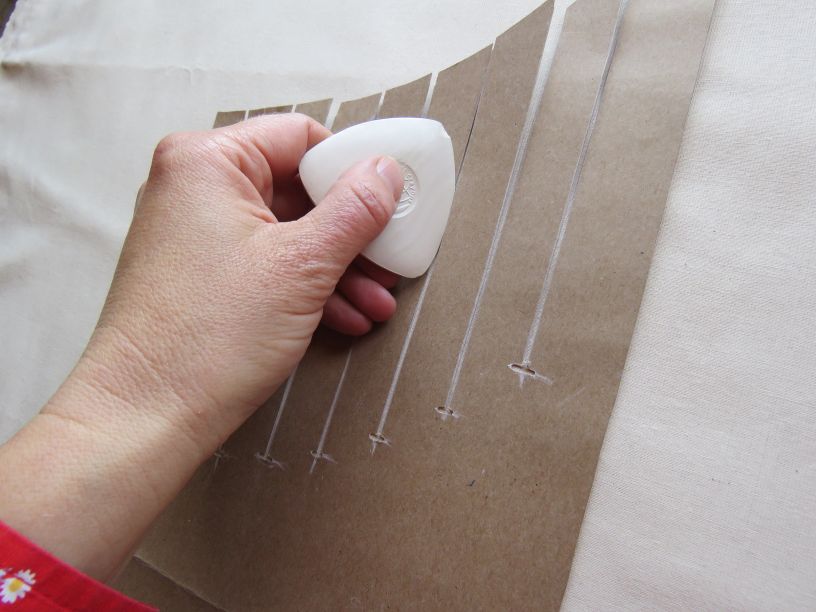
For short tucks, a cardboard template makes marking and sewing tucks so much easier. It’s a bit of faffing at the start when you’re keen to get on with sewing, but you only have to make it once.
This is what mine looks like:
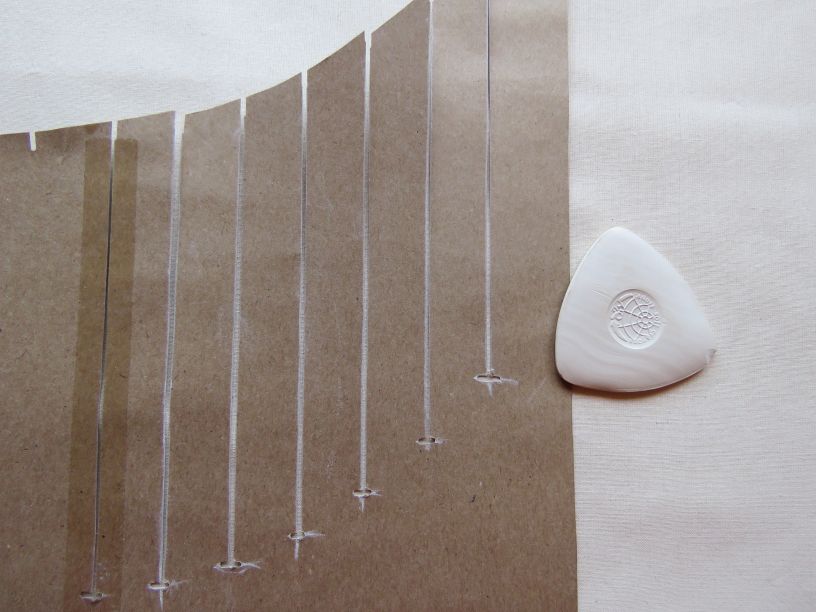
Use cereal box-weight cardboard or patternmaking card, and draw in the fold lines for the tucks. Cut either side of each line, so you can get a marking tool in there.
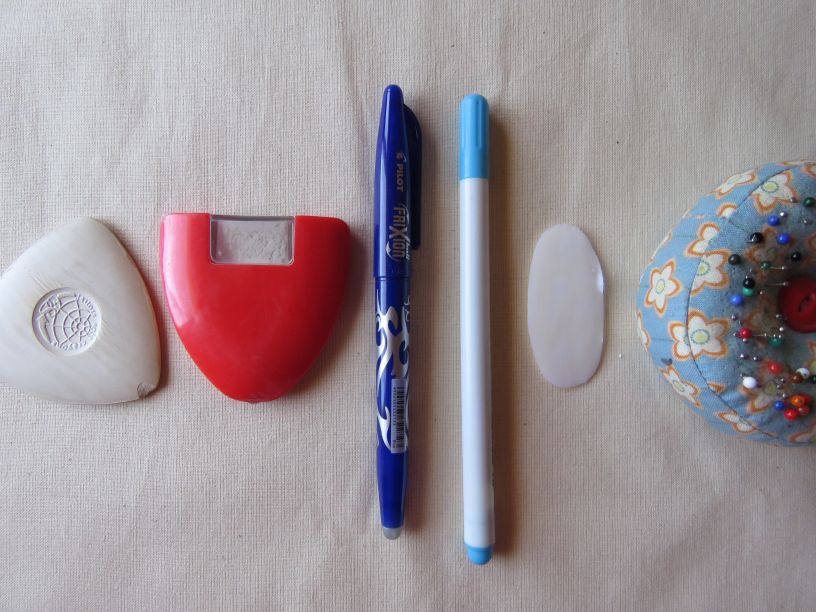
What should you use to mark with?
Options in L-R order of what I prefer: finely sharpened tailor’s chalk; a chalk wheel; frixion pen (iron to remove); water soluble texta (wet to remove); sharpened sliver of soap. Make sure it’s erasable! If none of these are suitable, put a tiny 3mm snip at the top of the tuck, and a pin at the bottom (or even a pin at the top and bottom, if snips won’t show).
I mark all the tucks, sew them all, then press them first from the wrong side then from the right side.
3. Best fabrics
The easiest fabrics for sewing tucks are stable wovens that press into crisp, sharp folds. Linen is ideal, as is quilting cotton, lawn, chambray or other 100% cotton fabrics. That’s not to say knits and synthetics etc won’t work; they’re just not as easy.
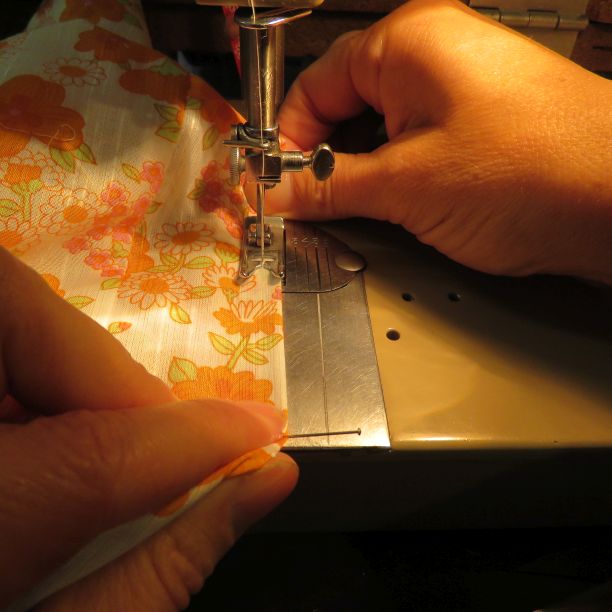
If the fabric is fine, floppy or synthetic, hold the tuck taut as you sew it, otherwise the stitching will make the fabric pucker and no amount of pressing will make the tuck smooth. To hold fabric taut, start stitching until there’s enough fabric behind the presser foot to hold, then hold the fabric firmly in front and behind the foot and let the machine feed through of its own accord. Reposition your hands as you sew each section of the stitching.
Cheers!
Discover more from The Craft of Clothes
Subscribe to get the latest posts sent to your email.
Good tips!
Another way to get perfect tucks is to insert piping cord and use a zipper foot. Pull cord out as each tuck is sewn. They will all be straight and identical!
Worth mentioning that tucks don’t work on bias cut fabric. Or can they?
Hi Janie! That is a good tip that I haven’t heard of, although I have heard of tucks that have cord in them and the cord stays there.
Tucks on bias-cut fabric is territory I would hesitate to enter – I think it would end in tears. (I had a poke around the internet to see if I could find any examples of tucks sewn on bias fabric, and came across this bias cut dress by Vionnet. The dress is on the bias but the tucks are on the straight grain: https://www.metmuseum.org/art/collection/search/158827 Now that’s some fabulous tucking!)
Thanks for the tips. I especially like the tip about pulling material taut when sewing, ironing first from the wrong side then the right side. I’m always in a hurry and want to skip the ironing but after sewing a few quilts/ shirts/ trousers I have realized that the step is essential. You would laugh at some of my early wonky looking attempts at making clothing for my kids.
You’re welcome Michelle. Some people iron after each tuck, and maybe it’s necessary with some tuck/fabric combos, but I haven’t been.
Ironing is the easiest way to improve the look of your sewing without actually changing the way you sew. Having said that, I never ironed preschooler’s clothes when I sewed them – it was too hard to iron with toddlers and babies around, and I discovered that after the clothes were washed you couldn’t really tell!
I’m not sure how cold it gets where you are, but Frixion pen’s marks come back in the cold.
I swapped them out for washable Crayola markers
Haha! I’m in Australia!
Thanks for the Crayola tip, very appreciated.
Ahhhh if only I had read this yesterday before I did all those pin tucks! I had some problems marking, my fabric is pink and black and so soft that every single marker I tried seemed to sink right in. I ended up doing the one pin tuck in the middle, then using pins to mark the next one out, sew, mark the next one etc.
And using the pin tucks to shape the sleeve worked so much better than I thought! The only thing I would change would be to do them as close together as possible, instead of evenly spacing them. I think this would both make the detail of of more noticeable / more pretty, as well as being more comfortable to wear.
Picture of the sleeve with tucks
https://photos.app.goo.gl/pM9F6j6tgPPLgj4i6
Thanks for the pic – it sure did work well. Nice sleeve head shape, too 🙂