The unexpected conclusion to the hug-me-tight experiment

Conclusion of the hug me tight experiment white cotton 2

Last week’s hug-me-tight experiment has taken an unexpected turn. You can read about the adventure so far here.


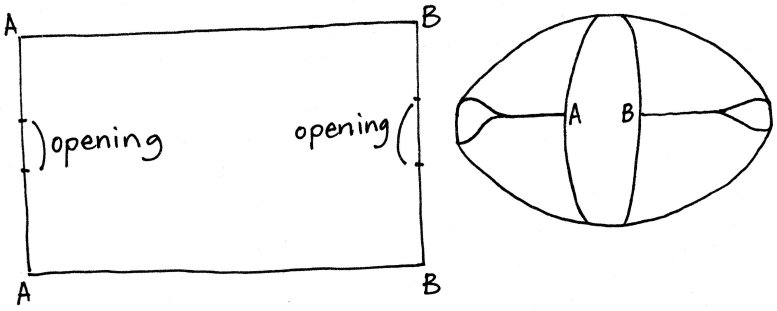
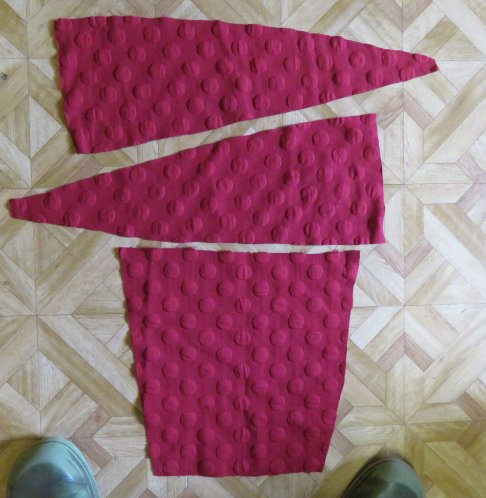
This is the cutting concept I started with:

Zero waste fashion hug me tight

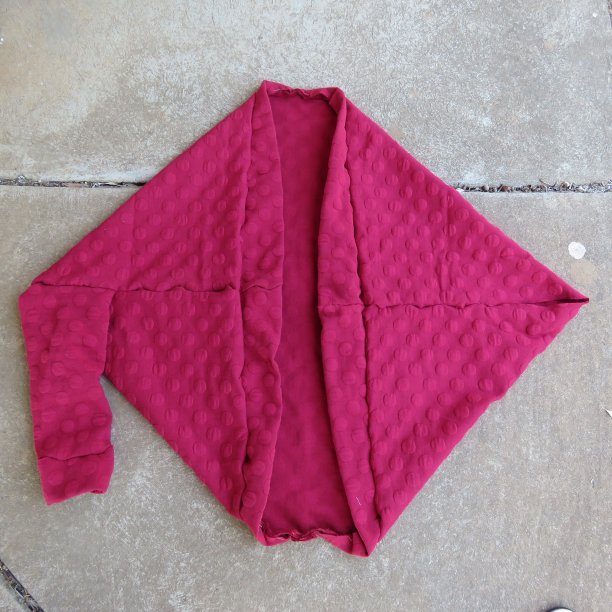
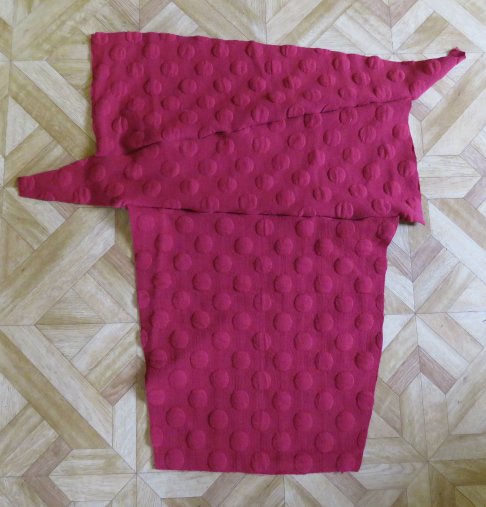
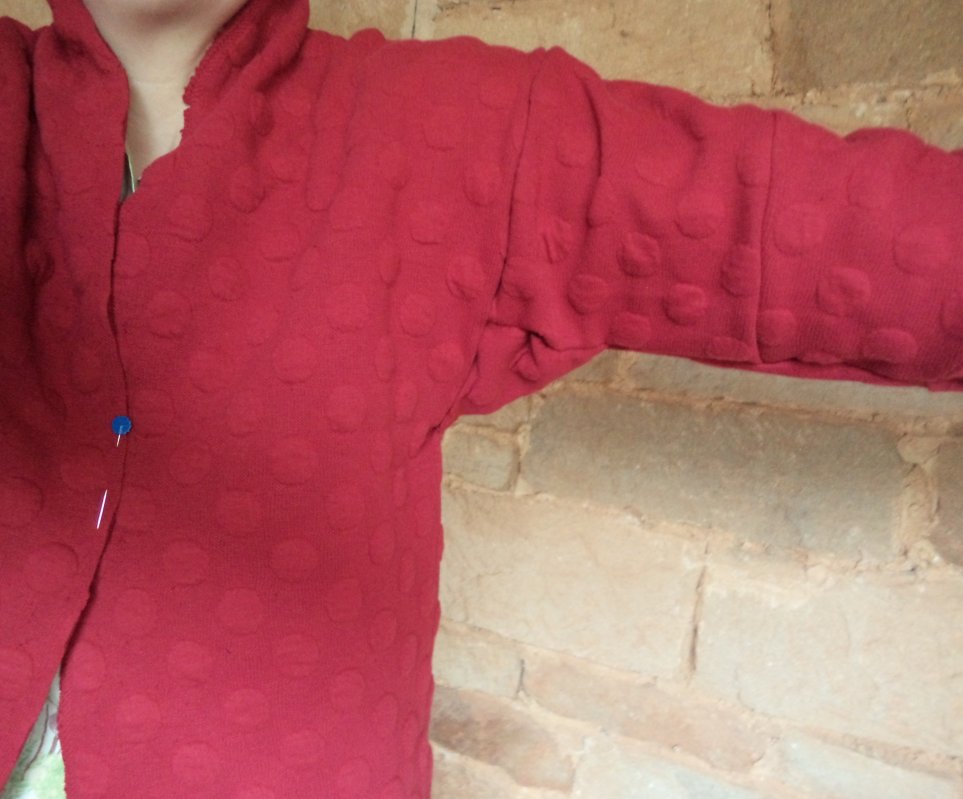
I felt that the maroon double knit hug-me-tight that I was experimenting with was too short (it finished at my waist), although the sleeves were good and the collar was okay. It looked okay as a shrug/bolero.

Hug me tight with bands and sleeves, flat

I have since been trying out some other fabrics and wondered if I’ve been “overthinking” the simplicity of the hug-me-tight. I also pondered last week’s comment by Michelle Shaffer about sheer fabrics.


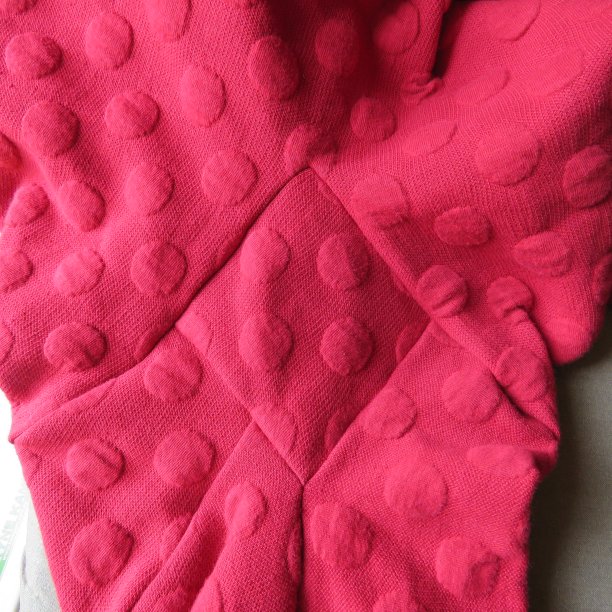
Here’s some other hug-me-tights in different fabrics (these are fabrics I already had, just pinned together).

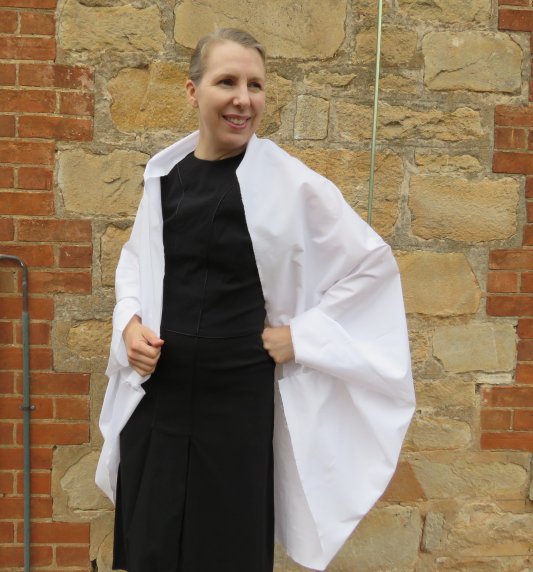
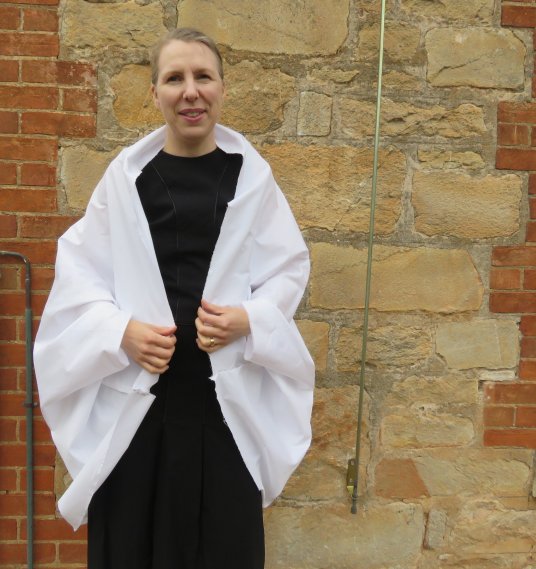
This is a piece of white cotton fabric I plan to make a shirt with one of these days. I had thought it might look like I was wrapped in a bed sheet but actually it looks a bit sculptural.

Conclusion of the hug me tight experiment white cotton 1


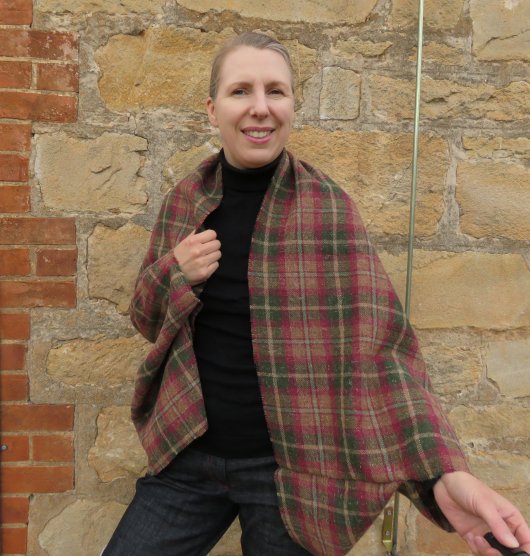
Here’s a skirt length of tartan wool. Again, it didn’t look as unwearable as I thought it would. It falls somewhere in between wearing Viv Westwood and wearing a picnic blanket. I could match those checks if I tried.

Conclusion of the hug me tight experiment tartan


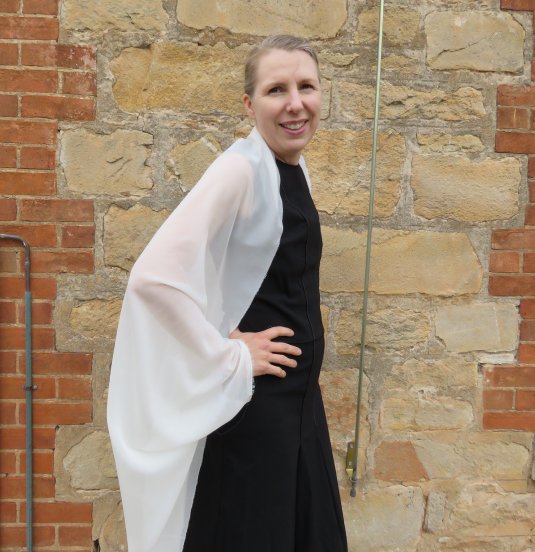
A sheer version, using cream 100% polyester. I don’t mind it, it’s certainly elegant.

Conclusion of the hug me tight experiment sheer 3


So, in conclusion, I would say

  • bigger is better – smaller looks too skimpy unless you’re aiming for a shrug/bolero look
  • the most important dimension is the centre back length
  • almost any fabric works…knits, sheers, wools, cottons etc
  • keep it simple


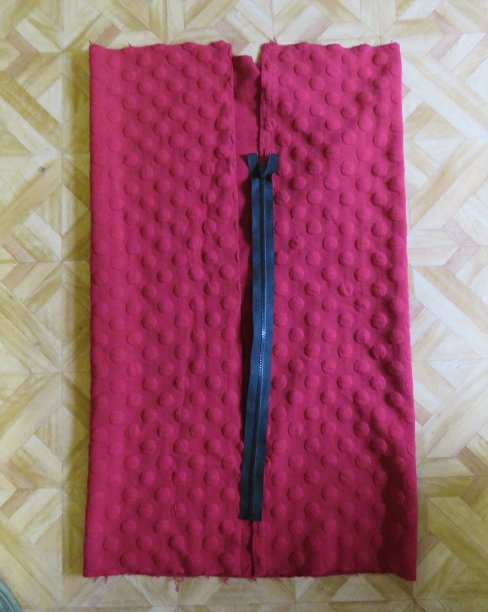
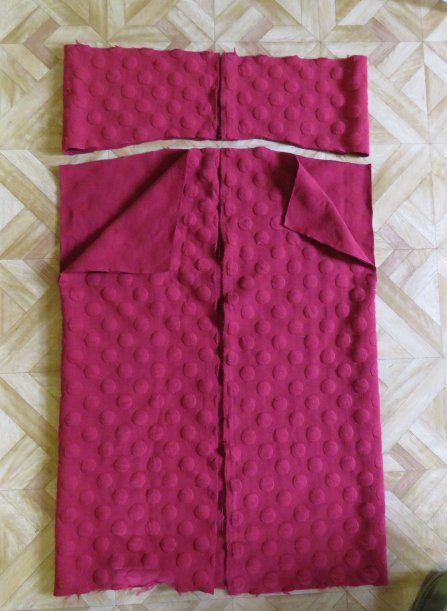
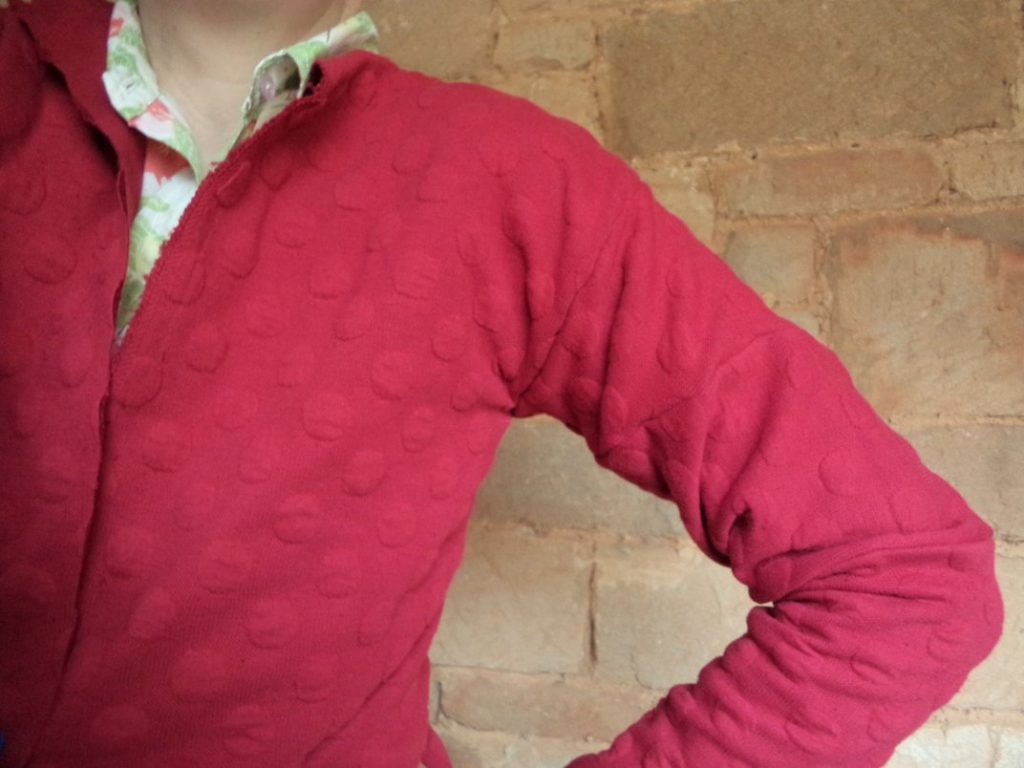
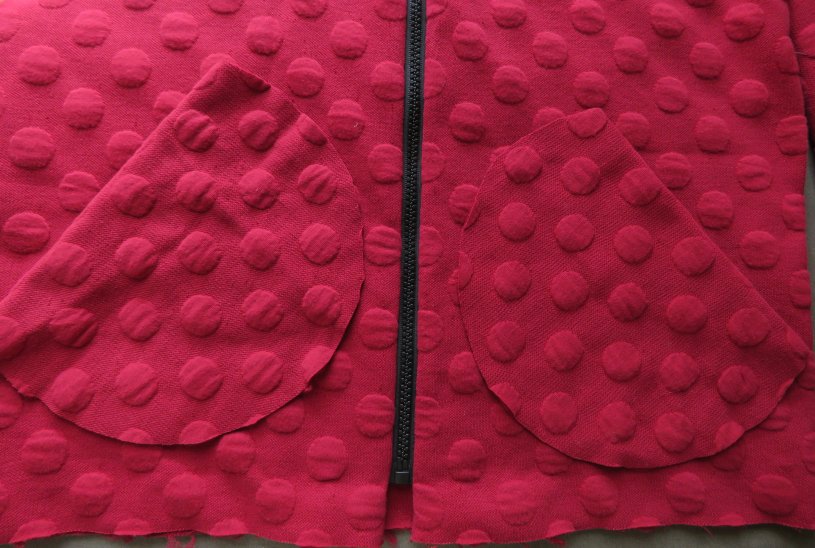
The maroon double knit had a happy ending. I took it apart and re-cut it into a conventional sort of a cardigan with a zip front.

Conclusion of the hug me tight experiment maroon cardi body 1
The biggest piece was just big enough for a body with a front zip opening and no side seams.
Conclusion of the hug me tight experiment maroon cardi body 2
I took a deep breath and cut a piece off the top (angled for the shoulders), then cut a slit down each side for the armholes.
Conclusion of the hug me tight experiment maroon cardi sleeves 1
To make the sleeves I used the triangles from the hug-me-tight’s collar…
Conclusion of the hug me tight experiment maroon cardi sleeves 2
…stitched together…
Conclusion of the hug me tight experiment maroon cardi sleeves 3
…and trimmed.
Conclusion of the hug me tight experiment maroon cardi sleeves 4
Tried it on. Uh-oh, the armhole is way too high!
Conclusion of the hug me tight experiment maroon cardi sleeves 6
Gussets to the rescue! I cut a 10cm x 10cm square gusset from the hug-me-tight’s cuffs.
Conclusion of the hug me tight experiment maroon cardi sleeves 5
Here’s the gusset pinned in. So much better!
Conclusion of the hug me tight experiment maroon cardi sleeves 7
Here’s the gusset stitched in under the arm.
Conclusion of the hug me tight experiment maroon cardi body 3
Here’s the cardigan nearly finished. I fashioned a collar from the strip I cut off the body at the beginning. If I’d thought ahead I would have left it attached to the back neck. By pure accident the cardigan goes well with my zero waste jeans.
Conclusion of the hug me tight experiment maroon cardi body 4
This is what I’m doing for pockets. There was a bit of fabric left from the original scraps.

Cheers!

2 Comments

  1. Michelle Shaffer on March 25, 2019 at 11:25 pm

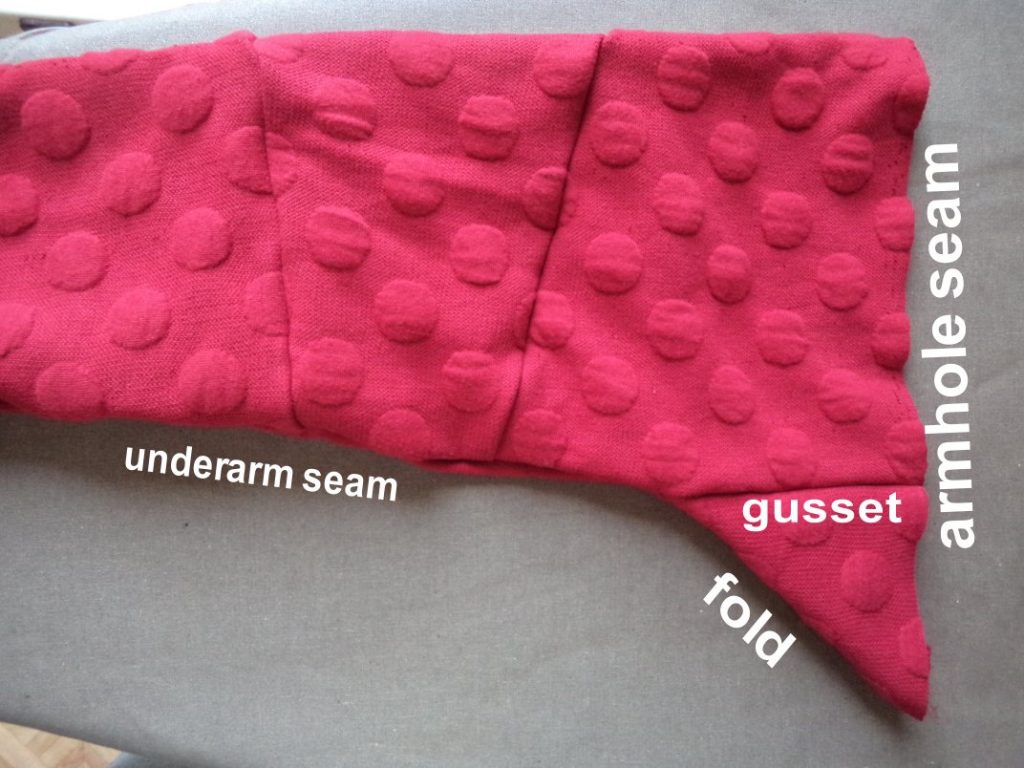
    I’m going to try the gusset on a sweatshirt I have that has restricted arm movement. Thanks for the tip.

    • lizhaywood on March 26, 2019 at 9:23 am

      Cheers, Michelle. Mine was a square but you could make it more diamond-shaped. I recommend pinning it in first.

Leave a Comment