Making origami ribbon trim
![origami ribbon trim](https://lizhaywood.com.au/wp-content/uploads/2020/07/origami-ribbon-trim-13-red-grosgrain-ribbon-IMG_9131.jpg)
While flipping through my sketch book looking for something, I found a page with notes for making a ribbon trim where the ribbon is folded origami-style. I’d folded some paper to work out how to do it.
![origami ribbon trim sketchbook](https://lizhaywood.com.au/wp-content/uploads/2020/07/origami-ribbon-trim-sketchbook-IMG_8996.jpg)
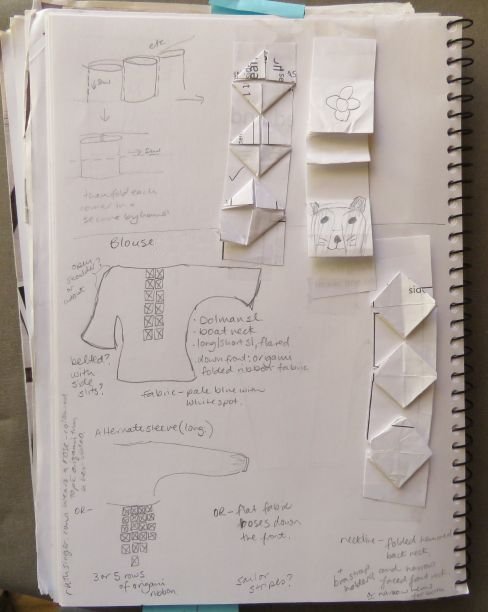
Luckily, I write the source of inspiration on all drawings, and it seems I saw a video of textile artist Ruth Singer who was wearing a top with this type of trim (the video was about her work, not her outfit, but both held my interest!). A quick internet search found the original video, but the trim on her top is not quite like how I’d remembered it.
![origami ribbon trim Ruth Singer](https://lizhaywood.com.au/wp-content/uploads/2020/07/origami-ribbon-trim-Ruth-Singer.jpg)
Nevertheless, I decided to try what I’d written in the sketch book.
My 11-year old has made a video for you:
And here are the step-by-steps:
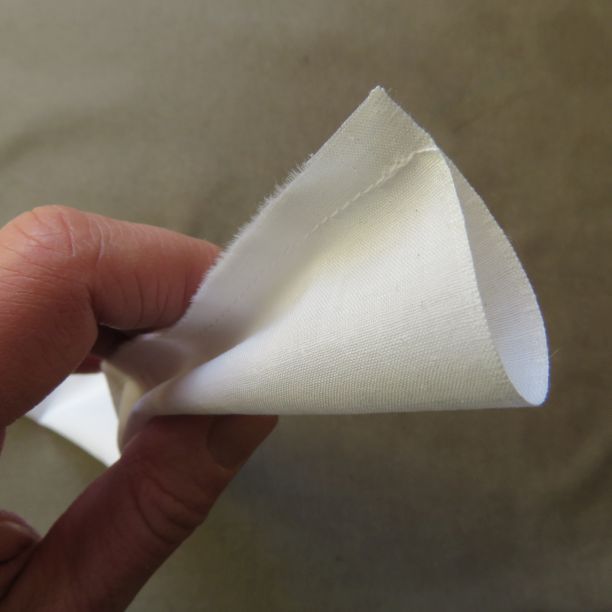
Step 1. Get some ribbon or sew a tube of fabric. You’ll need 3 times the finished length and it needs to be at least 2.5cm (1″) wide. Easiest ribbon to use is grosgrain. Best fabrics are fine ones, for example lawn, voile or even organza – the finer the better. Cut the fabric on the straight grain. When you press the tube of fabric, press the seam open and put it in the centre of the tube, not on an edge. I used a tube of fabric for these examples.
![origami ribbon trim 1 sew a tube](https://lizhaywood.com.au/wp-content/uploads/2020/07/origami-ribbon-trim-1-sew-a-tube-IMG_9013.jpg)
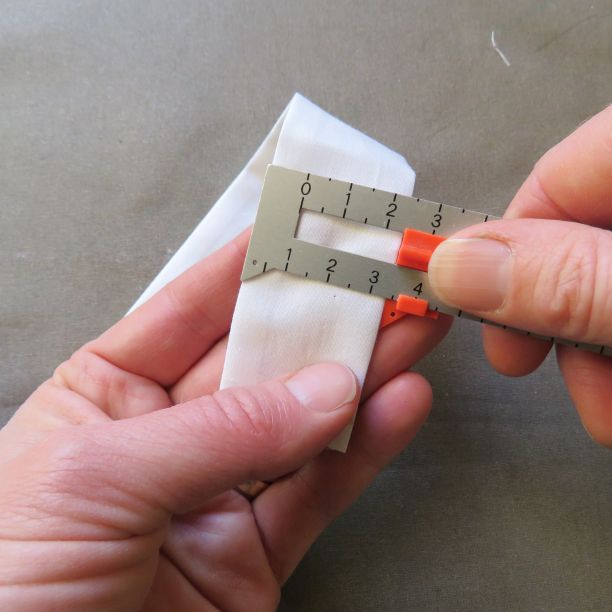
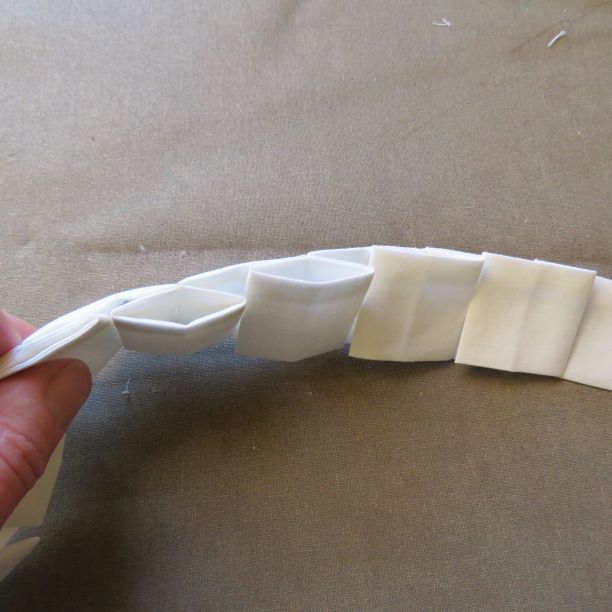
Step 2. Measure the width of the ribbon and sew a fold in the ribbon the same width (so the folded part is exactly square). A sliding gauge is very handy for this.
![origami ribbon trim 2 measure width](https://lizhaywood.com.au/wp-content/uploads/2020/07/origami-ribbon-trim-2-measure-width-IMG_9022.jpg)
![origami ribbon trim 3 sew first fold](https://lizhaywood.com.au/wp-content/uploads/2020/07/origami-ribbon-trim-3-sew-first-fold-IMG_9032.jpg)
![origami ribbon trim 3a sew first fold](https://lizhaywood.com.au/wp-content/uploads/2020/07/origami-ribbon-trim-3a-sew-first-fold.jpg)
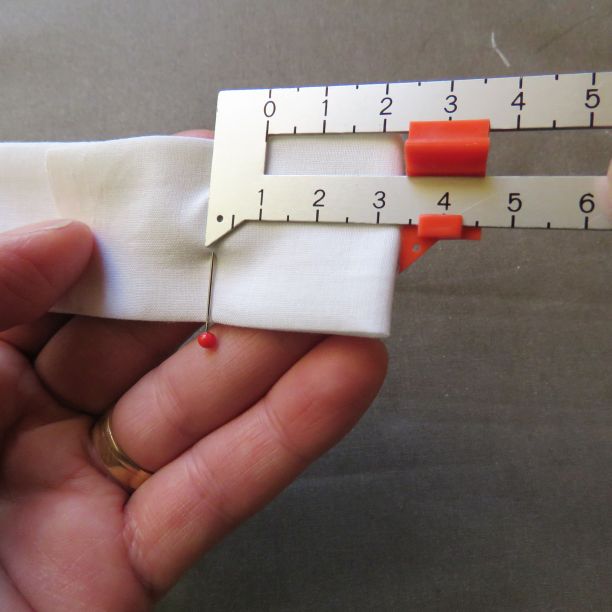
Step 3. Repeat for the length of the ribbon, sewing each square fold exactly one ribbon width’s away.
![origami ribbon trim 4 sew all the folds](https://lizhaywood.com.au/wp-content/uploads/2020/07/origami-ribbon-trim-4-sew-all-the-folds-IMG_9037.jpg)
![origami ribbon trim 5 all the folds sewn](https://lizhaywood.com.au/wp-content/uploads/2020/07/origami-ribbon-trim-5-all-the-folds-sewn-IMG_9046.jpg)
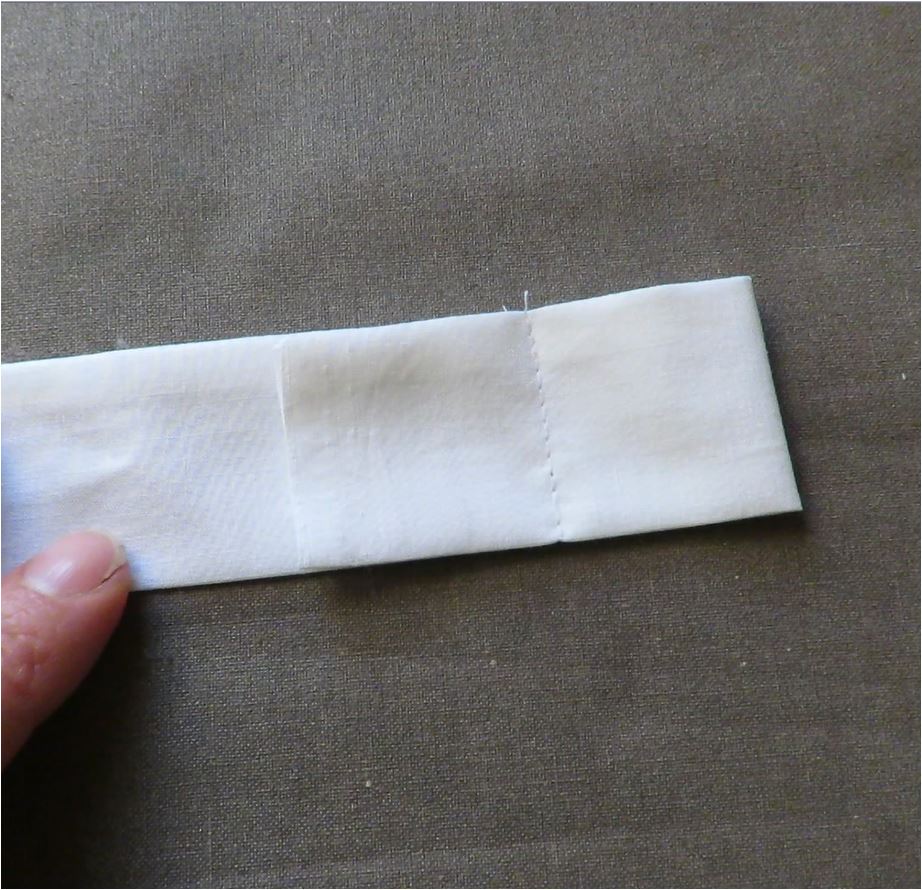
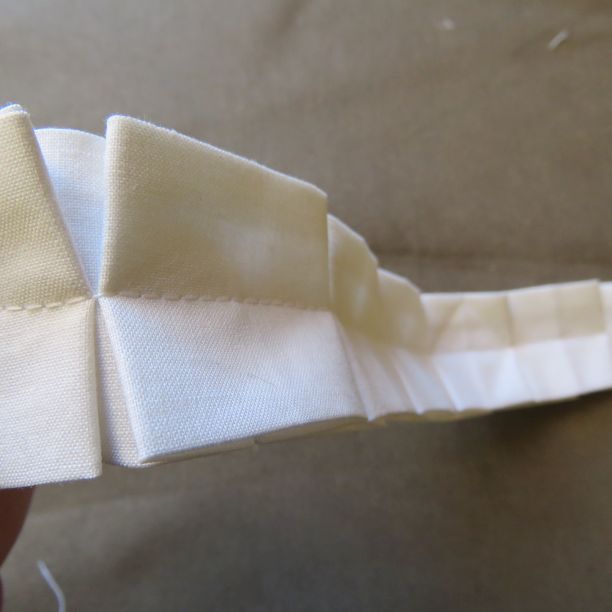
Step 4. Press the centre of each so it sits squarely above its seam; the squares should touch one other.
![origami ribbon trim 6 press the folds](https://lizhaywood.com.au/wp-content/uploads/2020/07/origami-ribbon-trim-6-press-the-folds-IMG_9051.jpg)
Step 5. Stitch down the exact centre of the ribbon so the squares stay put.
![origami ribbon trim 7 sew a line of stitching down the middle](https://lizhaywood.com.au/wp-content/uploads/2020/07/origami-ribbon-trim-7-sew-a-line-of-stitching-down-the-middle-IMG_9066.jpg)
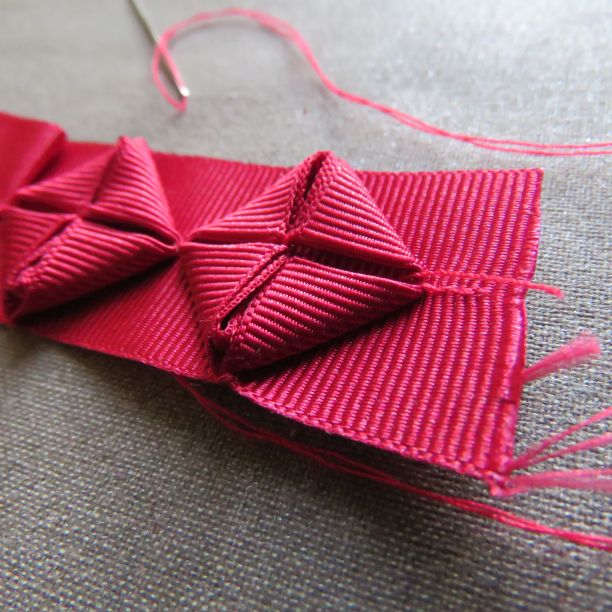
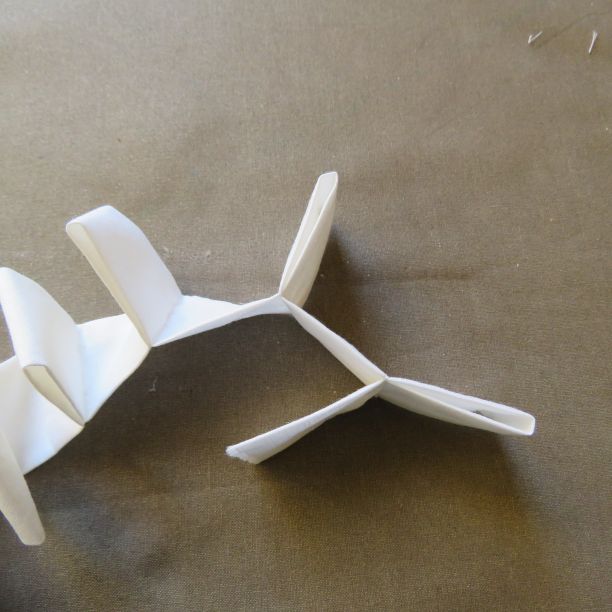
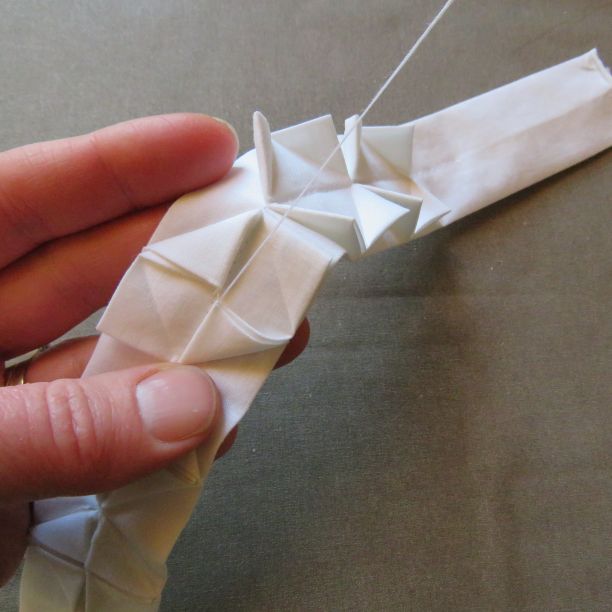
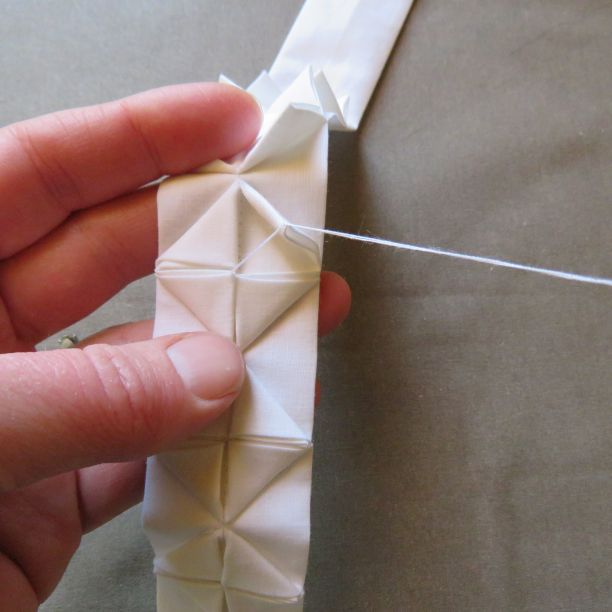
Step 6. Fold the corners of each square into the centre and press.
![origami ribbon trim 9 the corners should meet](https://lizhaywood.com.au/wp-content/uploads/2020/07/origami-ribbon-trim-9-the-corners-should-meet-IMG_9085.jpg)
![origami ribbon trim 8 press the corners in](https://lizhaywood.com.au/wp-content/uploads/2020/07/origami-ribbon-trim-8-press-the-corners-in-IMG_9080.jpg)
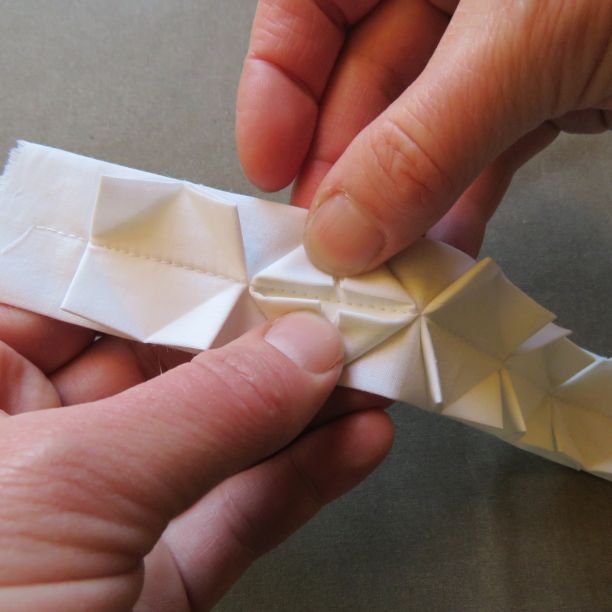
Step 7. Using a handsewing needle and double thread, catch each corner to the centre of the square. Fasten off the thread underneath then move to the next square without cutting the thread.
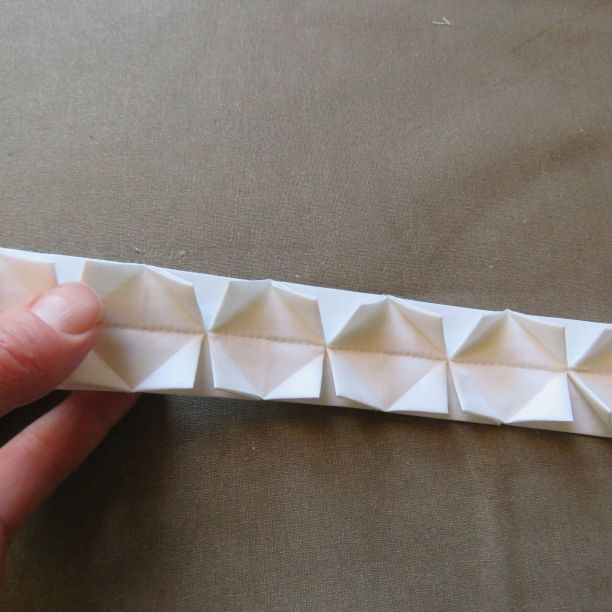
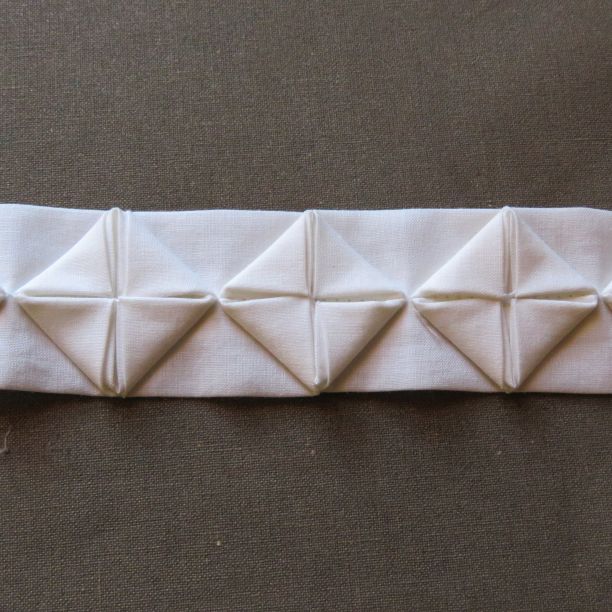
![origami ribbon trim 10 handsew to finish](https://lizhaywood.com.au/wp-content/uploads/2020/07/origami-ribbon-trim-10-handsew-to-finish-IMG_9093.jpg)
![origami ribbon trim 11 more sewing](https://lizhaywood.com.au/wp-content/uploads/2020/07/origami-ribbon-trim-11-more-sewing-IMG_9095.jpg)
Trim complete.
![origami ribbon trim 12 finished trim](https://lizhaywood.com.au/wp-content/uploads/2020/07/origami-ribbon-trim-12-finished-trim-IMG_9100.jpg)
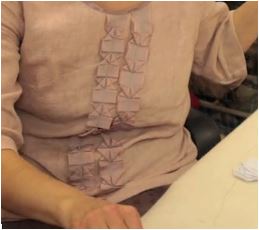
Now to find the right garment for it!
Cheers!
Lovely! I agree – I just need to work out where it can be used
I’m sure the perfect application will come along 🙂