Making Danielle Elsener’s zero waste scrub top
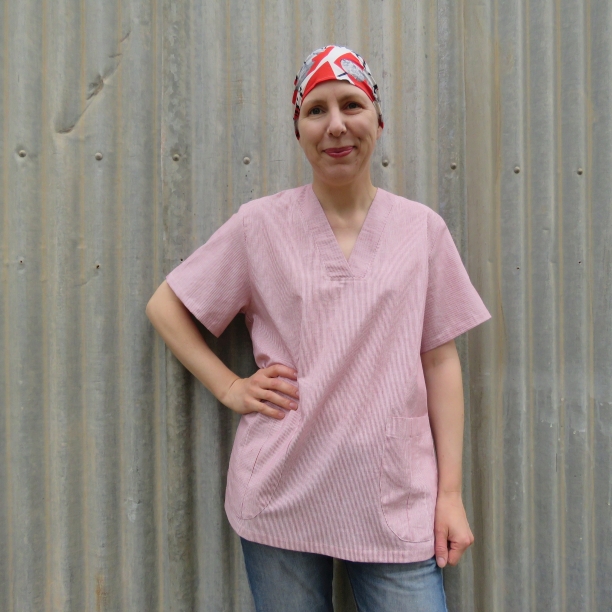
The free scrub pattern I did last week led me to Danielle Elsener of DECODECODECODE’s zero waste scrubs, and I thought I’d give them a go.
I’m fascinated that two patternmakers living on opposite sides of the Earth both endeavoured to make zero waste scrubs, took very different approaches, and produced such different-looking patterns which are still recognizably scrubs.
This pattern is very unlike a traditional pattern, even if you’re used to printable PDF patterns.
The instructions are brief, however if you’re familiar with sewing scrubs and how they go together, you’ll be fine. If you’re bored to tears with sewing scrubs, this might be the antidote!
There are extra seams in this top which one wouldn’t normally have – centre back seam, central sleeve seams and pocket seams, however, the trade-off is a top that’s extremely economical on fabric (this one took 58cm x 2m). One of the advantages of zero waste is that when we waste no fabric, we get the full use of what we do have.
I found some suitable fabric in my stash but unfortunately there was only enough for a top, not pants as well. While I have a reasonable collection of fabric to draw from, there isn’t much in the “plain cottons” department, and I can hardly use sequinned lace or crushed velvet.
Here’s how I did mine:
I made a size medium; the pattern has since been graded to XS – 2XL and has had a few tweaks.
There are 6-9 pages to print out depending on the size top. Note that you’re not printing out whole pattern pieces for the back and front; just the bits you need (neck/shoulder/armholes). Some are printed portrait and some landscape.
The fabric is cut to the size indicated and folded in half longways.
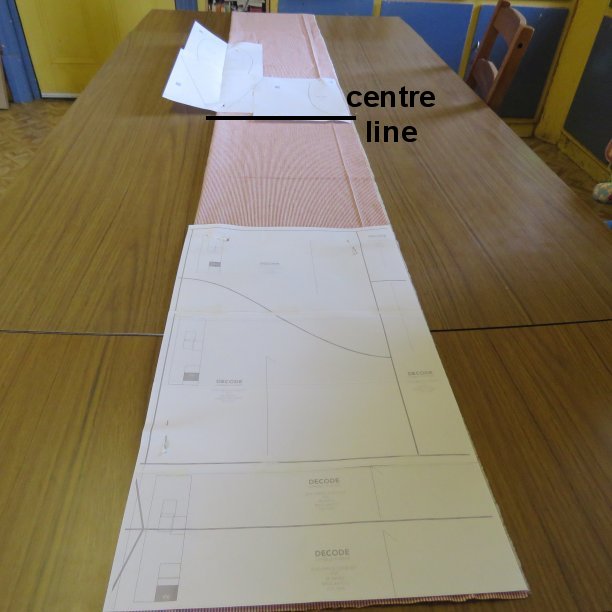
In the centre of the fabric is the body neck/shoulder/armholes (there’s a centre line on the pattern which will guide where to position this part), and in the foreground is the sleeves and details.
Before cutting out, measure the side seams of the body back and front to double-check that they’re the same – if not, move the pattern piece so they are.
Here’s the top cut out:
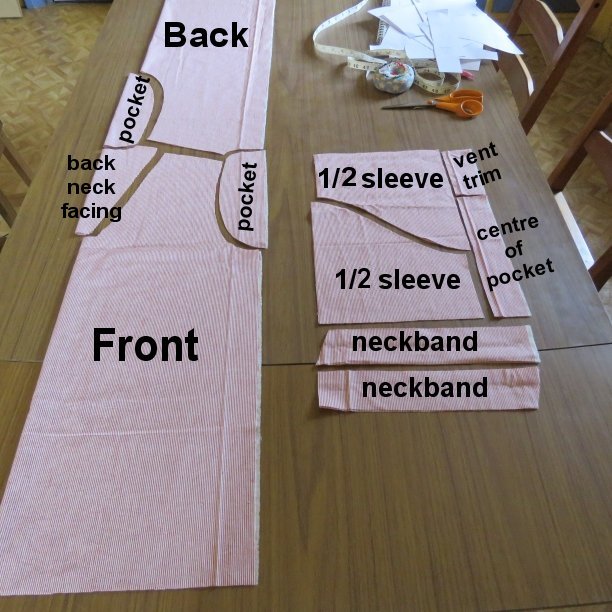
As with zero waste patterns, it was very quick to cut out because one scissor cut separates two pieces. (It also calls for cutting accuracy!)
A brief construction order would be:
- Make V neck at front
- Sew centre back seam
- Sew shoulder seams and back neck facing (see below for pic)
- Sew central sleeve seams to create whole sleeves
- Sew sleeves into body
- Sew underarm/side seams
- Make patch pockets and attach
- Hem and sew side splits.
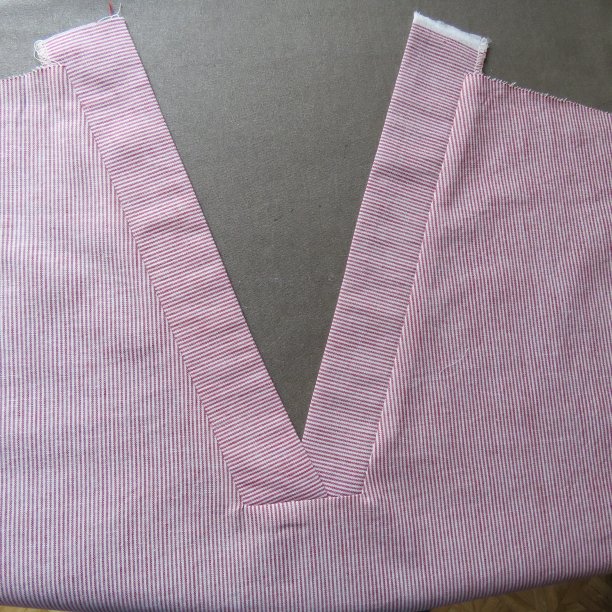
Mine is an earlier iteration of this pattern and the two strips didn’t cross over completely at the bottom of the V.
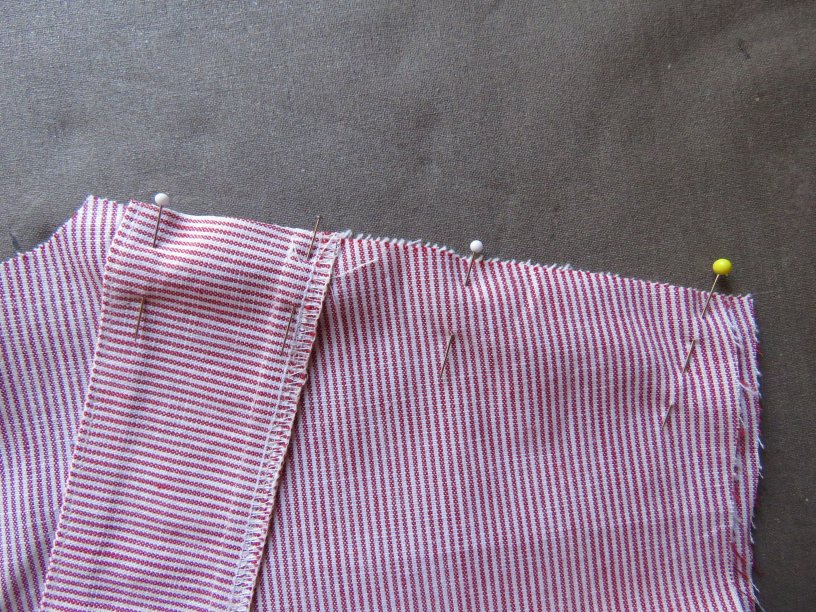
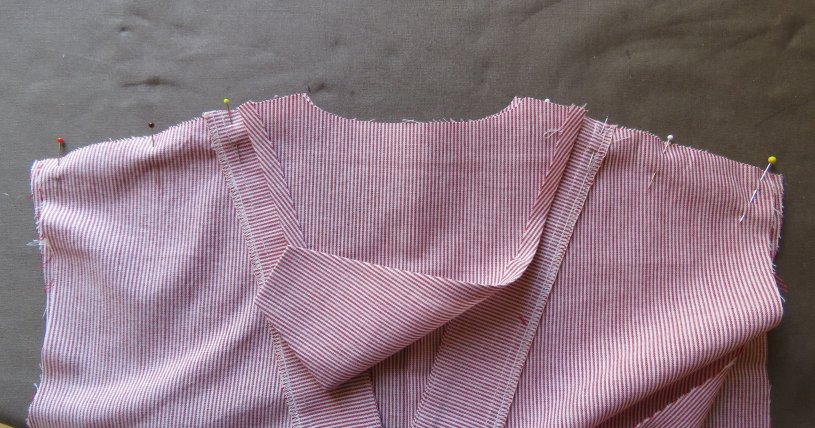
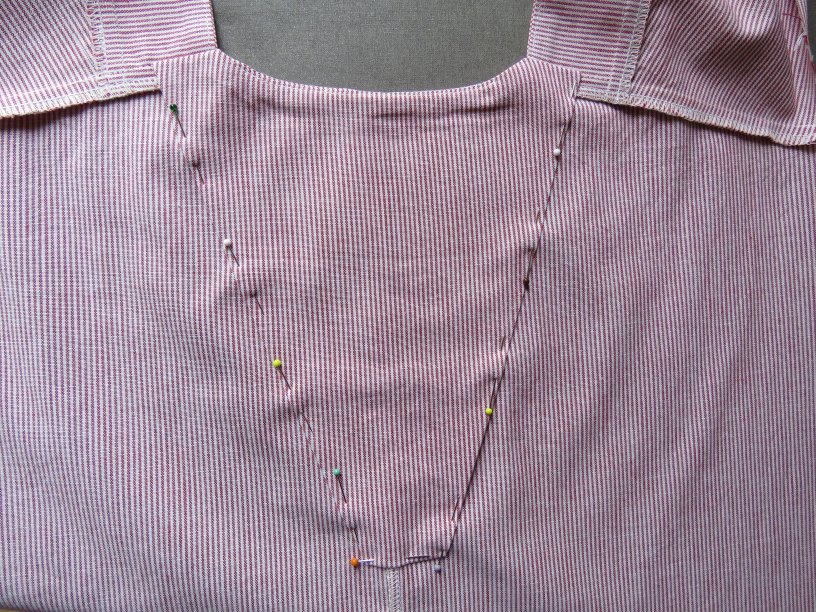
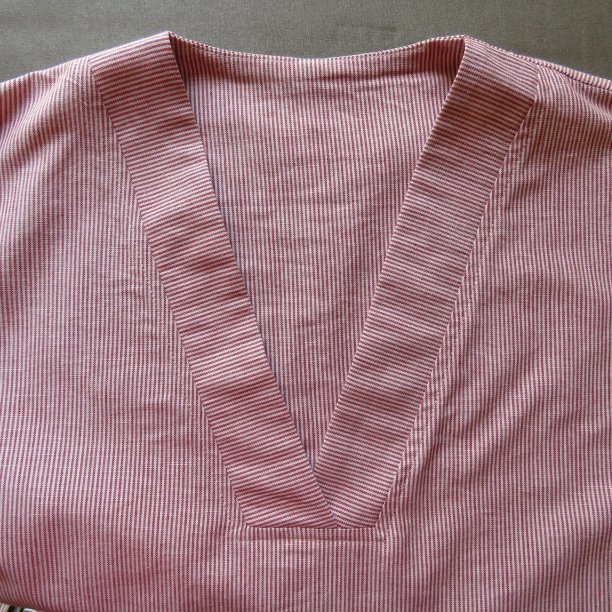
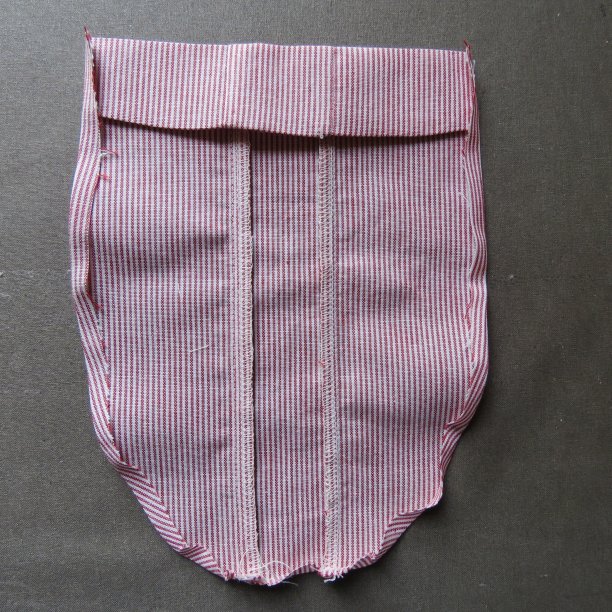
I sewed mine with 6mm (1/4″) seams because I was afraid the pockets would be too small. It turned out that 6mm was ideal for pressing under the curved edges.
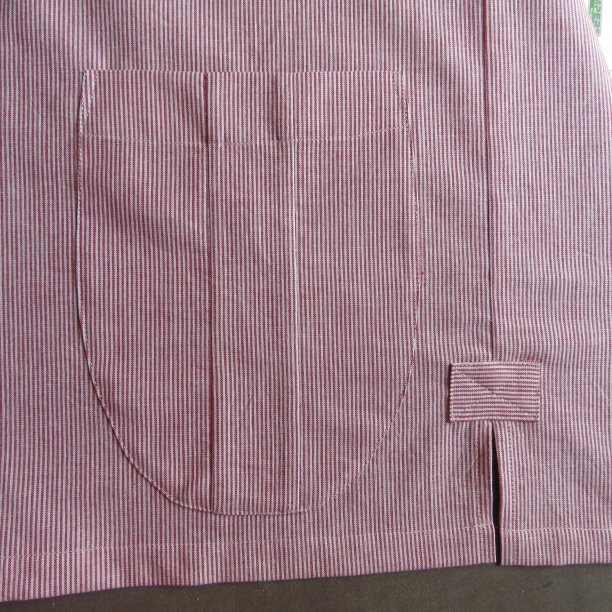
The side splits defeated me so I turned under the edges 1cm and stitched them, then added the reinforcing at the top.
The sleeves were plain sailing – there’s no ease so they just fell in. The back and front sleeve are the same. I thought the sleeve head looked a little pointy, but it looks fine when sewn in and feels comfortable enough.
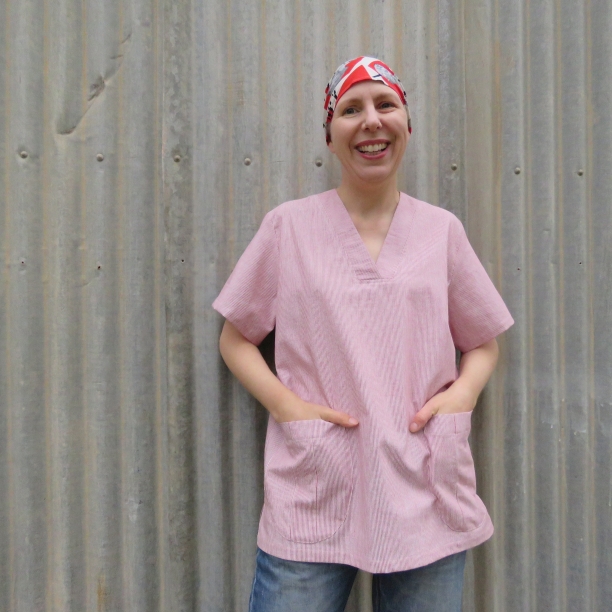
The fit is comfortable with plenty of movement.
The length of the top can easily be adjusted when cutting out.
I resisted the temptation to accessorize with a toy stethoscope.
So, be encouraged to go on a sewing adventure and give it a go! It’s a free, open source pattern which can be shared, adapted, and most importantly, used to support our health workers.
Cheers!
This is good, but the neckline looks quite fiddly! Round pockets are more difficult to sew straight than square. Liz Haywood – your Zero-waste scrub pattern is going the rounds in UK. BUT, it’s quicker and easier to sew pockets on FIRST, not last. In UK we are no longer putting pockets onto scrub trousers- health workers don’t need them, saves time & fabric. Just one or two patch pockets on top. We put the drawstring holes on the outside, (inside the knot gets uncomfy) and never elastic – it doesn’t withstand lots of washing. Drawstring made from one long edge, cut on the straight. Many thanks, Janie in Oxford UK.
Hi Janie, thanks for the very useful comments. In reply:
Yep, agree square pockets are far easier than round.
Yes, easier to sew pockets on first not last however as I didn’t make samples of every single size I couldn’t 100% be certain of the placement for every size – please make own notes re: placement so they can be sewn on first.
Heard conflicting Yays and Nays with trouser pockets, from UK and AU fb pages and Aussie doctors – better to have them in the pattern and omit rather than wish they were there. Bet you’re glad you don’t have to do them!
Originally had drawstring holes on the outside then changed them to the inside. Gah! Should have left them! For outside holes (Step 7, page 9), make the holes 6cm down not 2.5cm, but you’ve probably worked that out by now.
Heard about the elastic – put the option in for it.
Thanks for taking the time to comment and thanks for making scrubs. Cheers, Liz xxoo
thank you! you are saving my life… My daughter is going to start to work as a Nurse and she needs another top scrub as she has only one, but in Italy all the shops are still closed for the strict lockdown. I am going to use a bedsheet and your amazing pattern and explanation. Finger crossed as it will be the first time I sew something like that and I am a beginner!!
Greetings from Rome!
Thank you! – Your daughter will be saving people’s lives and you are helping her. Best wishes for your sewing.
Hi Liz, thank you so much for this blog post. I found Danielle Elsener scrub pattern and I really like her idea and design. But being a newbie to sewing, I have no idea how to sew her design. Thanks to your detail steps and a number of weekends to study and practice the various sewing techniques, I finally managed to sew this scrub and I am so pleased with the final product. Now I can wear it proudly to work. Thanks again!
It’s a good pattern, isn’t it? I think Danielle is destined for big things. I’m glad this blog post was helpful to you.
Thanks for sewing scrubs. And saving people’s lives 🙂
I have a friend, getting close to retirement, who brought some beautiful fabric to make a scrub top for her. I have only ever used a pattern for sewing. Thank you for sharing this as I don’t expect to be making more, and I can fulfil her wish. Thank you from Canada.
Thank you for your lovely comment Carol, and I hope your friend enjoys wearing her scrubs top.