Getting closure on the denim jacket
This blog post has been two weeks in the making – I was thwarted by an electrical storm last week which took out our modem and phone line. But after services were restored and I was ready to hit publish, Mr H happened to see it and said he didn’t like what I’d done with the front of the jacket. Just to say I highly value his honest and unfiltered opinions, however it dented my confidence a bit – was it really that bad? I’d been looking at it for so long I had no idea what looked right or wrong anymore.
The jacket in question is the nearly-finished denim jacket-cut-from-jeans I’m making for my teen. It’s my sew-a-long project for Zero and Zen, a course I’m co-presenting with Kate Ward.
I started this project with three pairs of jeans rejected by the opshop.

I cut them up into this jacket, using the zippered legs for the sleeves.
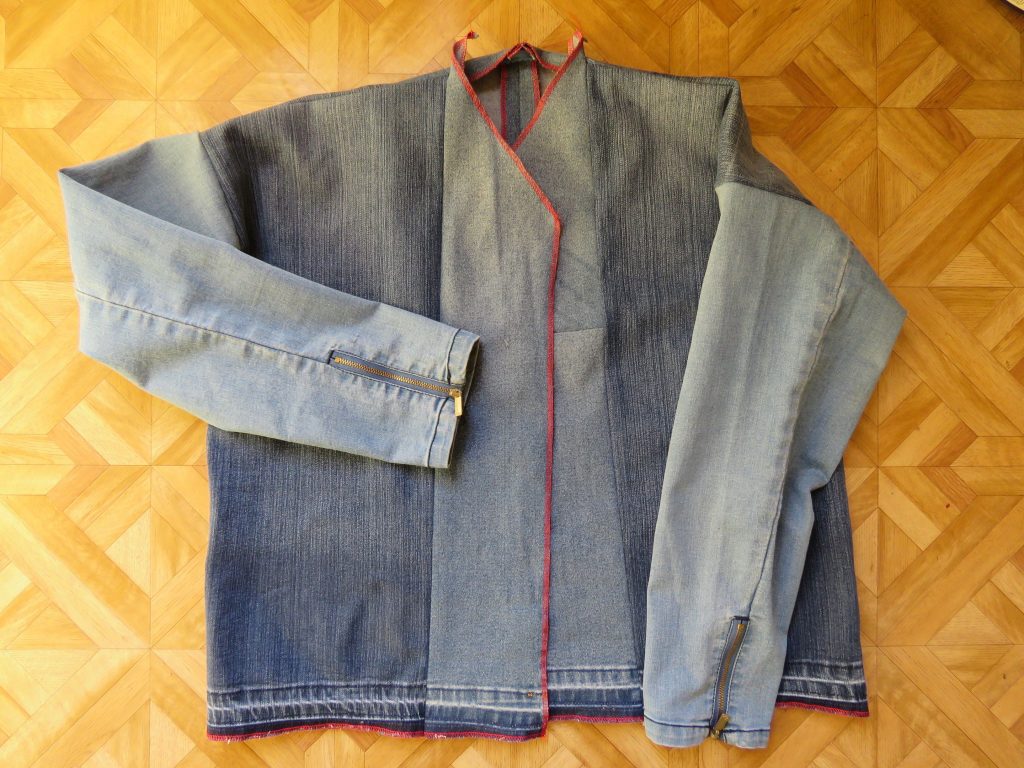
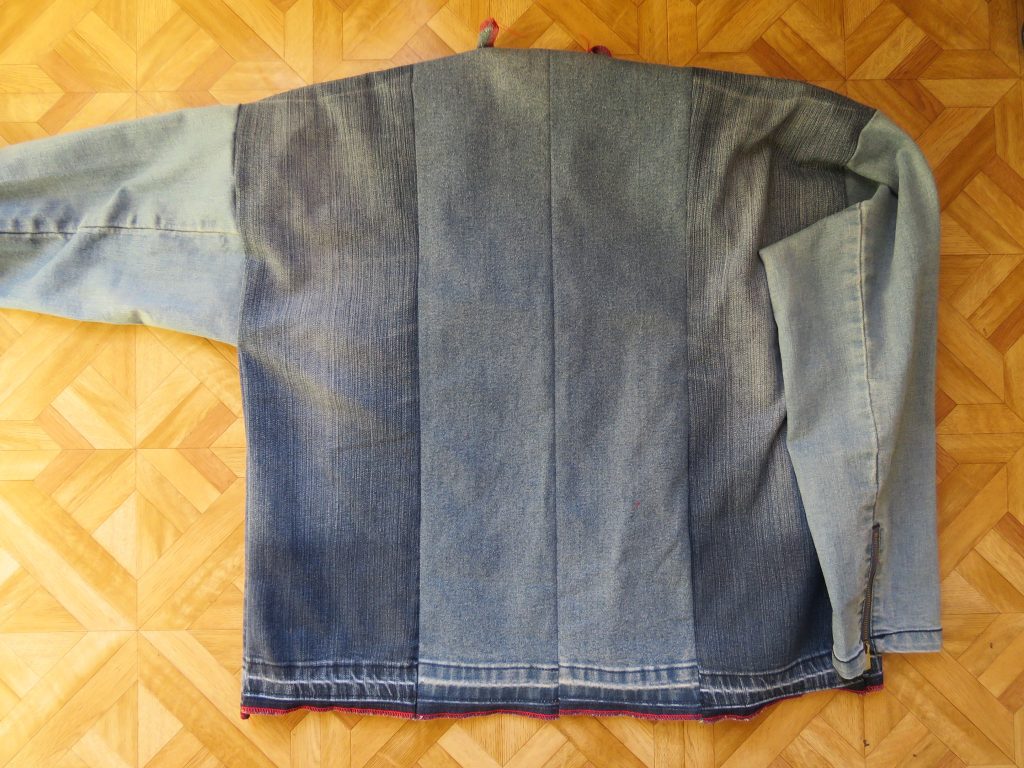
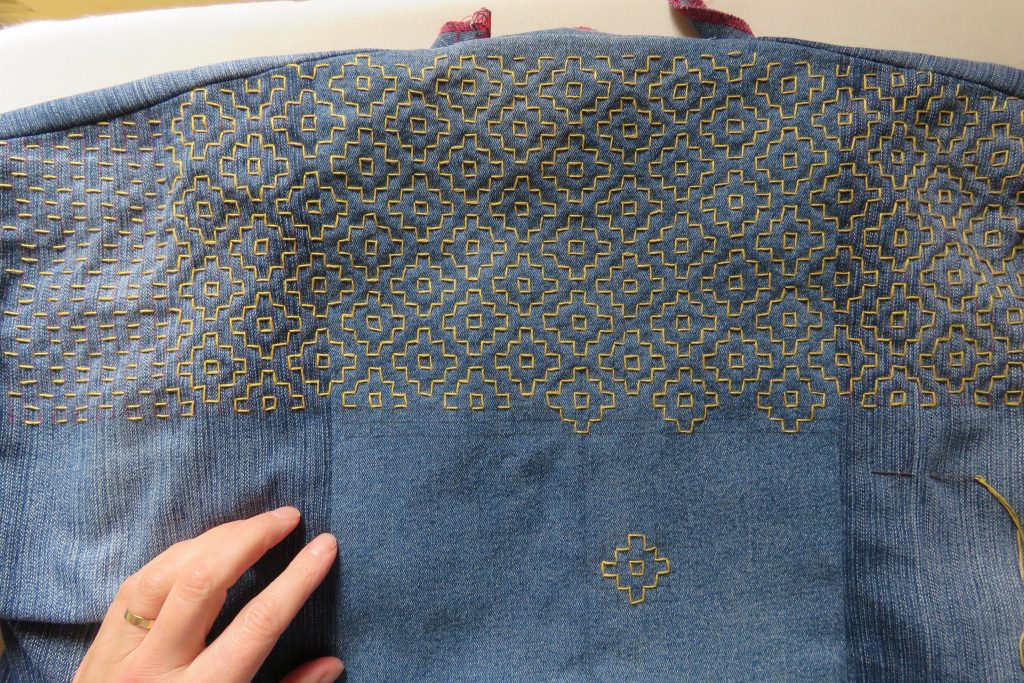
The previous posts on this jacket are: cutting and sewing the jacket, doing the sashiko stitching on the back, and adding pockets unpicked from the original jeans.
The question now is: how should the jacket do up at the front?
The first thought was a metal zip, to match the metal zips on the sleeves, but we didn’t have one – only plastic zips. I didn’t really want to go out and buy one, partly because it would use up precious energy (Long Covid), but mostly because I wanted to make the jacket only from things we already had at home or were being thrown out, like the denim.
The “least worst” plastic zip was this blue one…
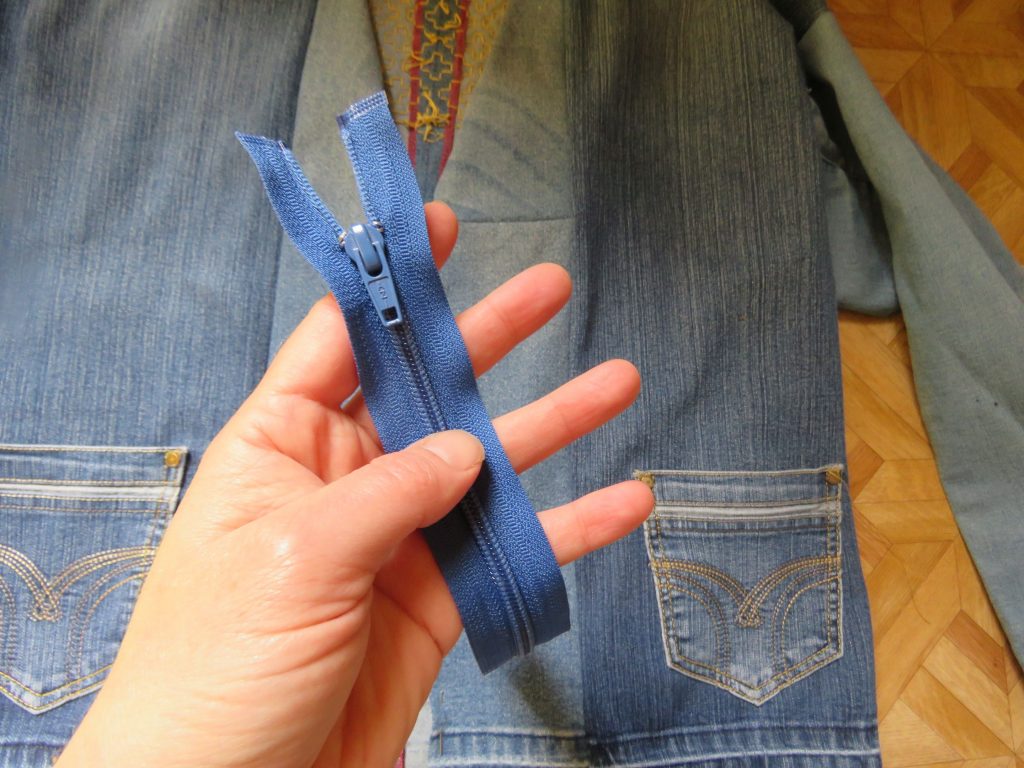
…but it looked very boring when pinned in place:

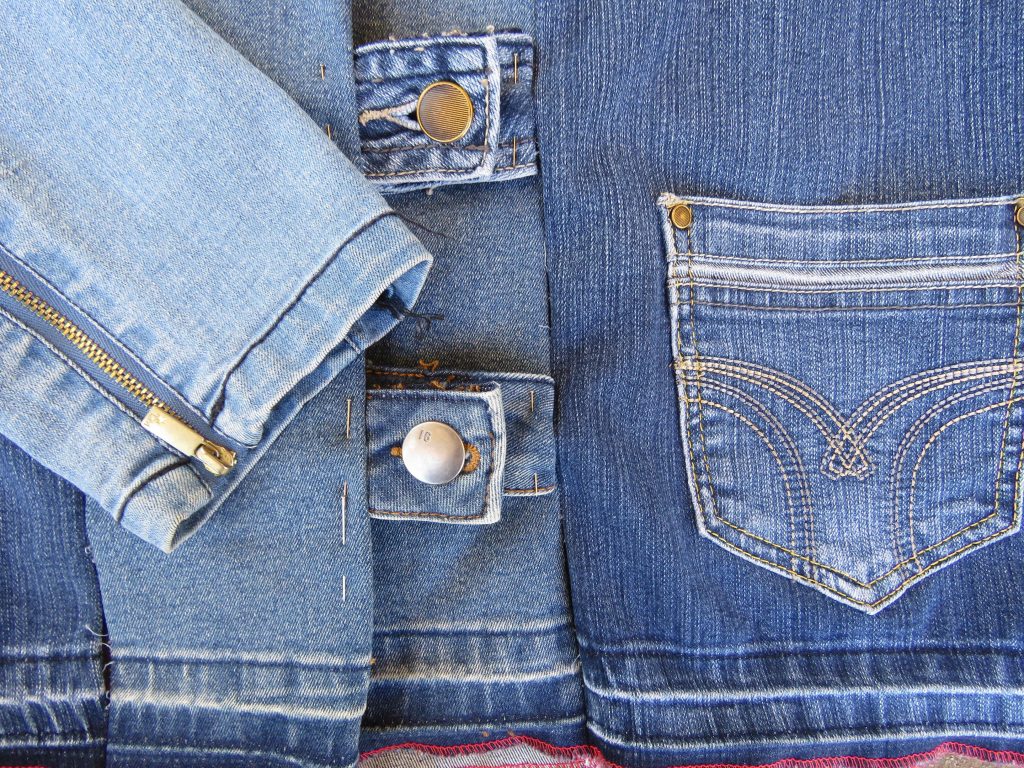
I was explaining the situation to my teen when a flash of inspiration came. What about the 3 waistbands from the jeans that the jacket was cut from?
I unpicked the front sections of the 3 waistbands (actually, I didn’t use the Dannii Minogue jeans because I previously only cut the legs off, leaving a very wearable pair of denim shorts, and it seemed a shame to butcher them. But I found another waistband in the “denim mending” box to use instead).
The waistbands got laid across the front of the jacket to see what they looked like:
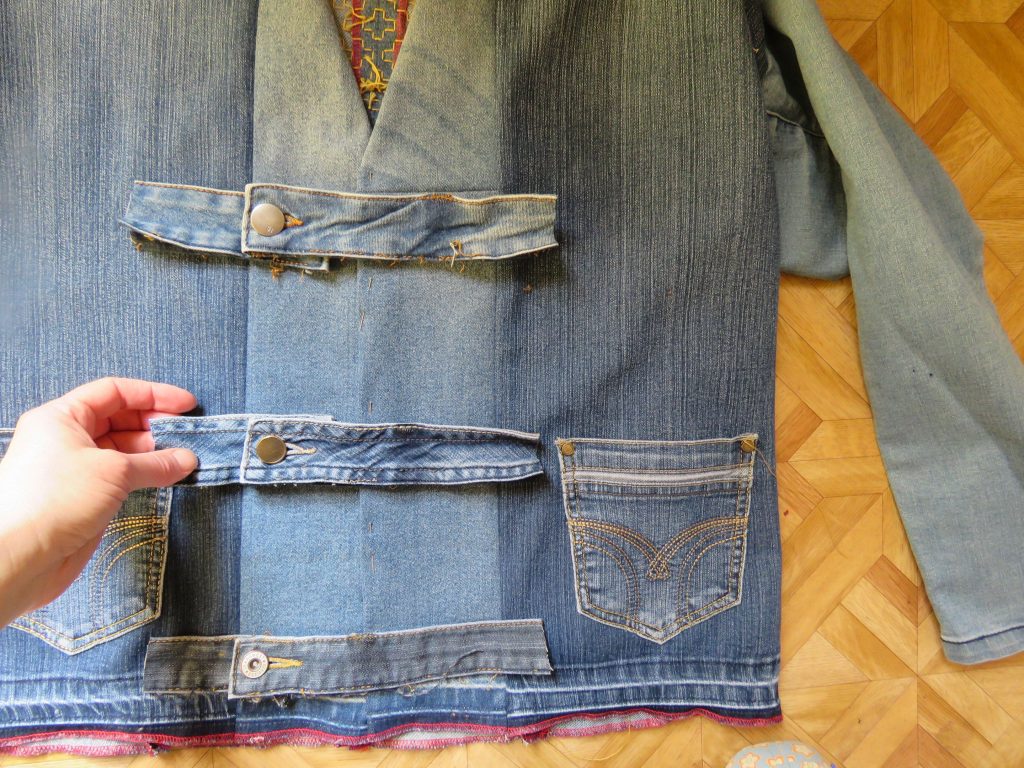
Then I unpicked sections of the seams to insert the ends into.
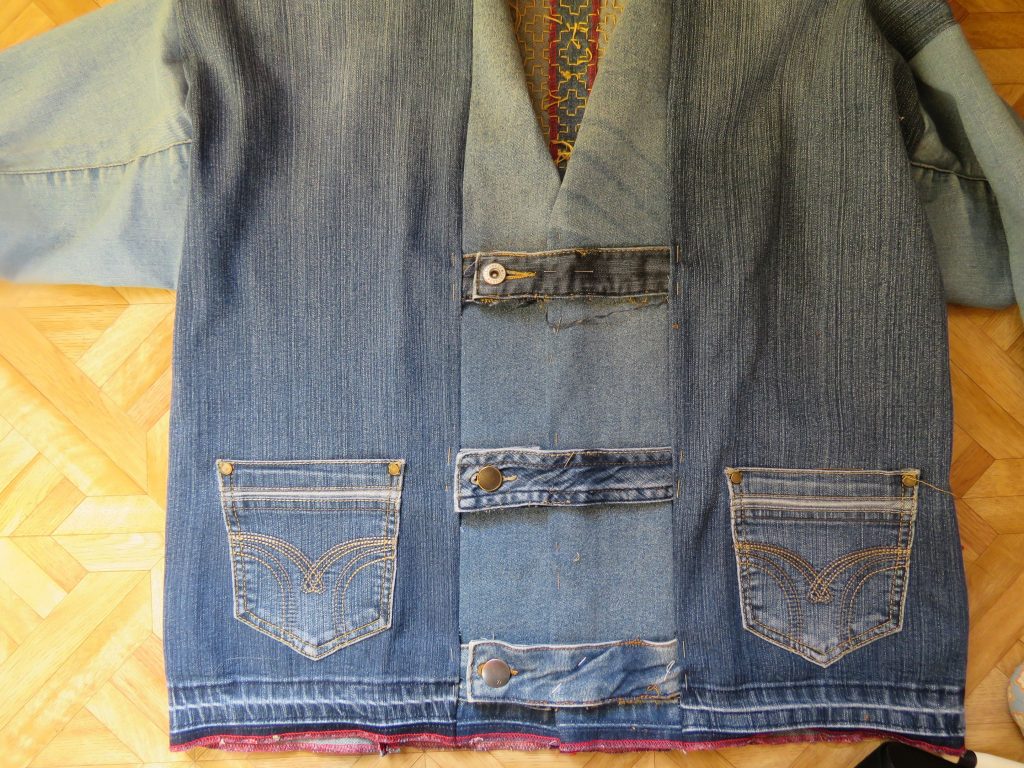
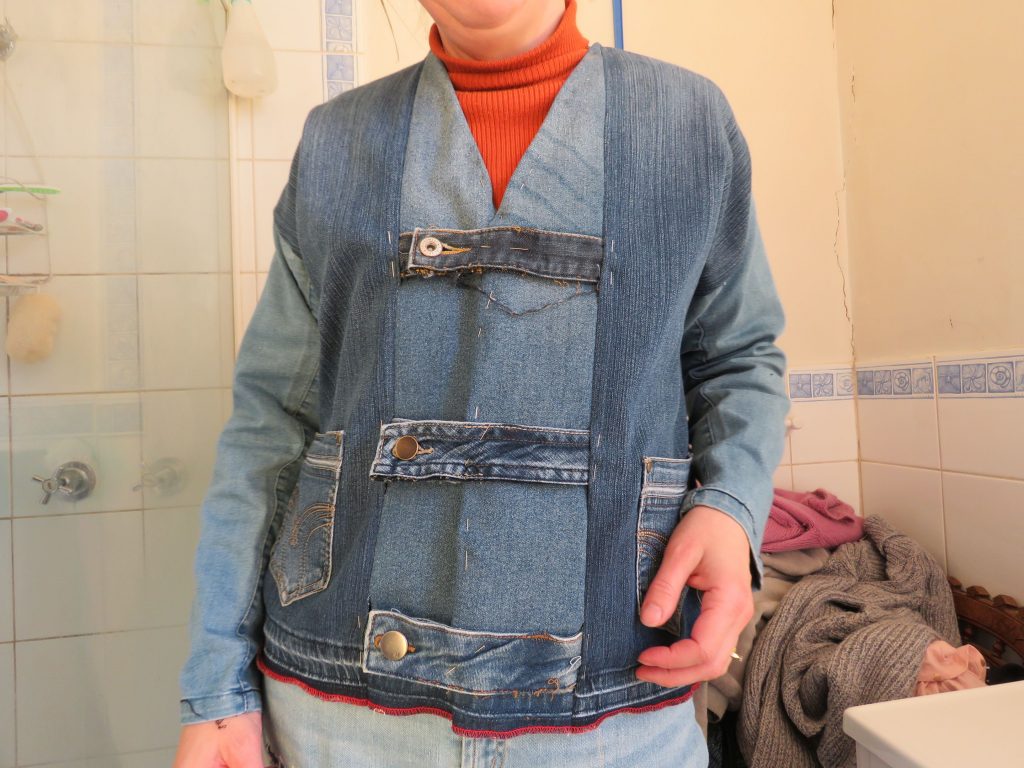
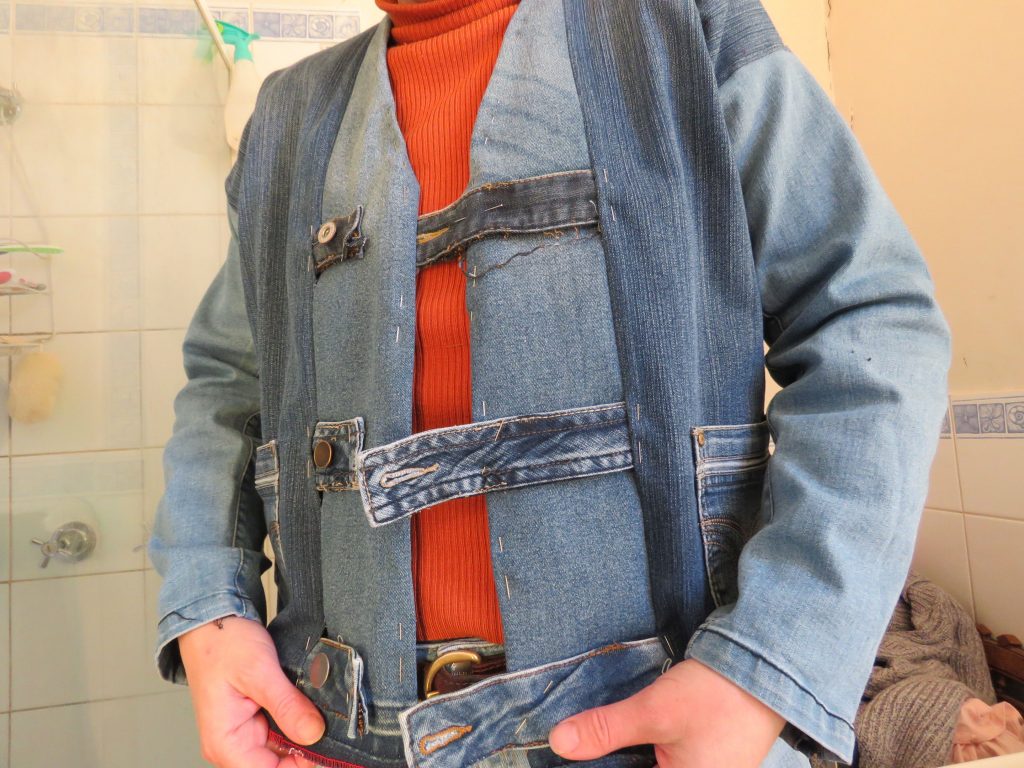
This is the point where we had the storm and then I just wasn’t sure what I was doing. I got an opinion from a trusted sewing friend, who agreed with Mr H. The waistbands looked too heavy and chunky, but she thought the idea was good and suggested I just play with the concept a bit more. Maybe just tabs?
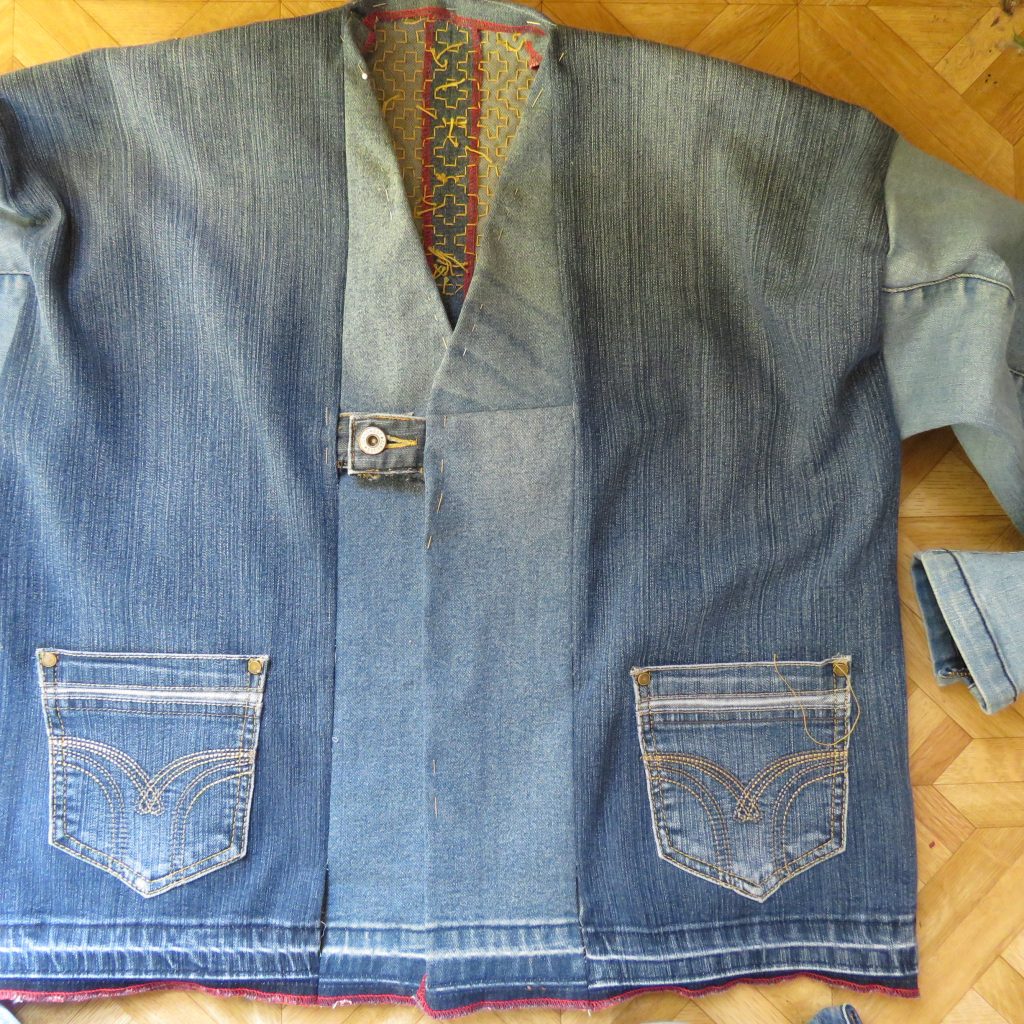

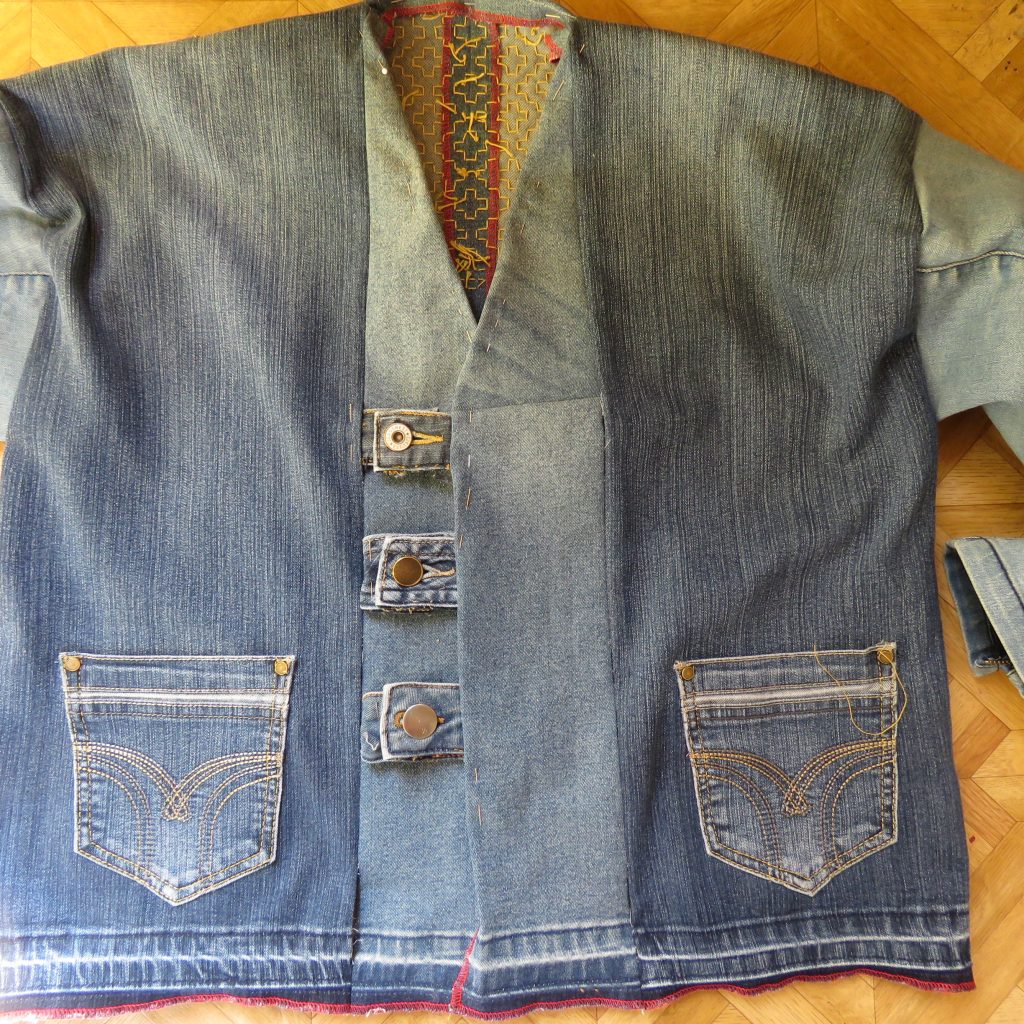
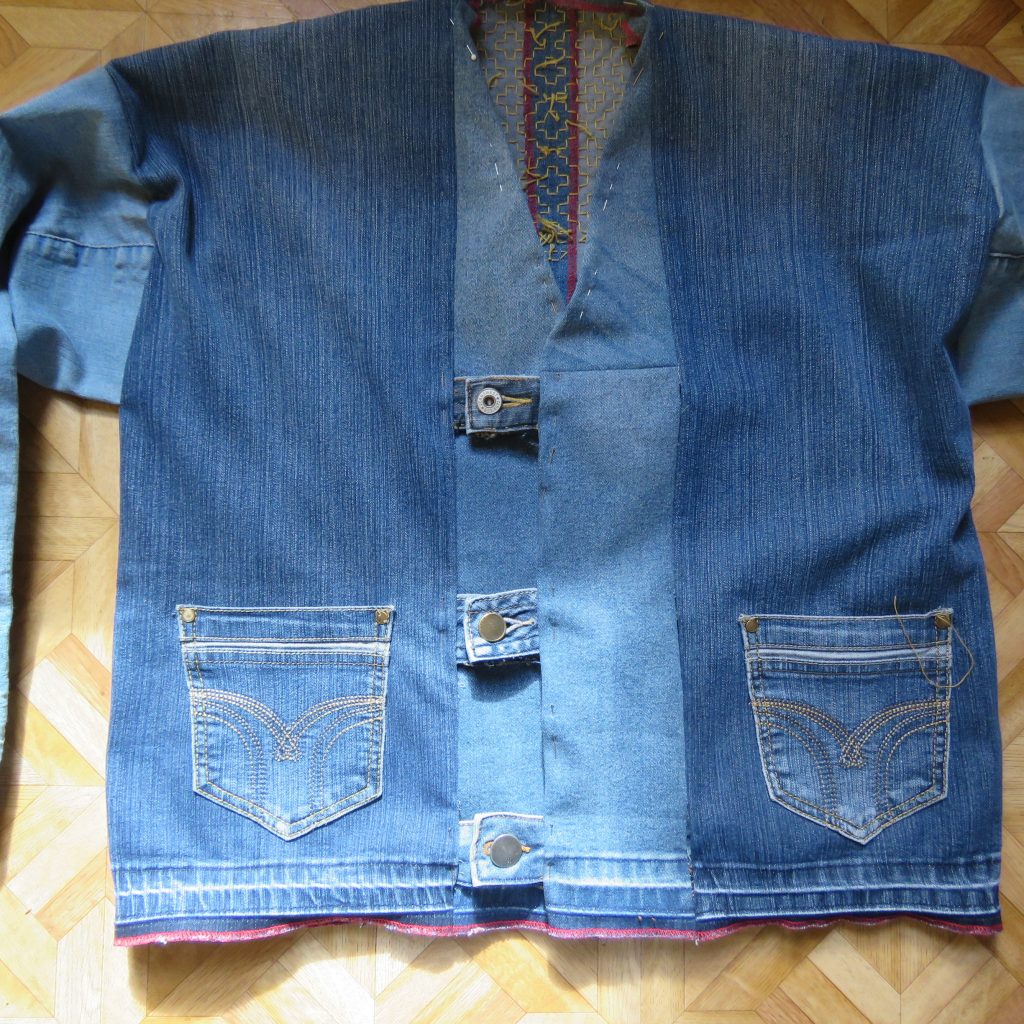
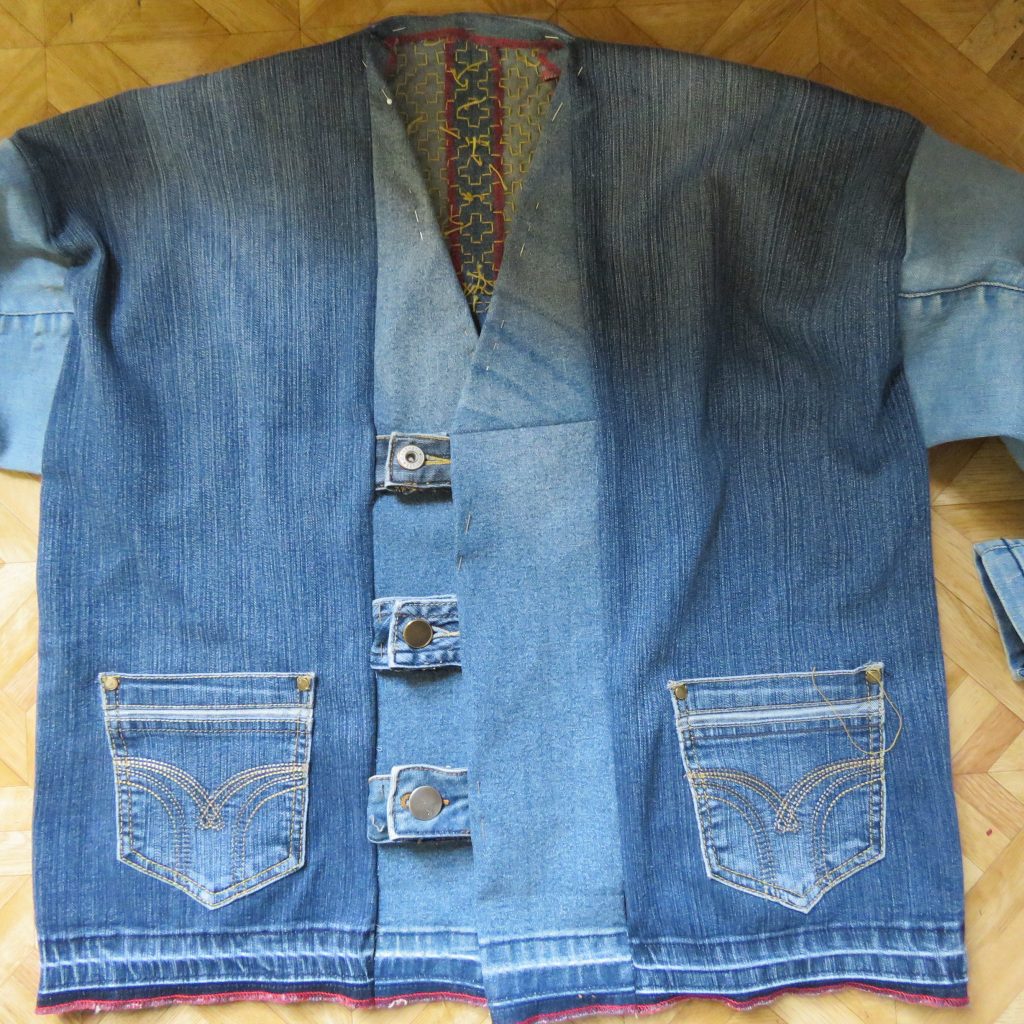
I thought the last one was the best, and I left it pinned together to think about.
Then, we had the final live session for Zero and Zen and Kate suggested trying it with a collar.
As I’d cut a very high neckline and hadn’t trimmed away anything, there was still the option. For a collar I unpicked more waistband and pinned it in place to see. Like! (Sorry there’s no pic of it being worn.)
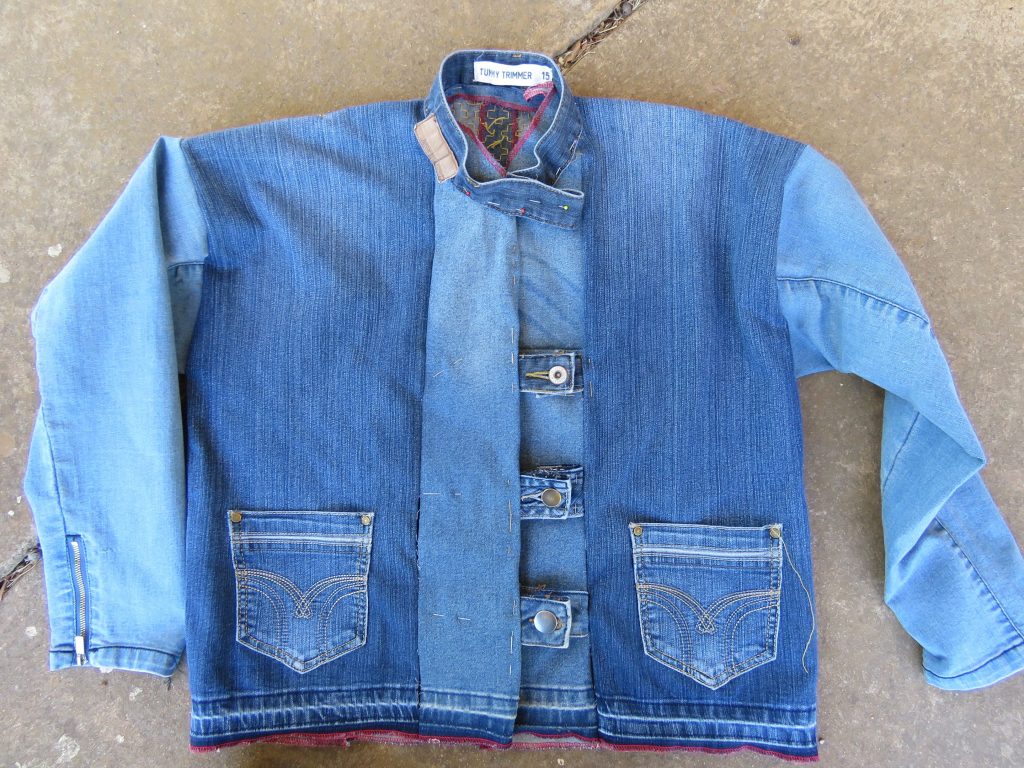
But I think I will unpick the jeans label from the new collar!

I’m very happy that the design details have been resolved, and for now the final sewing will wait until the summer holidays when I’ll enjoy finishing it off.
Cheers! Liz
UPDATE: here’s the jacket worn with the pinned-on tabs and collar:
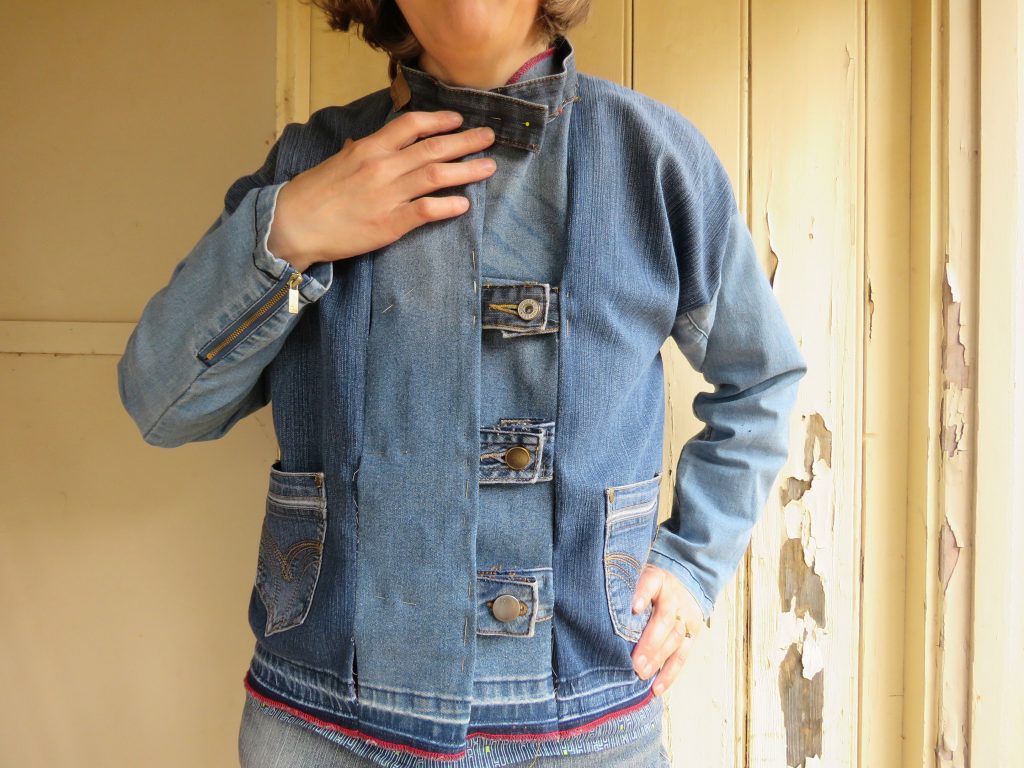
The tabs are definitely much better indeed, great idea! As for the collar… I’m looking forward to see what it looks like, I’m not over-convinced by he pictures but it could turn out really nice when worn.
Thanks Liseli. The collar looks better when it’s worn – I ran out of energy to model it yesterday but I took one today and it’s at the bottom of the post.
Much better when worn 🙂 And definitely a good choice in order to be a “cool mum” as mentioned in the comments… although it might end up “too cool for you” and stolen by your teen (I have memories of using this kind of trick on MY mum at some point 🙂
Looking forward to the end of the adventure, it looks greater each time!
Yes, agree, better than a flat lay! It’s actually intended for my teen, which has “informed the design direction” but we are the same size so I’ve been modeling it.
I like the design and removing the label from the collar sounds like a good idea. The fabric behind that label might have a different colour. If that’s the case, could you perhaps rotate it to back? However, I really like the inside as is right now! So I keep my fingers crossed that the fabric is all the same colour…
It’s good at your husband gave his honest opinion. Mine does the same thing and I’m sometimes a bit a frustrated when he does. But listening to his suggestions has always ended up in a better result. Since he is not really involved in the sewing process, he tends to see things that I don’t notice while focusing on something else. So I really value his criticism…
Have a lovely holiday,
Judith
Thank you Judith, yes it can be very good to get an opinion from someone with a fresh pair of eyes.
Hi Liz. I really enjoy your design/construction posts especially when you’ve imposed boundaries and talk us through problem solving. That jack is beautiful. Hope you continue to get better.
Thanks Emma. This isn’t my usual way of working – I like to have all the details organised in my head first, otherwise there’s a danger of dithering due to indecision and things never get finished. But with this jacket there was the double incentive of Zero and Zen, and wanting to be a cool Mum!!
The jacket looks amazing with the tabs and collar — the neck label is hilarious! The smaller fastner tabs make the jacket look really finished.
How would the fastners look if the largest one was in the middle rather than the bottom? I’ve obviously spent far too much time puzzling over my random button collection. Haha.
Thank you Adele, I’m very happy with it now. I arranged the tabs from smallest to biggest but I’ll have a final play with it before sewing. The top tab uses the same waistband as the collar.
I am loving the new closure and the collar looks fabulous. What a gorgeous jacket!
Thank you Sue, I’m so thrilled with how it turned out – much better than I ever imagined.
Oooh, a very nice jacket! I would have absolutely loved this as a teen when I wore a jean jacket every day
Thanks Hann. I would have liked one of these too!