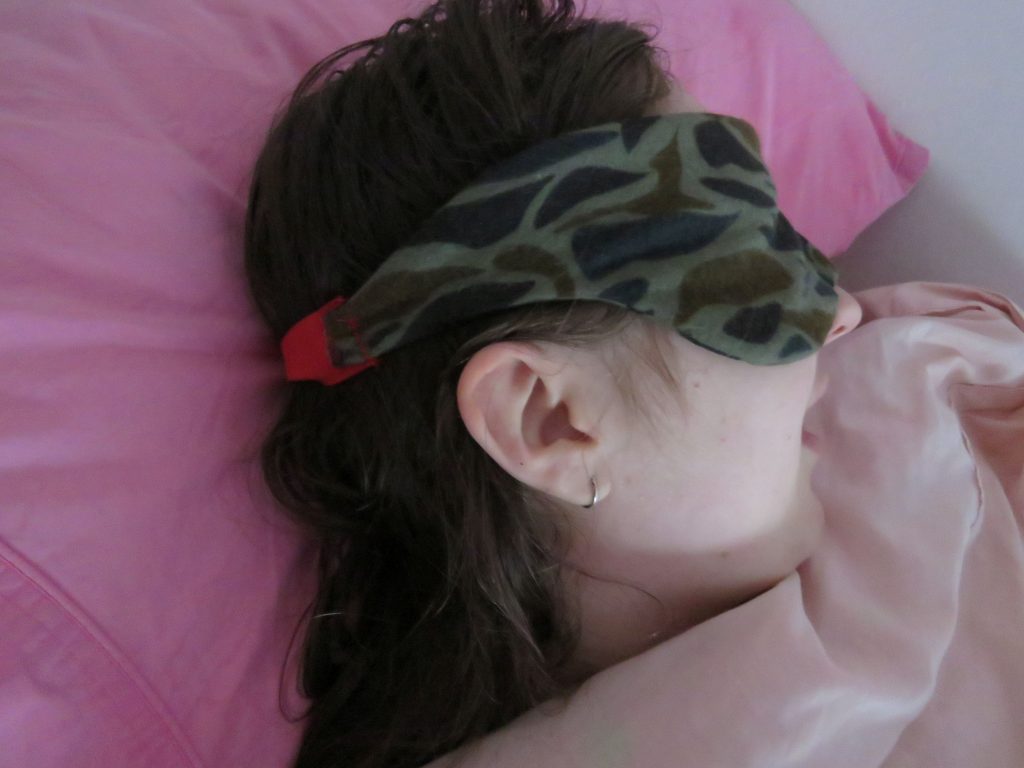
The zero waste eye mask quest is now complete. I’m very happy with how the mask turned out, and my teen and I have been wearing the samples for the past week. If you’d like to embark on your own quest, I’m here with the pattern, instructions and handy hints 🙂
Read about this pattern on the two previous blog posts:
Episode 1: the quest begins after dissatisfaction with the current eye mask. Read if you’re interested in the design process.
Episode 2: a comprehensive report on the fit, function and comfort.
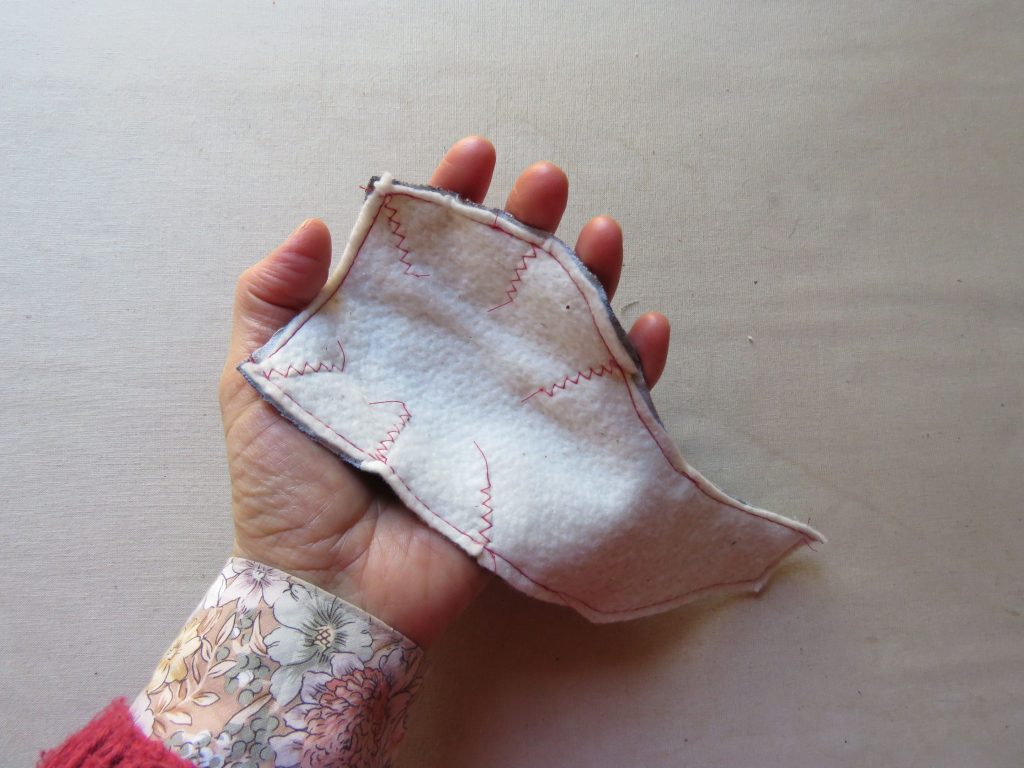
The eye mask has a nose triangle to help block out light.
The sides are an unusual shape, curving over the ear and joining the elastic further back. It’s designed to stop the mask/elastic junction from digging into one’s temple, giving a flatter finish for side sleepers.
You need…
Fabric. Some say silk is the best eye mask fabric, but I used soft flannelette. You don’t need much – I’m sure you have something around the house you could use.
Batting. I used thin cotton batting used for quilts. Again, you don’t need much.
Elastic. I used 18cm (7″) of 2.5cm (1″) wide elastic, for an “average” size head. The pattern better fits elastic 1.5cm (5/8″) wide, which you’ll see if you scroll down right to the end of the instructions.
This pattern has a Creative Commons Attribution-ShareAlike 4.0 International license, which allows you to distribute, remix, adapt, and build upon it in any medium or format, so long as attribution is given to the original creator (ie me – please link this blog post) and you license the modified material under identical terms. Commercial use is allowed.
Pattern
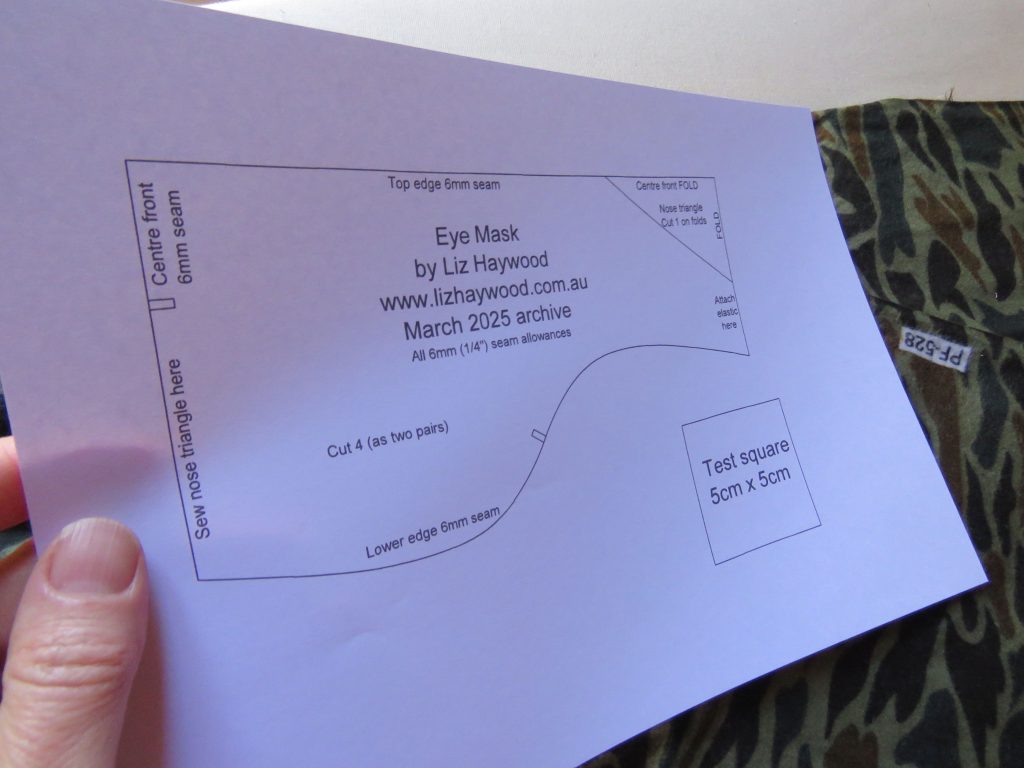
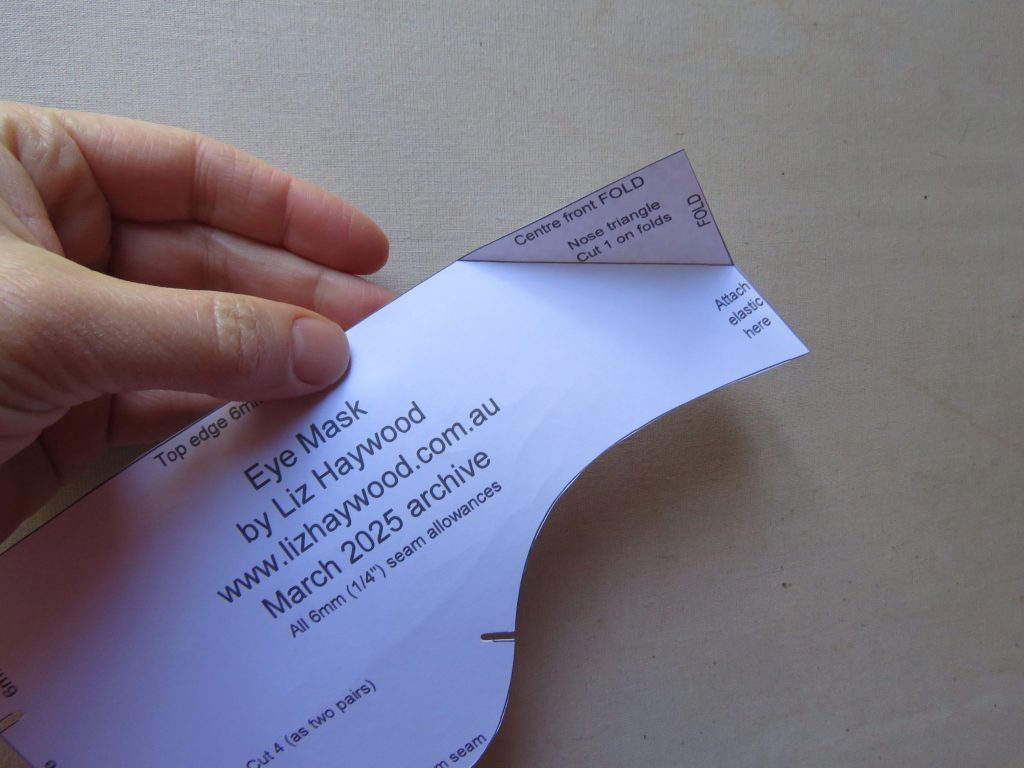
Step 1. Print out the pattern on a single sheet of (landscape orientation) paper. As always, print at 100% or actual size.Step 2. Cut out the paper pattern piece, but don’t cut along the nose triangle – just fold it back so you can mark the line on the fabric.
Cutting
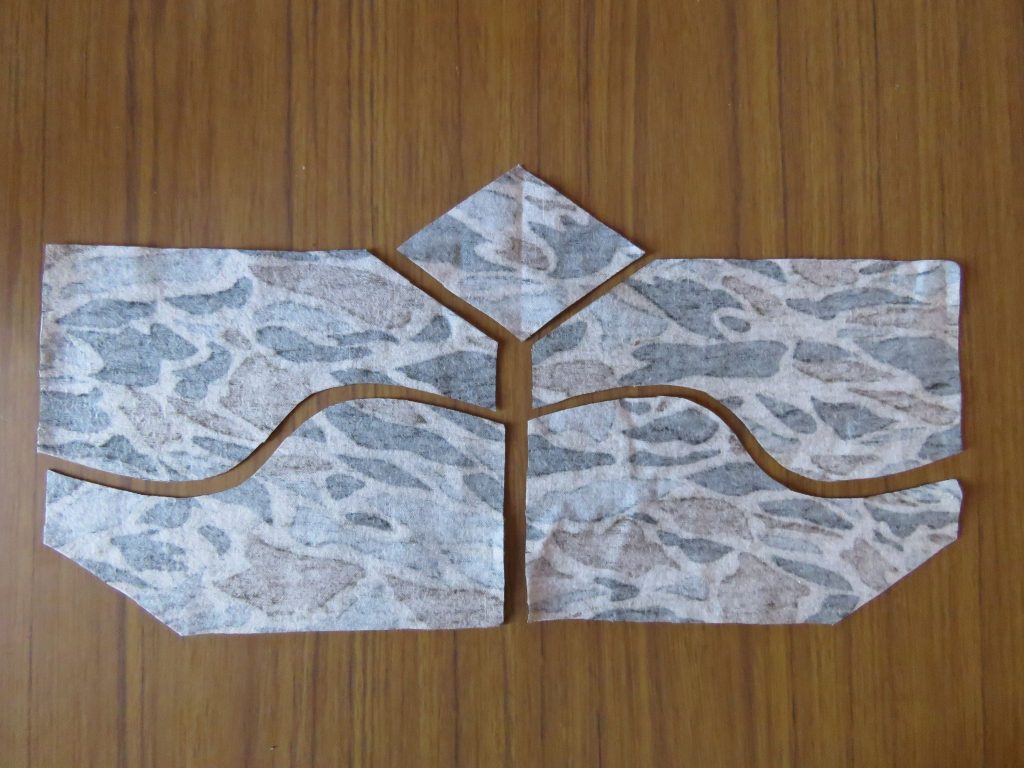
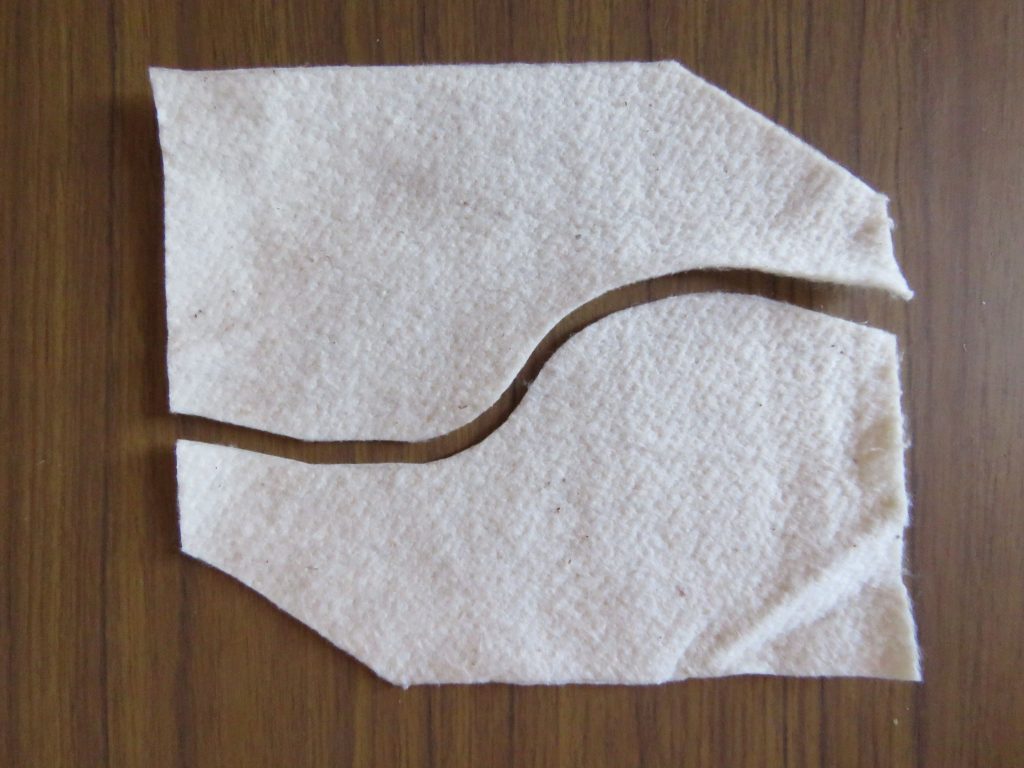
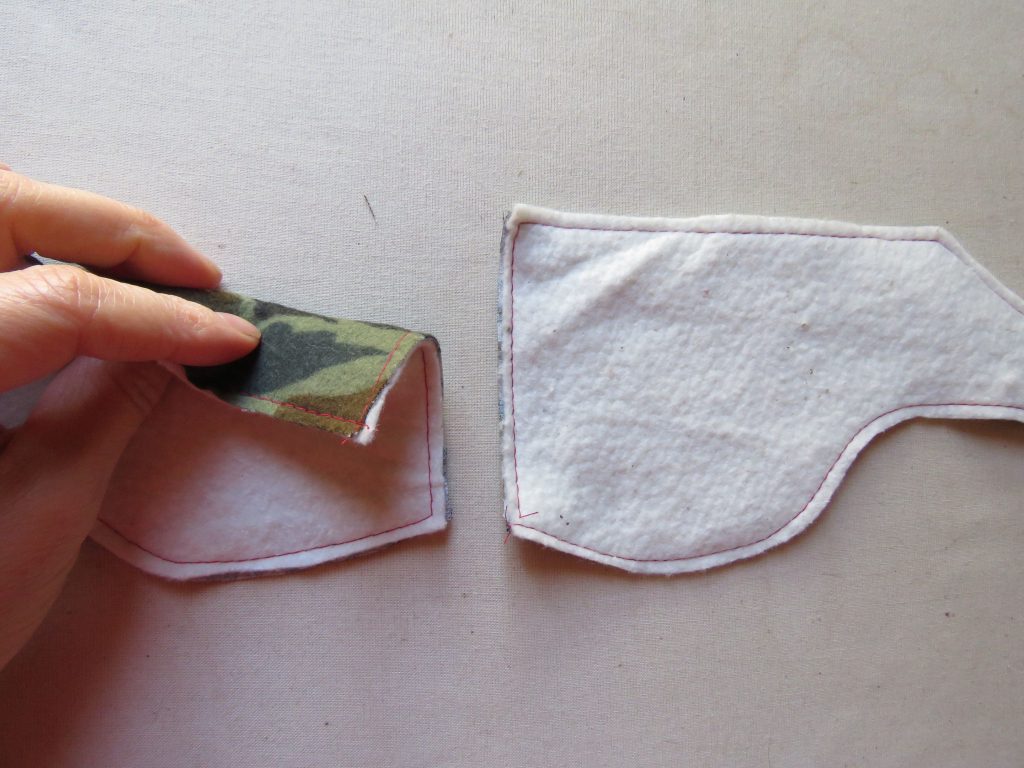
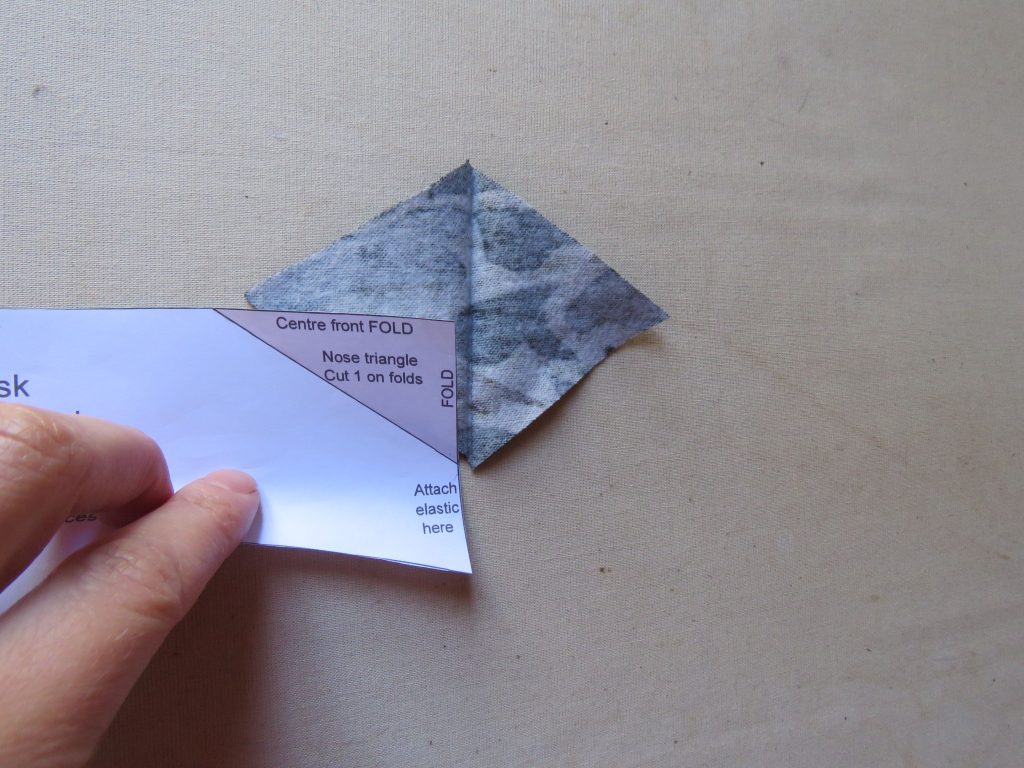
Step 3. Cut out four mask pieces (as two pairs) and one nose triangle. The nose triangle is actually a diamond shape, but will be folded to make a triangle later. If you’re cutting multiple eye masks, you can cut this whole arrangement as a tessellating unit. Snip the notches with tiny 3mm (1/8″) snips, as you only have 6mm (1/4″) seam allowances.Step 4. Also, cut two of thin batting. No nose triangle. As the batting has no right or wrong side, you can nest the two pieces together as shown, with very little waste.
Sewing
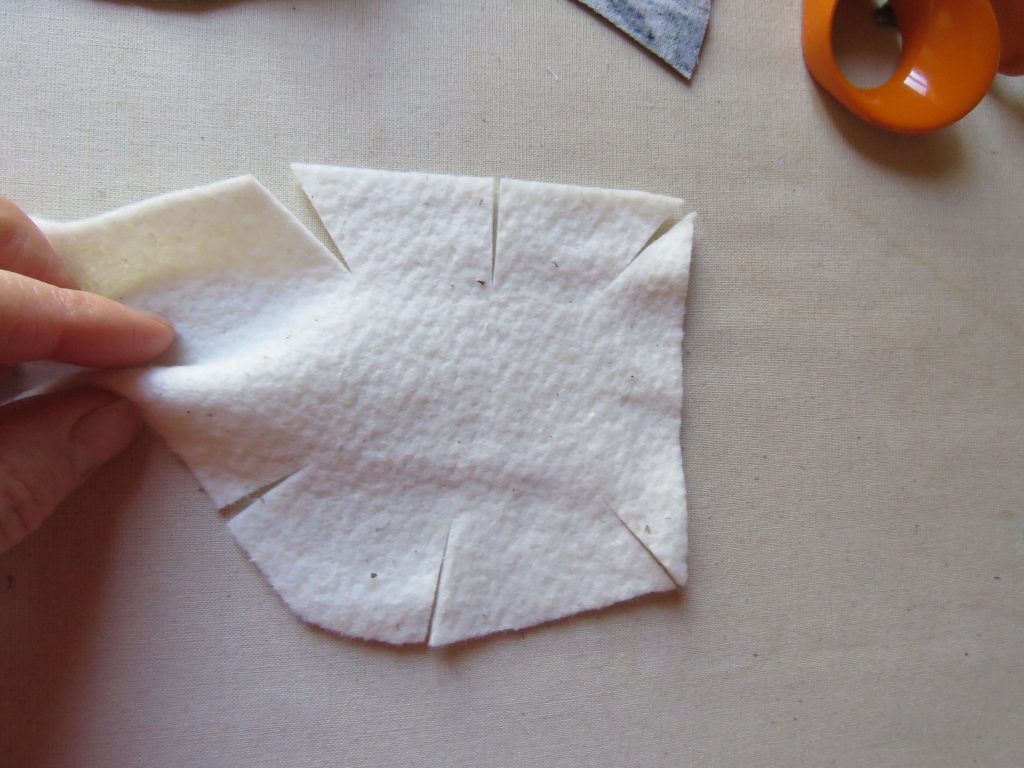
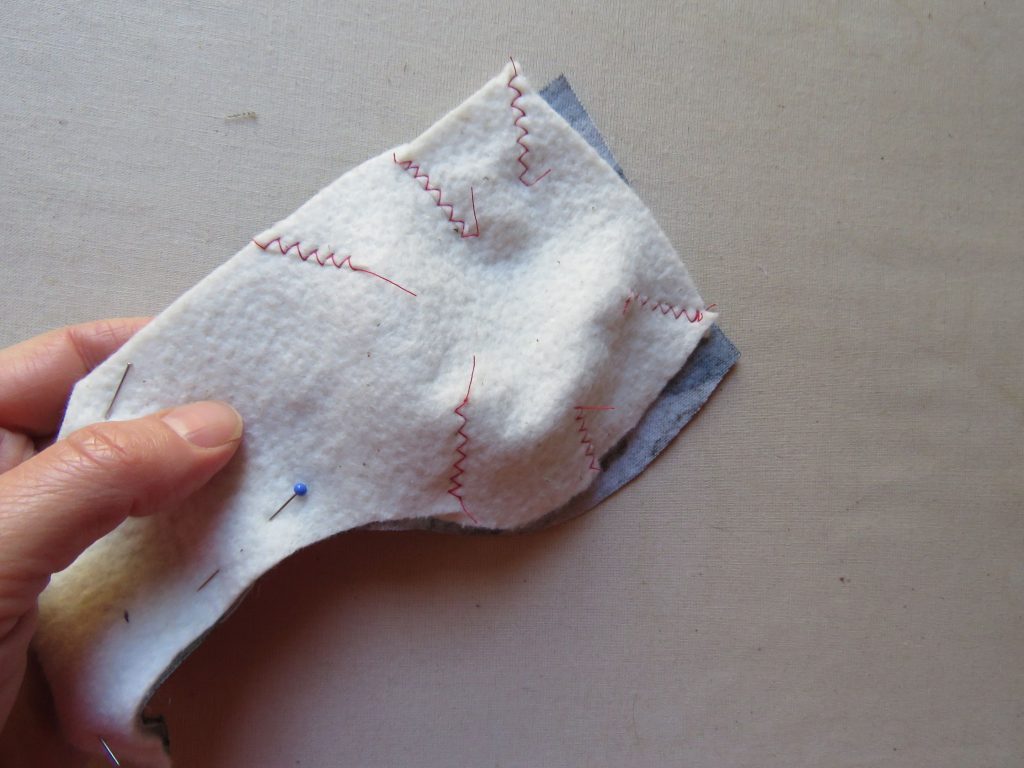
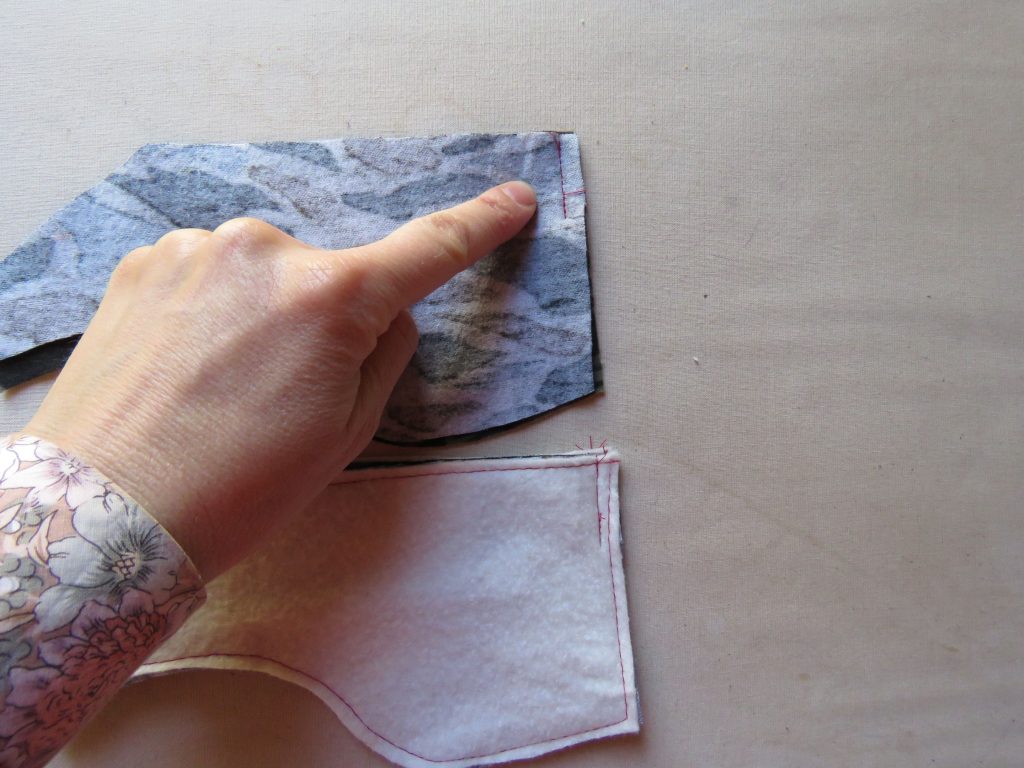
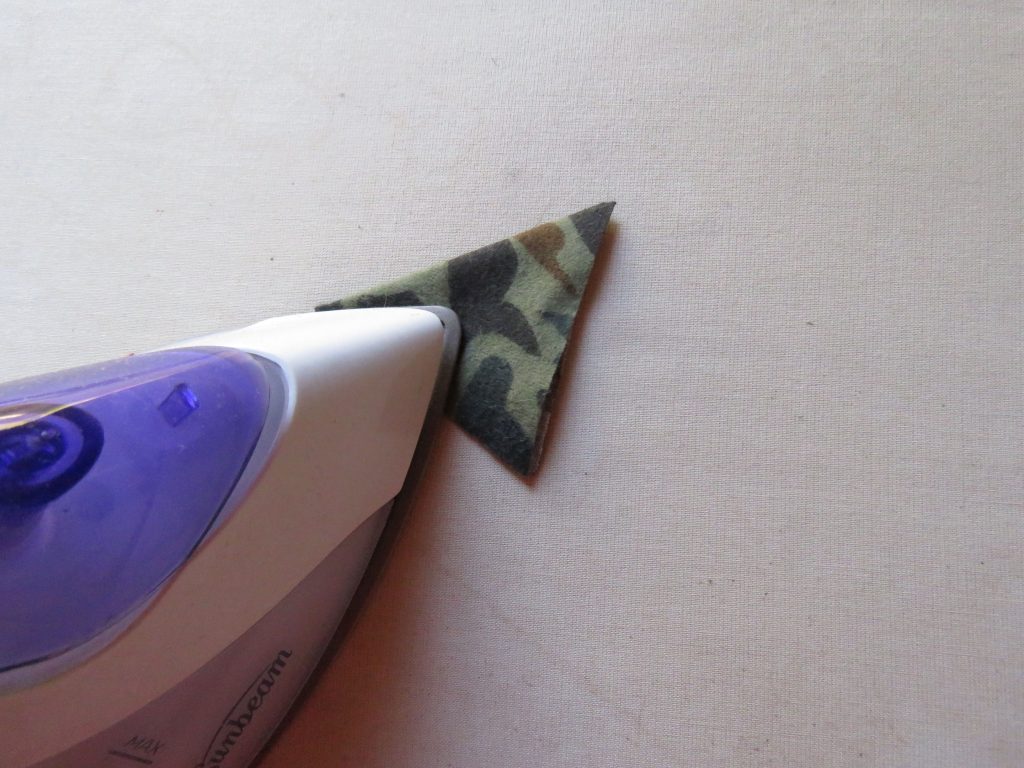
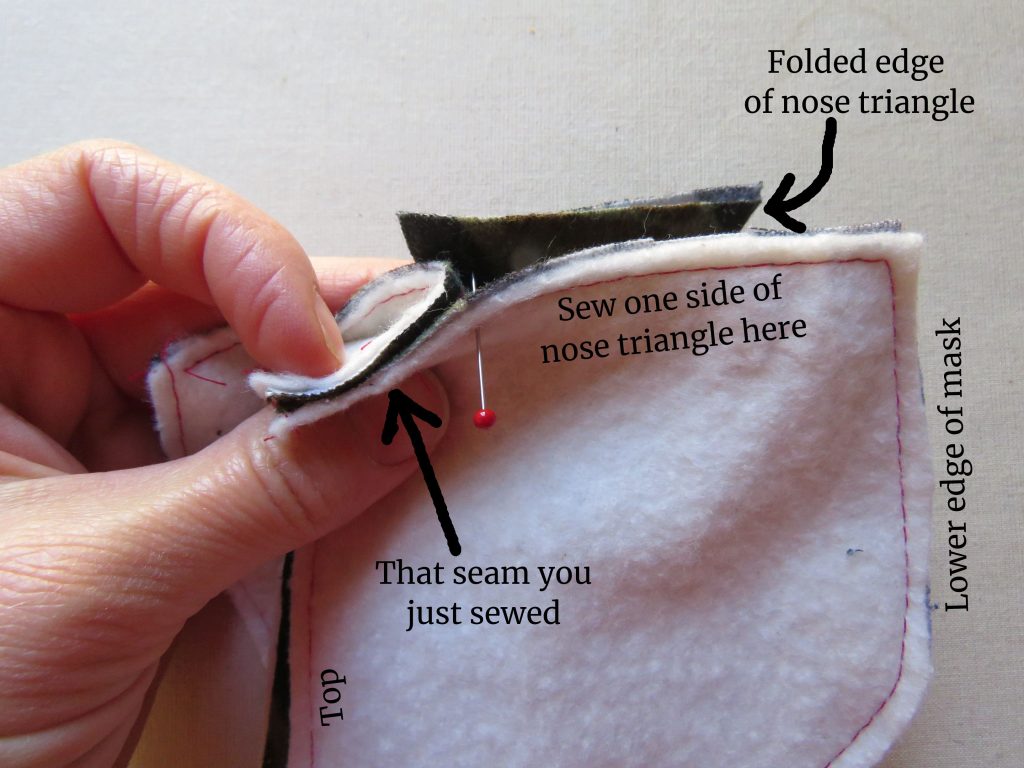
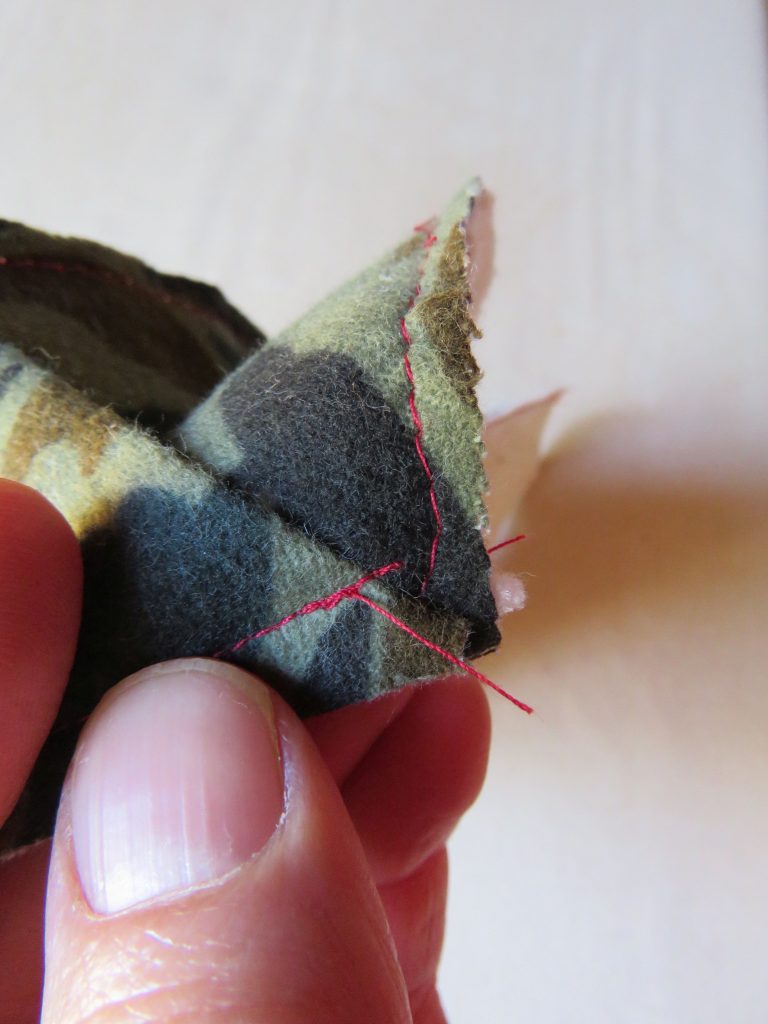
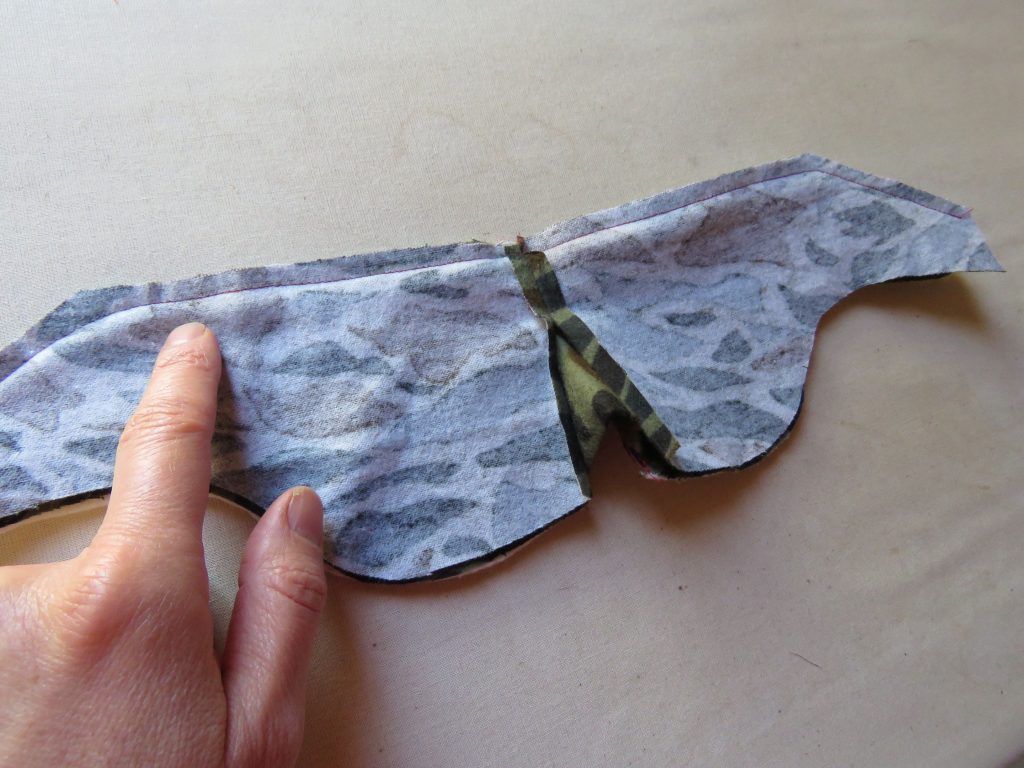
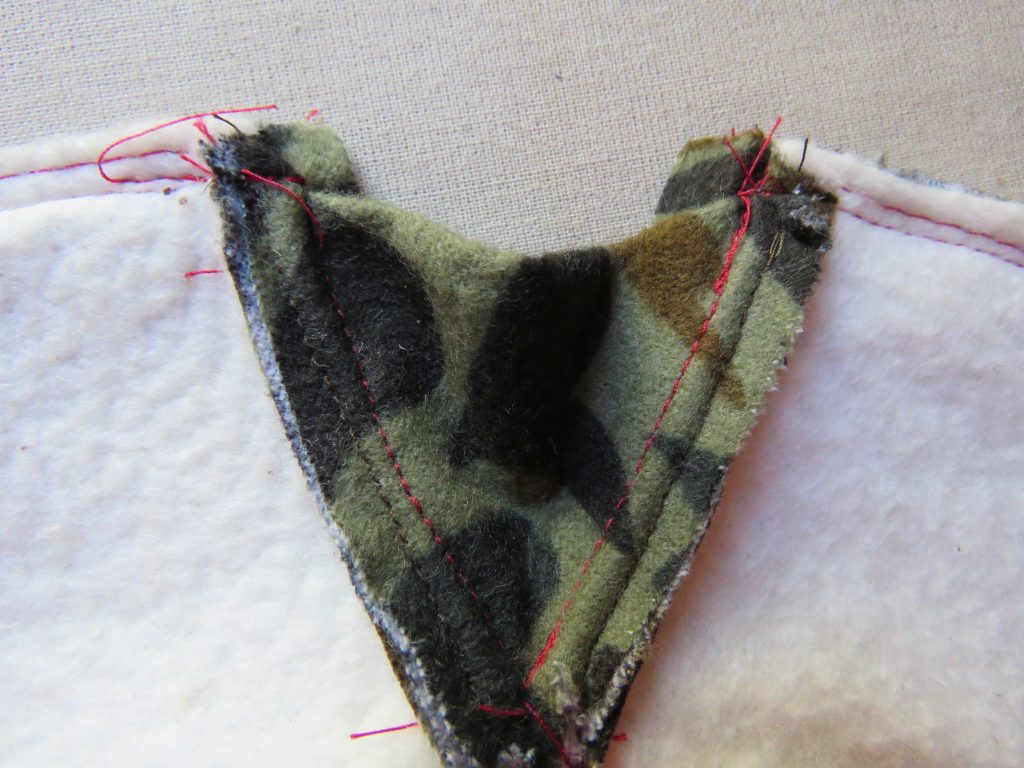
Step 5. Baste the batting onto one pair of masks (the pair that will be outermost when the mask is worn), using a long stitch around the edges within the 6mm (1/14″) seam allowance. Please use matching thread; I’m sewing everything in red so you can see it easily.If you want to dome the eye parts, cut some snips 2.5cm (1″) deep around the edges.Overlap the slits so they’re like lapped darts. I think I could have lapped these more to make curvier domes.Curve this as you baste it to the mask. It works better if your mask fabric is very pliable. I pressed mine over the very rounded part of a tailors ham. There is room for experimentation here.Step 6. Sew the centre front seam, stopping at the notch. Do this to the batting and non-batting pairs of masks. Make sure you securely and accurately backstitch at the notch. Press the seam open (see next photo).On the non-batting pair, press the seam allowance open all the way along.Step 7. While you’re at the ironing board, iron the nose diamond in half to make a triangle.Make sure you iron it the right way! Take note of the orientation.Step 8. Take the batting mask and sew the nose triangle in. The fold of the nose triangle goes at the bottom, so it’s hemmed with its own fold. This operation is done in two stages because each side of the triangle needs to be sewn separately: begin at the top of the triangle, and push a pin through the end of the seam and the top of the triangle (where the stitching lines cross), so they’re lined up. Lower your machine needle into the point, whip out the pin, and start sewing.
Note that the triangle’s fold will land 6mm (1/4″) from the mask’s raw edge.
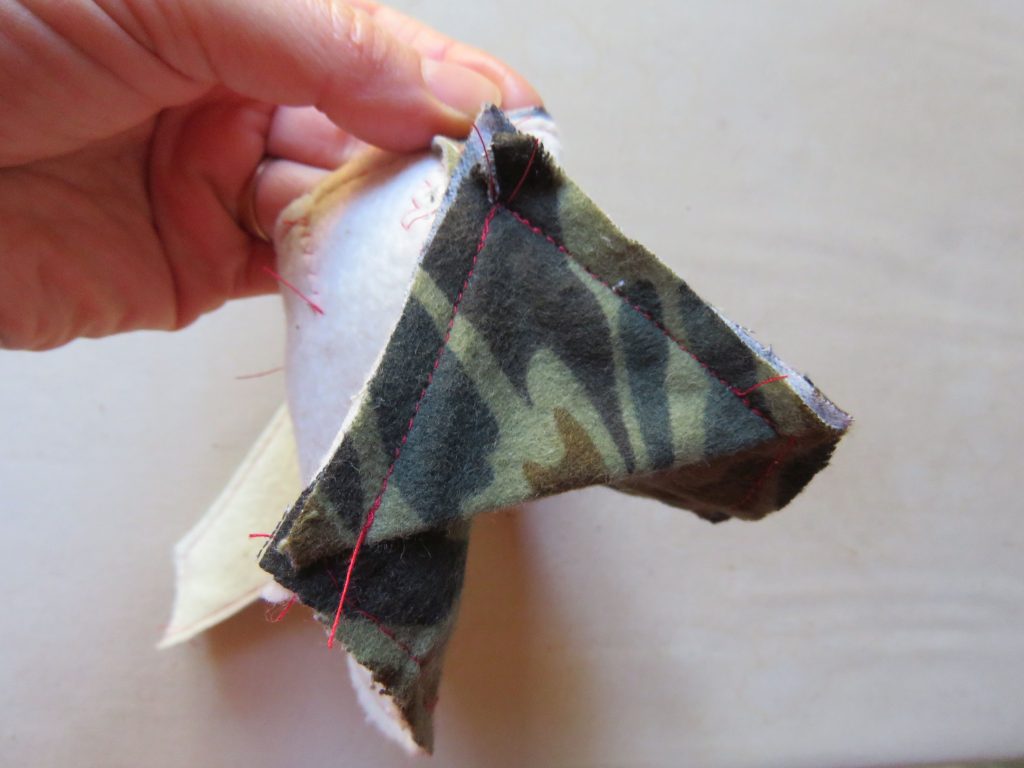
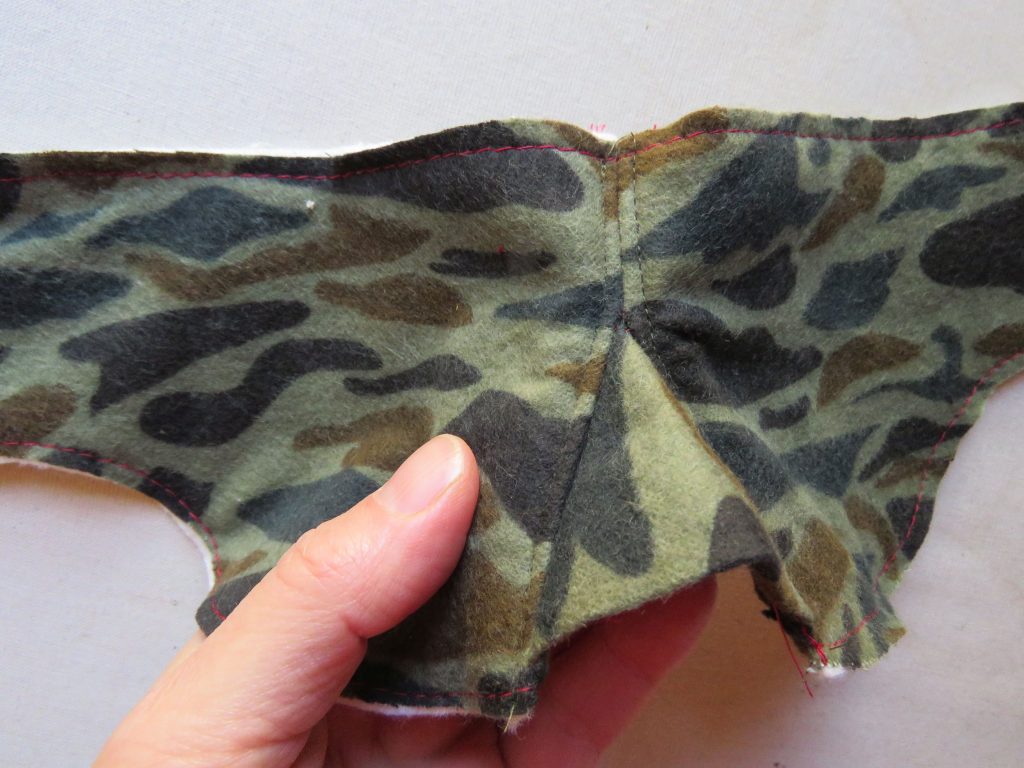
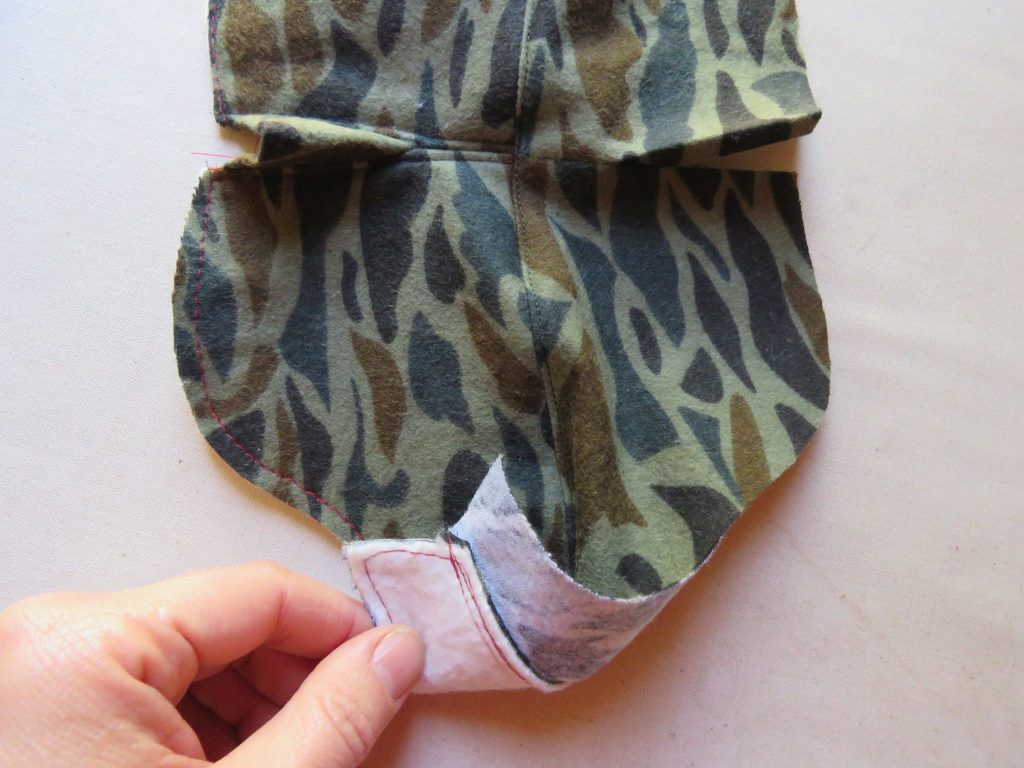
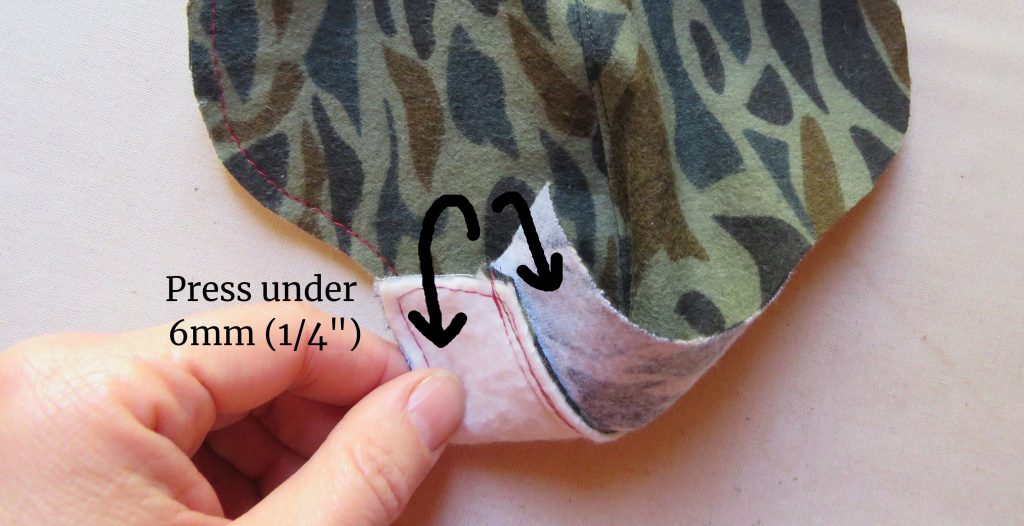
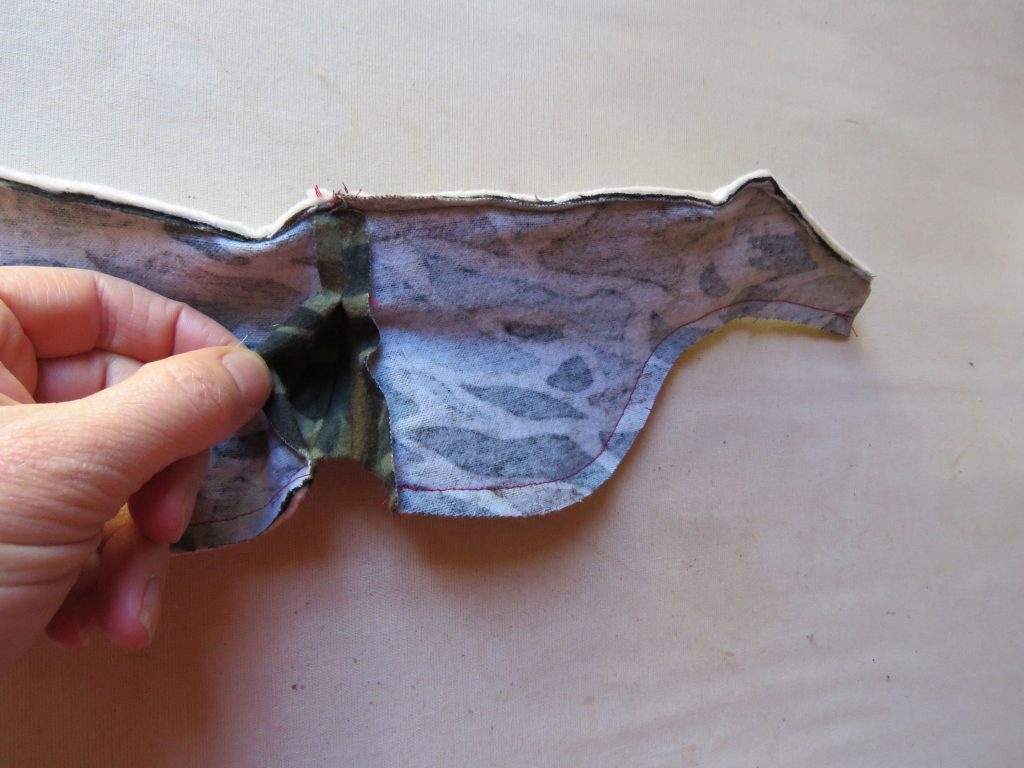
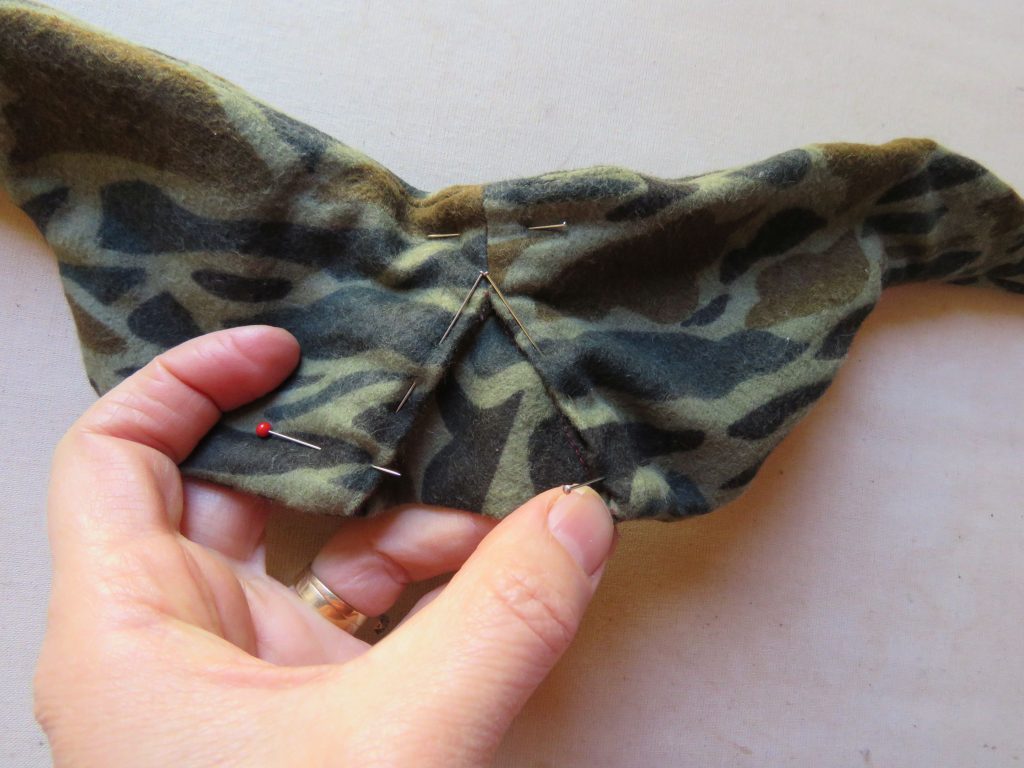
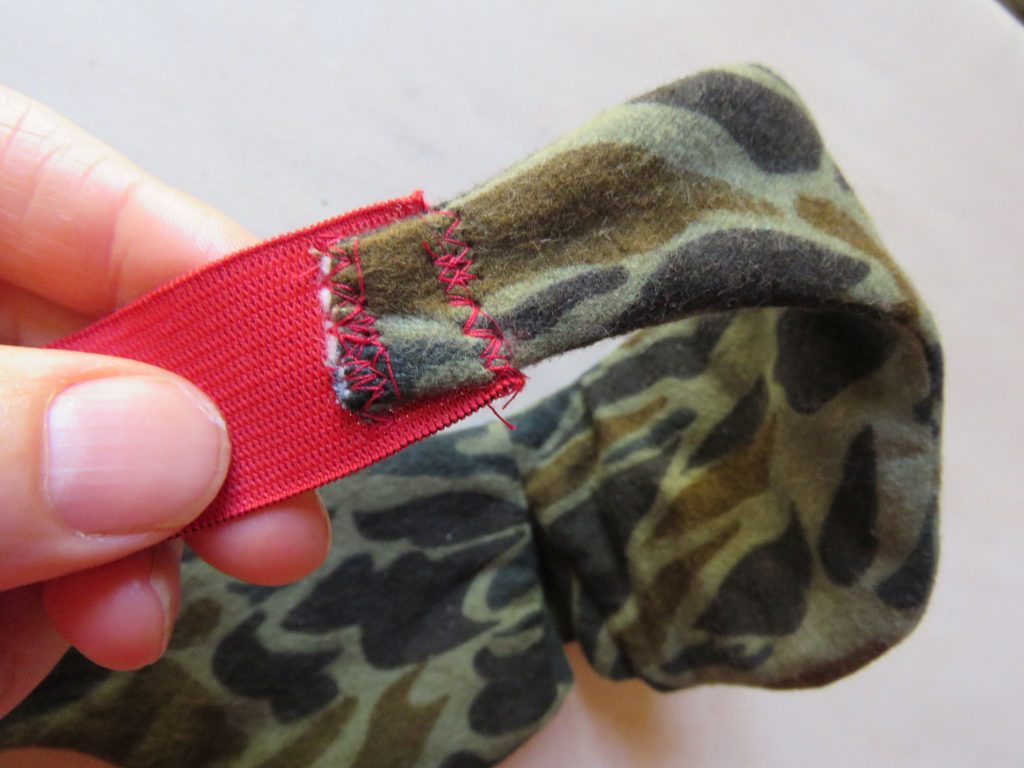
Stitch the other side in the same way. It should look like this now. Press both seams away from the nose triangle.Step 9. (Optional) Topstitch each side of the nose triangle to hold the stitching flat. I discovered later that it doesn’t make any difference whether you stitch it or leave it, it will still lie flat, so it’s up to you.Step 10. Place the batting and non-batting masks together and stitch all the way along the top edge. It’s easiest to sew with the batting side uppermost (not as shown in the photo). Round off the obtuse angles on each side as you sew (ie – there’s no need to pivot at the angle).(Optional) Press the seam allowance towards the non-batting side and understitch. I sewed one mask with and one without and the understitching didn’t seem to make any difference, so you could skip this bit.NOTE: for a neat finish when you attach the elastic, press under the seam allowance at the short end. I neglected to do this and had a rather messy, yet flat, elastic junction. If you press it under now, you can neatly insert the end of the elastic in later. Skip through to the last step and you’ll see what I mean.Step 11. Sew the bottom edge of the eyemask. You’ll have a gap around the edges of the nose triangle.Here’s a close up of the ends of the nose triangle. Your stitching should be level with the triangle’s fold.Step 12. Turn the mask through to the right side via the gap in the nose triangle. Handsew the gap shut around the triangle. In the seam above the triangle, stab the needle in and out, to keep the layers in their place.Step 13. Attach the elastic. I know you can do a better job than I’ve done! If you pressed the raw end under after Step 10, you can see that you would just need to slot the elastic in the gap and stitch shut. It fits elastic 1.5cm (5/8″) wide. If you want wider elastic, or a flatter finish, follow my example 🙂
So there we have it! Many thanks for following along, and if you make one and have any thoughts on how to improve or adapt it, please leave a comment below.
Thanks for the pattern and explainations, no need of one for the moment on my side but I always enjoy reading your posts and admire your creativity on such “simple” things as eye-masks, it’s really interesting 🙂
I like your mask adventure! I almost regret not using one, but I dislike having anything touching my face when I rest. Still, my curiosity is awakened. 😉
I made the eye mask this afternoon! I really wanted to make a 100% cotton eye mask, and I had some good scraps of cotton lawn and quilting cotton to use. It was a fun (if fiddly) project and I’m looking forward to trying it out while sleeping. I used navy cotton corduroy instead of batting, because I didn’t want to feel too hot (some eye masks bake my eyes). I did try to dome it, which was tricky and only kinda worked and then made the rest of the sewing difficult (harder to line edges up), but it was an interesting experiment. The instructions about the nose triangle were hard to understand until I was actually doing it. Thanks for a fun pattern!
Hi Martha, many thanks for giving it a whirl.
I agree, the dome idea needs some experimenting. I’ve since wondered whether a tiny dart along the lower edge would help the dome situation. As in, a dart on the outer and lining, and the padding cut to fit around the dart.


Thanks for the pattern and explainations, no need of one for the moment on my side but I always enjoy reading your posts and admire your creativity on such “simple” things as eye-masks, it’s really interesting 🙂
Thanks for following along, Liseli. File this one away for future eyemasks 🙂
Man, I just love the way your mind works out problems
Gotta nurture the inner nerd!
I like your mask adventure! I almost regret not using one, but I dislike having anything touching my face when I rest. Still, my curiosity is awakened. 😉
Thanks Manuèle. I’ve never been a mask user until the last year or two but I can relate to not having anything touching the face.
I made the eye mask this afternoon! I really wanted to make a 100% cotton eye mask, and I had some good scraps of cotton lawn and quilting cotton to use. It was a fun (if fiddly) project and I’m looking forward to trying it out while sleeping. I used navy cotton corduroy instead of batting, because I didn’t want to feel too hot (some eye masks bake my eyes). I did try to dome it, which was tricky and only kinda worked and then made the rest of the sewing difficult (harder to line edges up), but it was an interesting experiment. The instructions about the nose triangle were hard to understand until I was actually doing it. Thanks for a fun pattern!
Hi Martha, many thanks for giving it a whirl.
I agree, the dome idea needs some experimenting. I’ve since wondered whether a tiny dart along the lower edge would help the dome situation. As in, a dart on the outer and lining, and the padding cut to fit around the dart.
Ah yes, that might work. In any case, I can confirm it’s comfy at night!