Cutting zero waste sleeves from triangles
Zero waste sleeves have been on my radar lately. Sleeves were the theme of the newly-published September zine for A Year of Zero Waste Sewing, and I looked through lots of new and old sleeve ideas while writing it.
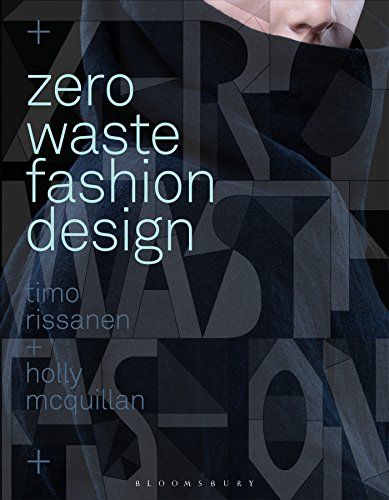
Of course I turned to the influential and significant Zero Waste Fashion Design to see what they had.
Within the pages lies a cutting layout for a top that’s constructed from an oval, which is cut from a rectangular piece of fabric with the triangular corners used as sleeves.
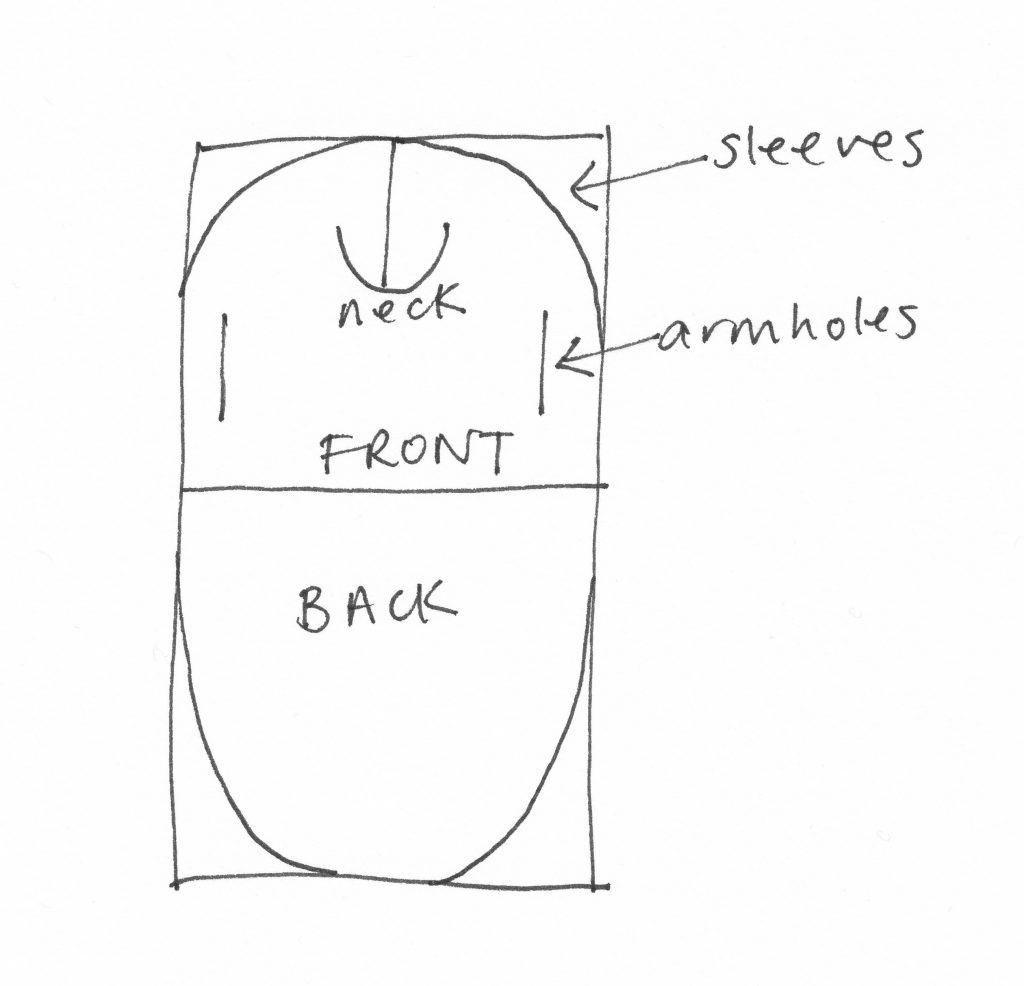
While there’s a cutting layout and an accompanying garment photo, the book doesn’t exactly say how to form the sleeves. The photo is in black fabric so it’s hard to see. (If you happen to own a copy of this book, it’s pages 100/101, and maybe the same top is on page 81.)
The actual instructions are: “By twisting the triangle pattern piece into a tapered tube form, a sleeve is able to be constructed.” That’s all – no how-to illustrations. I’ve had the book for 7 years and pondered this from time to time, but just lately I think I’ve twigged how to do it. (Maybe others intuitively got it from the start – I salute you!)
Here’s how I think it happens. A circle or oval gives the triangle-y shapes at the corners.

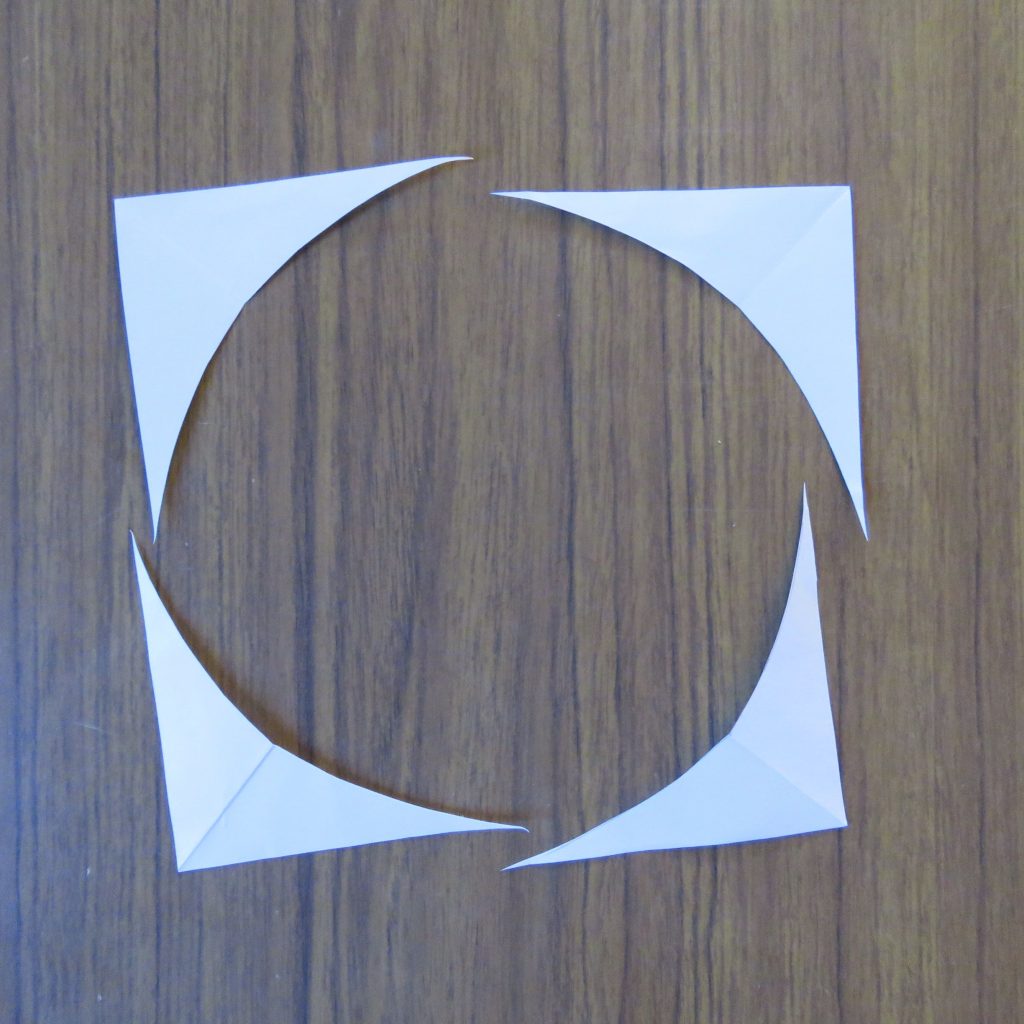
Pair these up with each other like this:
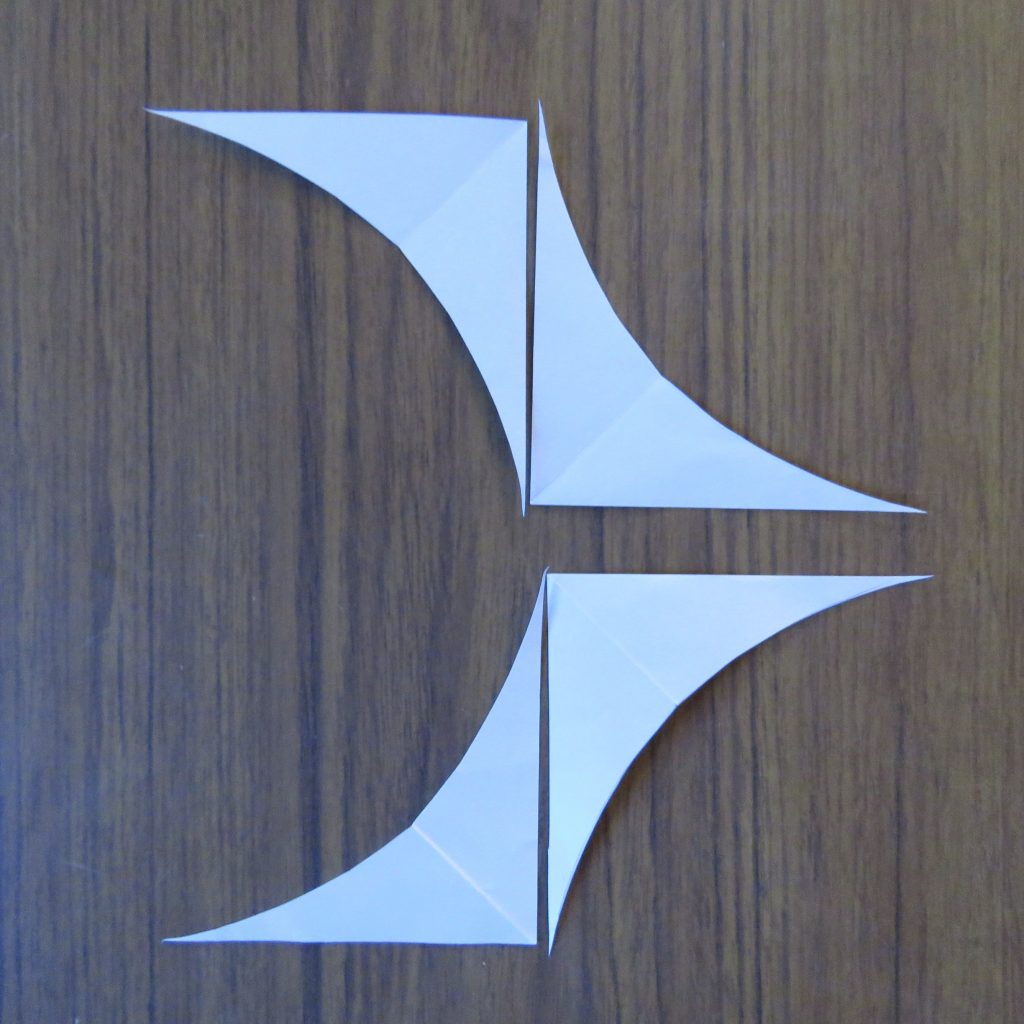
Then, join the straight edges together.
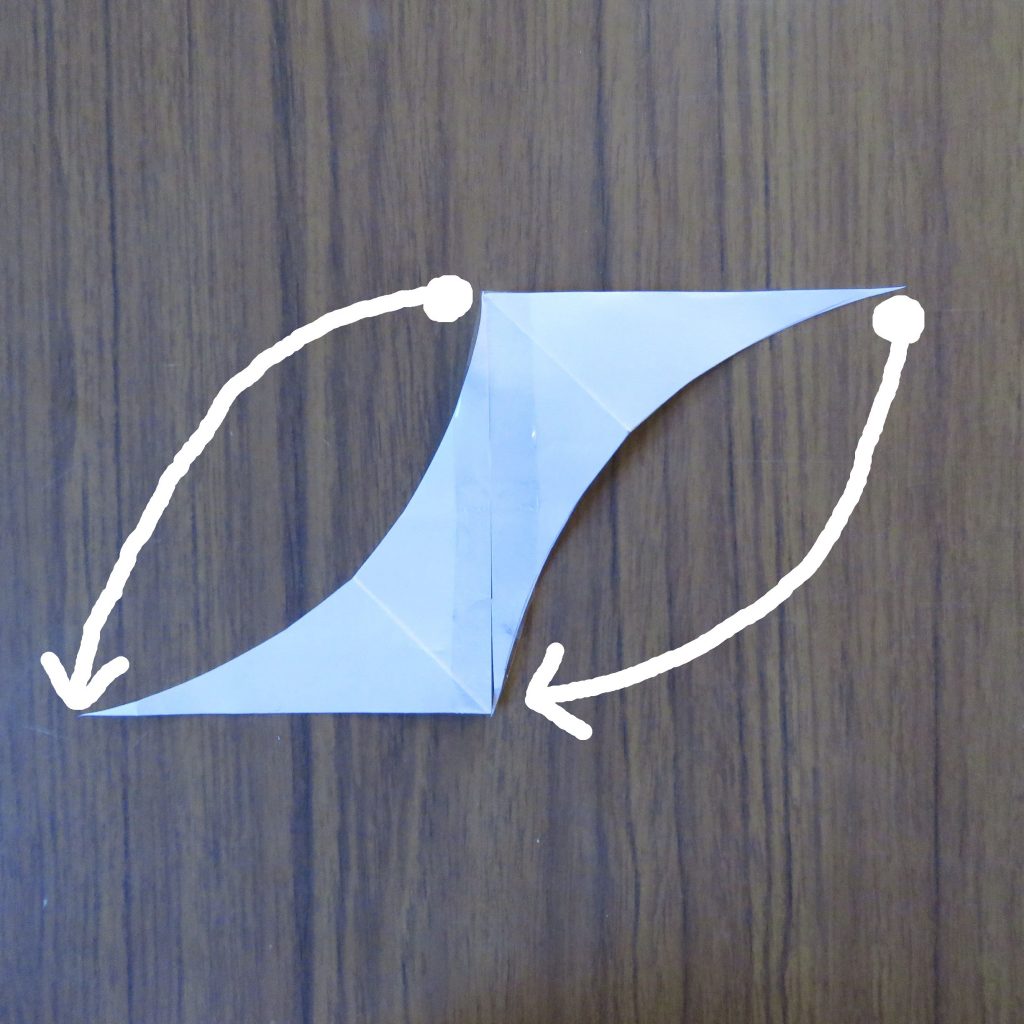
This forms a ring like this:
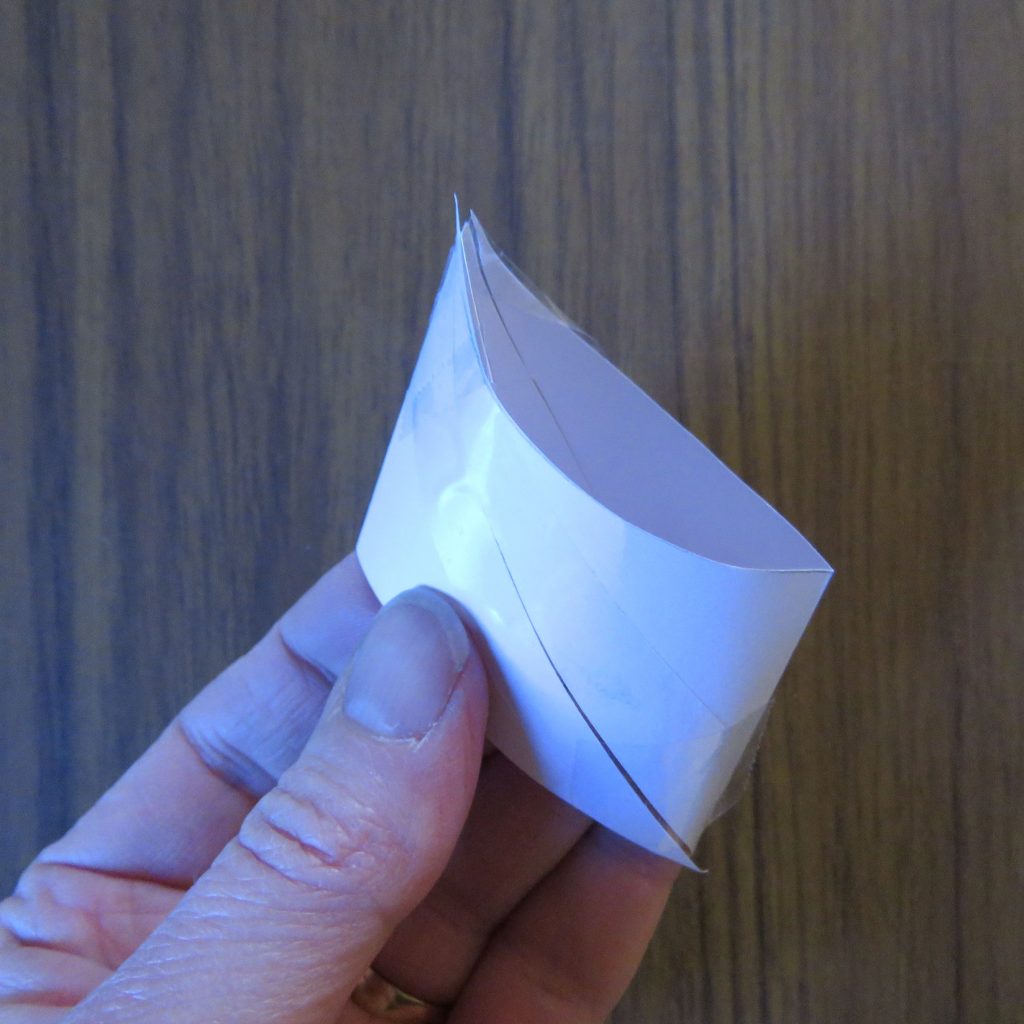
There you have the sleeve. Of course, I may have this totally wrong.
The curved diagonals form the top and bottom of the sleeve, so they’re on the bias. They’re not exactly straight, so the pointed part could go at the top centre of the sleeve.
So…that’s as far as I’ve gotten, ie just thinking about it. But I will try it out though. I’ve fallen in a bit of a heap with Long Covid lately – I’m back to daytime sleeps with lots of little lie-downs in between. My teen said I looked “cr*p-er than usual” (harsh, but not untrue). It’s school holidays here for 2 weeks so I may take a blog holiday at the same time.
See ya!
Hi Liz,
That sleeve construction looks very promising! Congratulations on your beautiful coat in the newest Tauko magazine. I caaaan’t wait to get my hands on the magazine (20.10.) and have a proper look! I hope you feel better soon. That longCOVID is nasty and unpredictable. best, Giul
Thanks Giul. I will be very happy if it works well in fabric. Cheers re the magazine – I think this one will be good. Just looking at the projects, you could practically sew a capsule wardrobe.
Thank you tackling this! I’m not the only one that stares at these diagrams and ???????
Only took 7 years Haha!
I think you nailed it! Especially impressive for someone laid down with long Covid. Hope you feel better soon!
The proof will be in the fabric! Maybe next week. Long Covid = lots of thinking and rest time! Many thanks.
I would NEVER have figured that out. And you did it while sick!
I love when you can just sit, & puzzle out a problem- so satisfying!
It clicked while I was experimenting with bias cut (September zine) at the same time as sleeves (October zine)…at the same time as resting 🙂
Thank you so much for posting this. I had been trying to figure it out to no avail for years. I printed out the diagram and cut out the pieces to play around. I thought the “sleeves” pattern pieces are way too small to actually be sleeves. Putting 2 together like that makes so much sense.
Thank you Pam, I don’t feel so bad that other people were scratching their heads too! I’ve since corresponded with Holly McQuillan, which I should have done before, and the sleeves are constructed in a far simpler way. I totally overthought it! In a long and thoughtful reply, she also told me about an alternative with a gusset. I’ll write a follow-up blog post this weekend.
The whole pattern is a head scratcher! Thanks for sharing it. I thought at first glance the horizontal line was the shoulder line, but looking closer I now see that, based on the neck and armholes, the horizontal line must be the hem. Eagerly awaiting the sleeve update. This reminds me a bit of Studio Faro’s pattern puzzles.
Yes, the horizontals are the hemlines, but the curved seam sits towards the back which makes the top longer at the back than the front. Very much like the famous pattern puzzles!