The Mystery Skirt Part 2: The Trial of the Toile
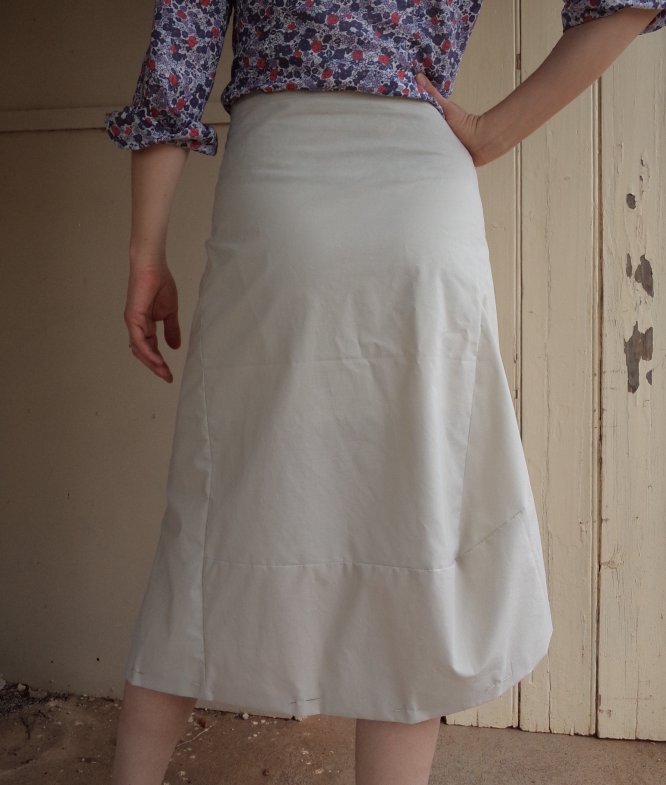
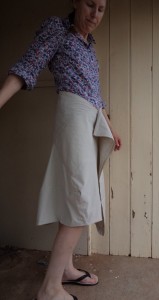
On the weekend I sewed a toile for the “Tweed skirt with panel detail” from Stylish Skirts by Sato Wantanabe. I wrote about this skirt in my previous post.
I was reminded how hard it is to fit oneself. I was also reminded how unlike this quickly-sewn calico skirt is to the one I’m eventually going to make.
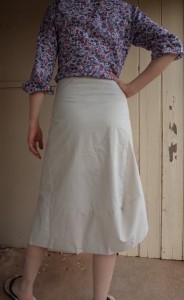
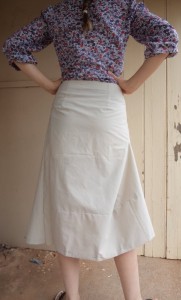
I didn’t think my toile was outrageously bad, but it did need a couple of major things changed.
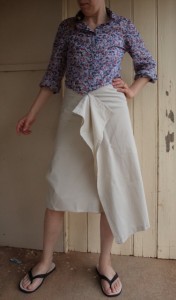
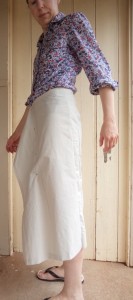
It’s clearly too short for me, and, as anticipated, was a bit too small around the hips.
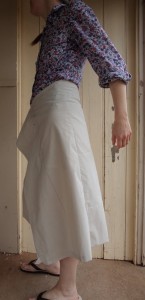
The back waist sits very high up which is not only uncomfortable but makes the skirt shorter -you can easily see this on the side views. I widened the back pattern piece by 5cm and put in waist darts. I didn’t really want to interrupt the simplicity of the rectangles and triangles that this skirt is, but it needed some waist shaping. I’ll fine-tune the position and length of the darts when I cut the real fabric.
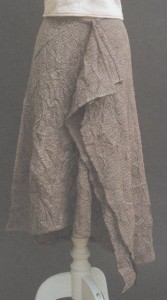
In other adjustments, I made the front extensions a little longer. They aren’t hemmed -you use the selvedge of the fabric for the edges.
The skirt needs to be longer, although this will mean changing the proportions as well. I spent a fair bit of time umming and ahhing about the length, while standing in front of a full length mirror wearing the boots I want to go with it. It can’t be too long, or else the front extensions will touch the ground, but since this is a winter skirt I feel it needs to be generous in length.
I’m not planning on making a second toile; I’ll just go straight to fabric.
While on the subject of toiles (or muslins, or calicos), how far should you go? How much detail should you sew and what can you leave out? I have made countless toiles over the years to check patterns, and my predictable answer is: Do as little as you can possibly get away with.
- Before you make a toile, give it every chance of fitting by checking the pattern’s measurements -bust, waist, hip, lengths, sleeve widths, etc. If the pattern is tissue paper, pin the pieces together and try it on, or at least hold it up in front of a mirror. Check it against an existing pattern you know fits. If you’ve drafted the pattern yourself, go through it and check that the seams match up and all is correct.
- If you know in advance what you want to check, you may only need make part of a toile. Eg- the bodice of a dress, or the shoulders/neckline/collar.
- Before you making a second toile (if required) see if you can just adapt the first one, or re-use any bits of it without wasting too much time.
- When I was a fashion student (and a few times since), sometimes to make a quick toile we would just cut out the pieces and staple them together, then press it. It was usually because we were too lazy to set up a machine or had left our sewing supplies at home. Actually it worked quite well. Pins with no heads can be used instead of staples, but pressing is the key.
- The great thing about toiles is you can draw on them. Use a biro to rule centre lines, grainlines, darts and pocket shapes/positions. Stand in front of a full length mirror with a thick texta and draw in design lines, pockets, notes to yourself, etc.
- Sew toiles together with a long stitch. I like to use a matching thread -I find contrast thread too distracting when trying to see the overall look.
- Collars and waistbands are essential to include, because they stabilise the edge as well as being an important part of the design. You don’t need to sew them on as you would for a real garment. For toiles with a waistband, press the waistband in half longways and stitch it right sides together onto the waist (accurately matching the notches of course). For taped waists, “tape” the waist with a strip of selvedge accurately stitched on, or use cotton tape and recycle it afterwards. I know some people like to sew a zip in their toiles, but I just leave an opening and pin it closed. Use a biro and ruler to draw accurate seam lines so you pin in the right place. For collars, you don’t need to bag them out -just stitch them straight on to the neckline (accurately, of course). You may like to trim off the outer seam allowance so you can judge the finished size.
- You cannot keep toile-ing forever, and a toile will only take you so far. You’ll still need to fine-tune the fit in the actual fabric, which will perform differently to toile fabric anyway.
- If you’re reasonably certain the pattern will be ok and don’t want to toile it, try these: If the garment has a lining, sew and fit the lining first before cutting the fashion fabric OR cut the garment with wider side seams (eg 2cm) to fine-tune the fit as you go OR cut in calico any garment parts you’re unsure of, leaving enough fashion fabric to cut them later OR if you have time, make the garment in a lesser-loved fabric and then you’ll end up with something you can wear.
Join me next time when this skirt will be finished!
Sewing friends: do you have any tips for sewing toiles?
Hey Liz,
That looks great…!!!! Those puzzle patterns take a bit of time sometimes to nut them out!
Well done…I look forward to seeing it in your finished fabric.
Keep up the good work…!
Regards, Renee
Thanks for visiting Renee -I’m looking forward to seeing it in fabric too. I’m looking forward to wearing it even more.
Great to see your site up! Looks good.
Do you re-use your toile fabric in other projects? Or is it not worth salvaging the pieces?
Hi Tom, thanks for commenting.
Mostly toiles are recycled as rags. I have to be very careful to take out all the pins or else I get in BIG trouble!
Hi Liz. I am loving your blog! The mystery skirt is most intriguing – a far cry from the conservative skirts I make. I am looking forward to the next episode of the mystery.
Thanks Mum! My skirts are usually conservative too -this could be a new direction for us!