That old dressmakers model Part 2: Armed intervention
The arm pattern I made last week for my dressmakers model has been corrected, cut out and sewn in the “good” fabric, which is calico. I went ahead and cut out a pair of arms instead of just one.
Read about the beginnings of this project here.
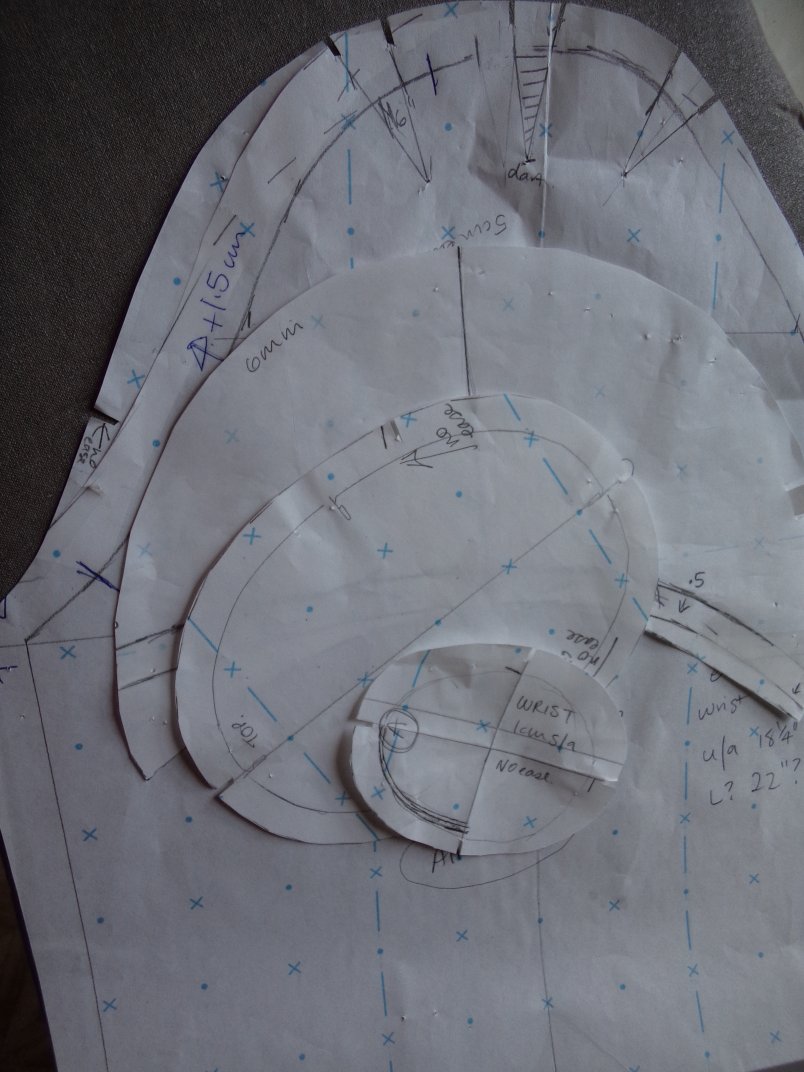
For a pattern I began with a regular sleeve, modified it, and went through three toiles and changes..it’s looking a bit scrappy now!

Each arm has five darts: a long one from elbow to wrist, this horizontal one to shape the elbow, and three at the shoulder.

This is the top of the sleeve, sewn and ready to be pressed. As well as the darts, there’s about 5cm ease over the top to try and get a natural shoulder shape.
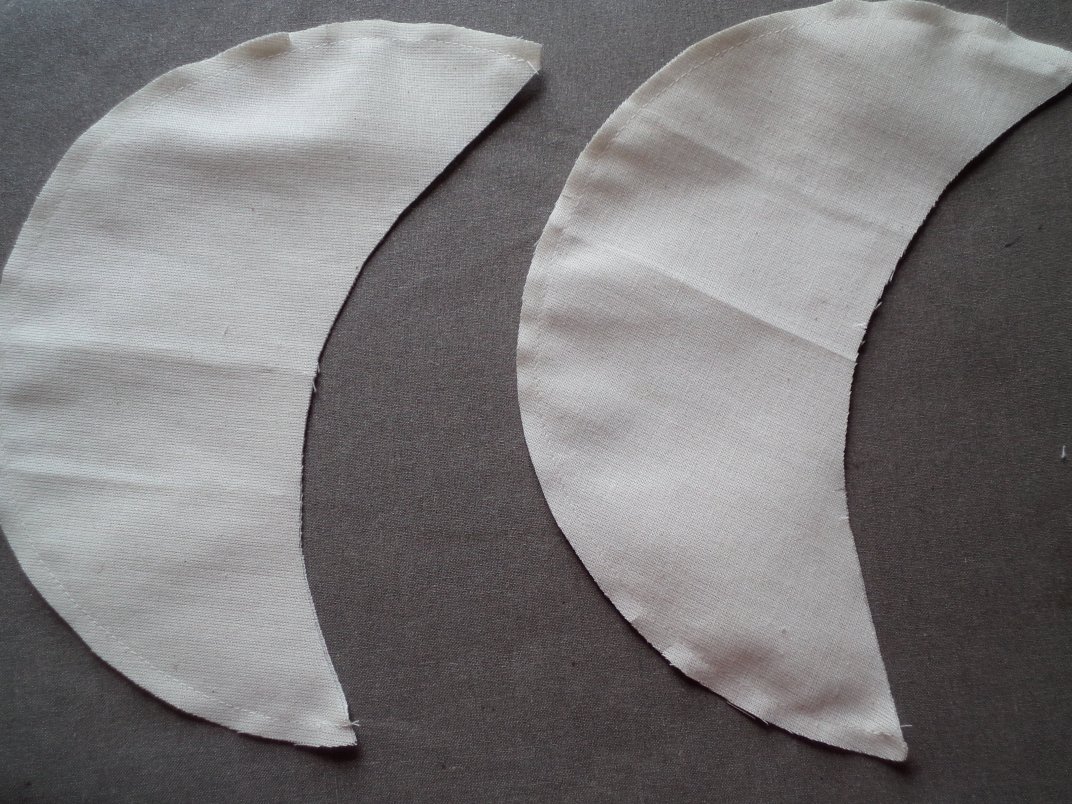
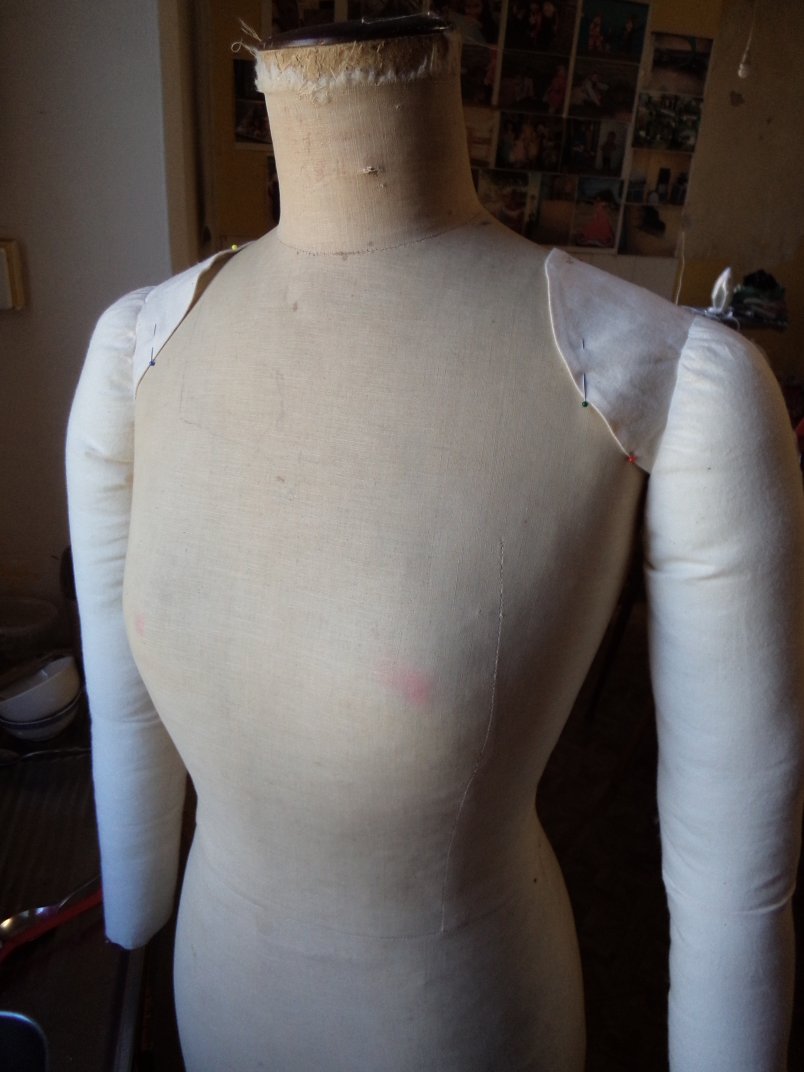
These are the parts that get pinned to the dressmakers model’s shoulders.
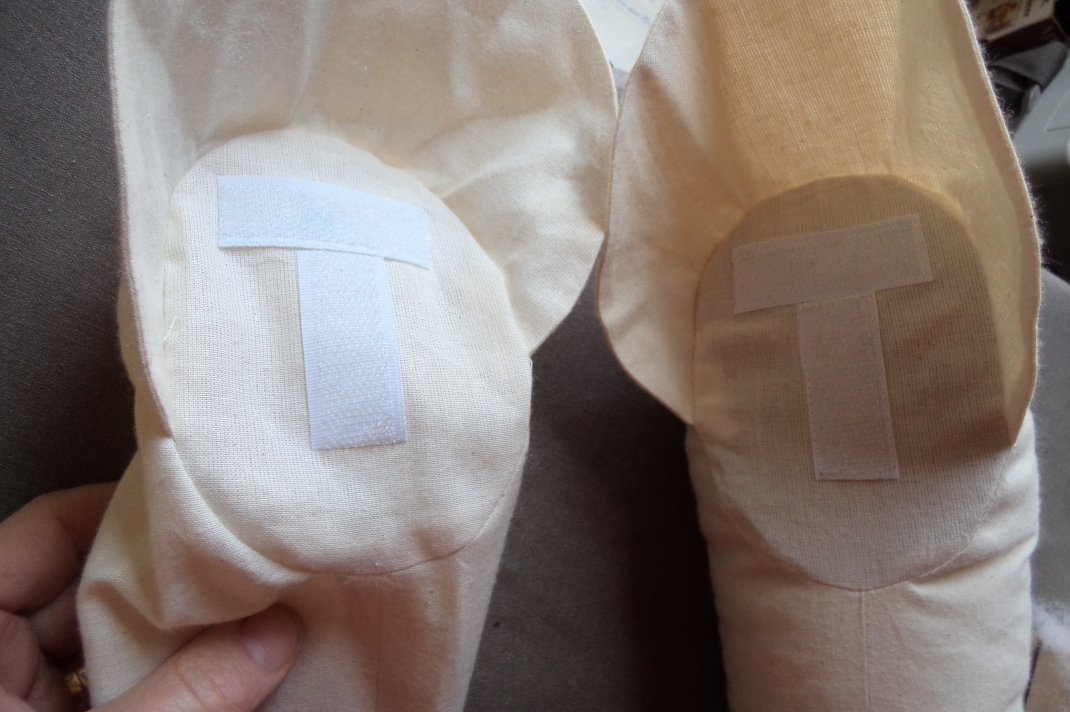
The tops of the arms look like sunbonnets! I sewed velcro on to help attach it to the model’s sockets, but don’t know if it will work until I attach the corresponding velcro to the cover (which I haven’t made yet).

The arm ready for stuffing. At the wrist I sewed an oval shape.

Behind the oval at the top of the arm I inserted two thicknesses of patternmaking cardboard to try and keep the oval sitting flat against the model.

Sewing the gap shut after stuffing. I used Hobby Fill polyester stuffing from Spotlight.

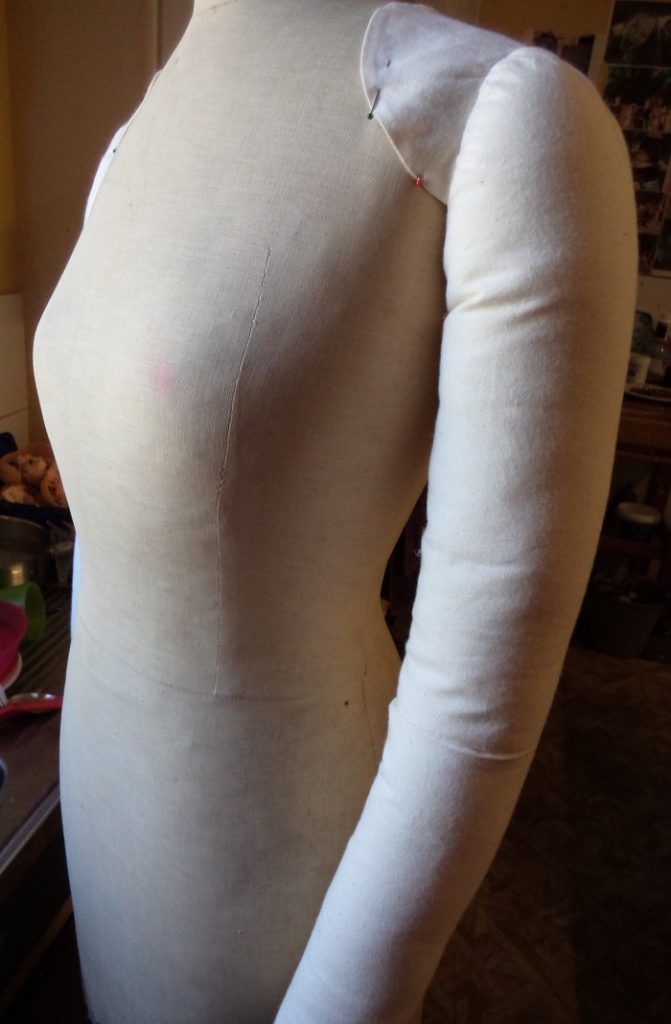
I did a test installation on the dressmakers model, but the arms stuck out at the sides (as sleeves sometimes do when there’s not enough height on the sleeve head). It helped a bit to take a tuck at the underarm.
Not too bad! They take a bit of time to get in the right place. They might sit closer to the model when they’re velcro’d.
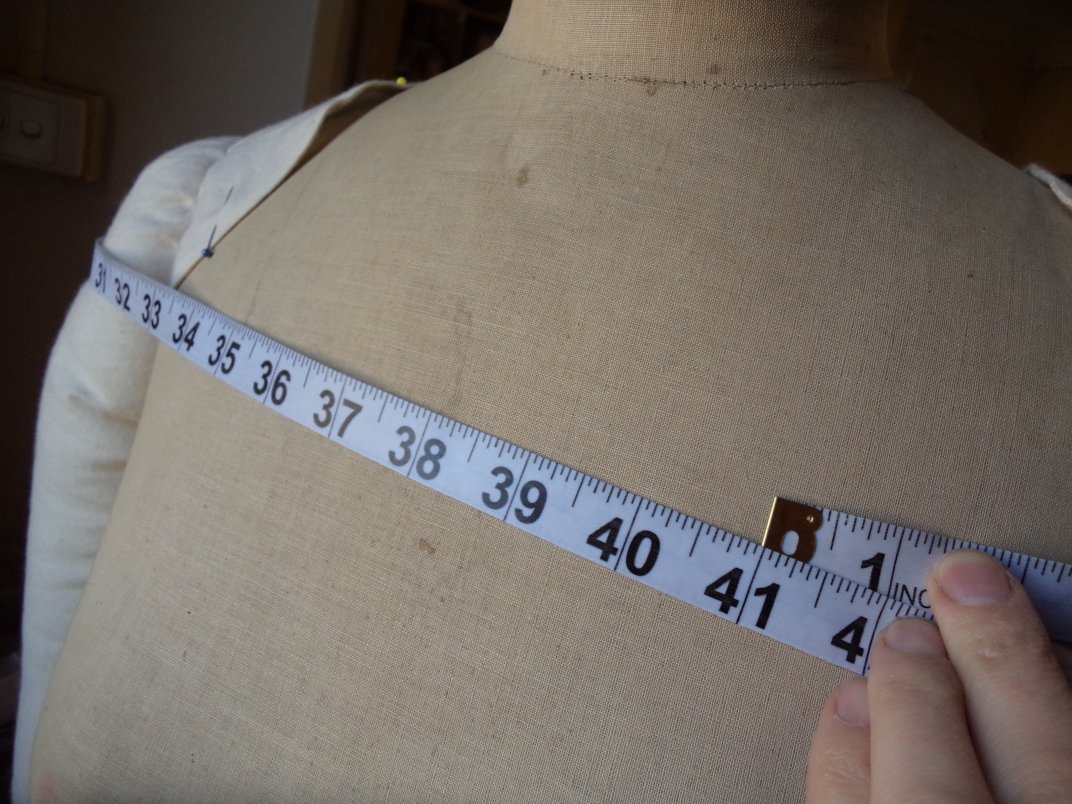
Very happy to discover that the “around shoulders” measurement on the model+arms is the same as me.
The verdict? I could probably tweak them further but on the whole I’m fairly happy with them. I guess I’ll find out how useful they are when I use them! This week I’ll be making a (removable) cover for her.
Cheers!
Are you in Adelaide? Greenacres library are hosting a Dressmaker’s Companion author talk. I’d love to see you there! Details and bookings here.
Hi Liz,
Well done for the completion of the arms! I own a couple of them, and when I made an arm for my first dummy for the first time, it didn’t work. I followed the instruction for it, but I was a beginner at sewing then. I didn’t know what I was doing.
After that, I purchased detachable arms for my third dummy. They have strong magnets for the body, so they’re easy to put on and take off. Having that option is great!
I’m looking forward to seeing your ideas for using your mannequin. Good luck!!!
The magnets sound great. I’ve already discovered how hard it is to dress a mannequin with non-poseable arms.