Finishing Tilke’s Chinese Trousers
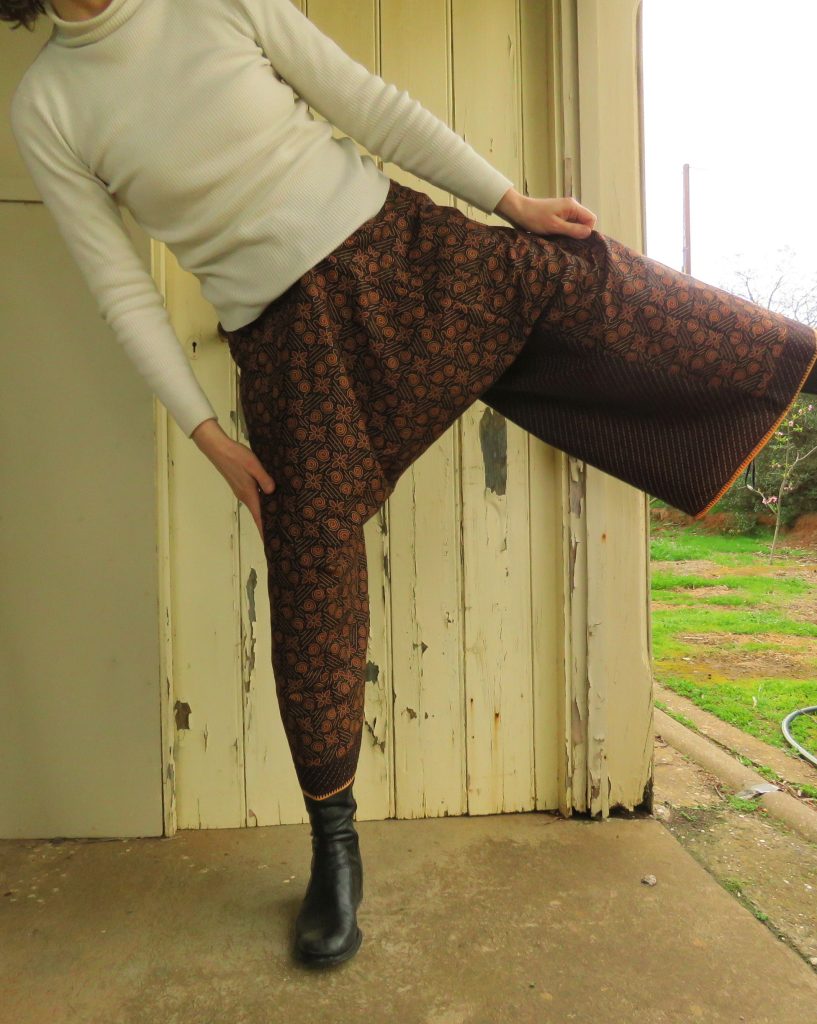
During the week I finished off the Chinese trousers in Max Tilke’s Costume Patterns and Designs. I like them very much, and so does my teen who looks very cool in them. Read about them in last week’s post.
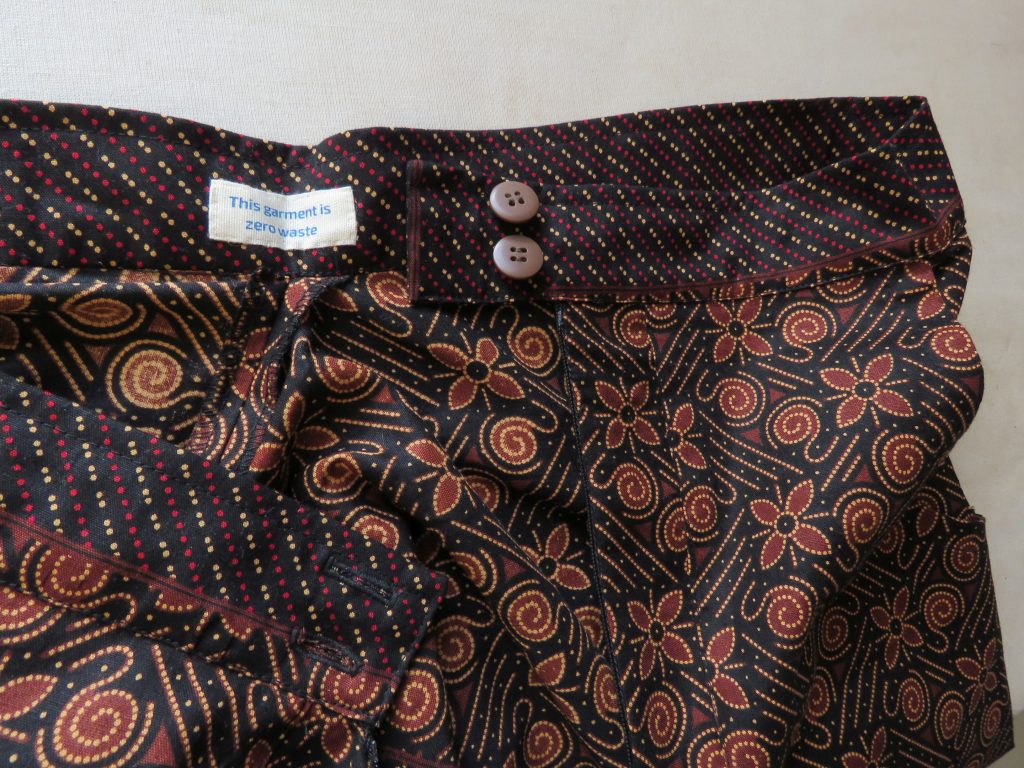
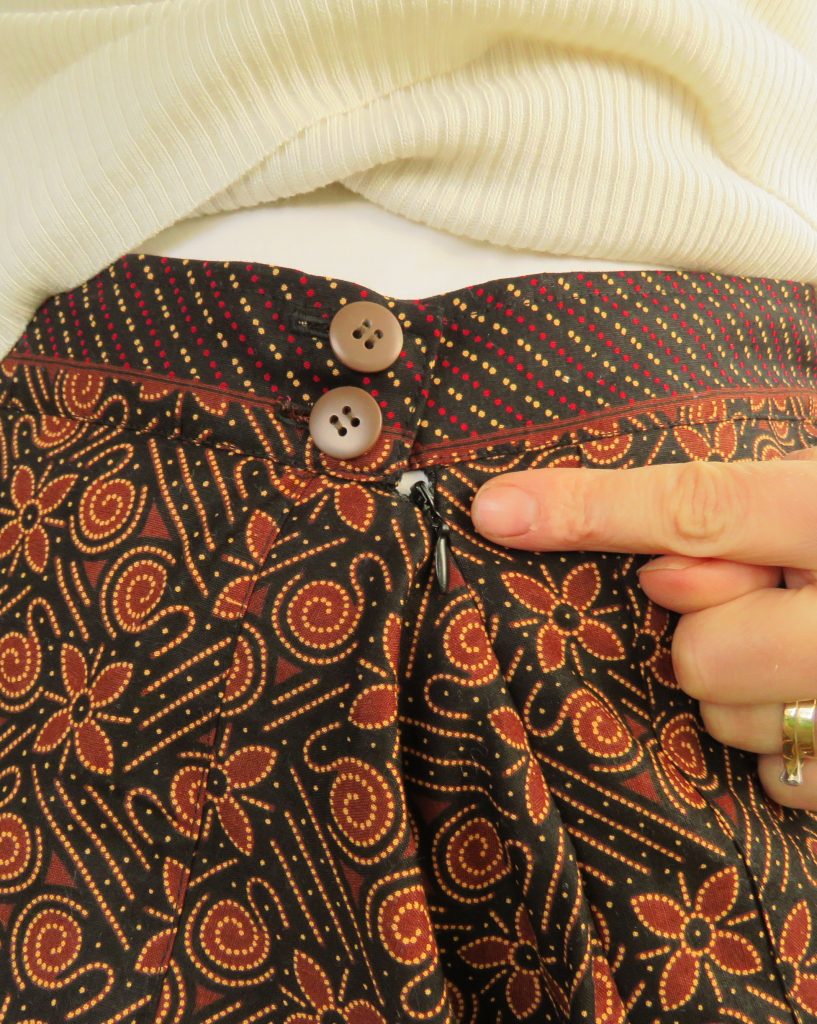
Last week after sewing them, I discovered that I needed a zip to get into them, as they didn’t fit over my seat. So I installed an invisible zip and then attached a waistband (using the double fold waistband – instructions here or in the back of Zero Waste Sewing).
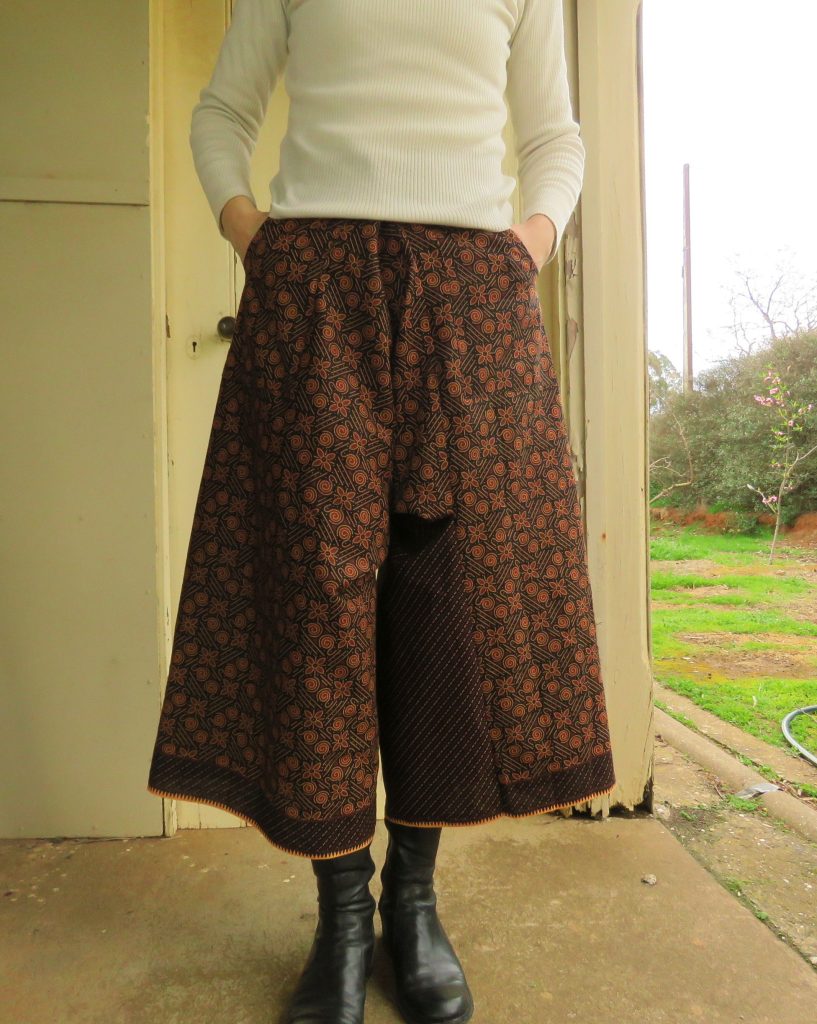
Certainly low crotch trousers are very much a “yay or nay” item. However, these are bordering on culottes, and if they’re to be worn as a trousers-under-a-dress ensemble, they would be a very comfortable choice.
I also added pockets, as the hard reality is that they’ll never get worn without them.
The print is so busy you can hardly see the pockets.

I have a few regrets. I wish now I’d put the zip at the back instead of the front. I also wish I’d arranged the print on the waistband differently, as it’s not printed straight and doesn’t match up at the front. But it’s too late now and not even a big deal, as I wear my tops untucked anyway.
I have quite a few thoughts to offer on these trousers. I did an internet search on them and followed up every Google suggestion and Instagram hashtag. There wasn’t really that much but there sure was some interesting patternmaking to be had! I wondered if there were any extant examples of these trousers. The V&A collection has none, I checked. Apparently Tilke drew many of the garments from the costume collections of museums in Berlin and Georgia, but did these examples survive both world wars?
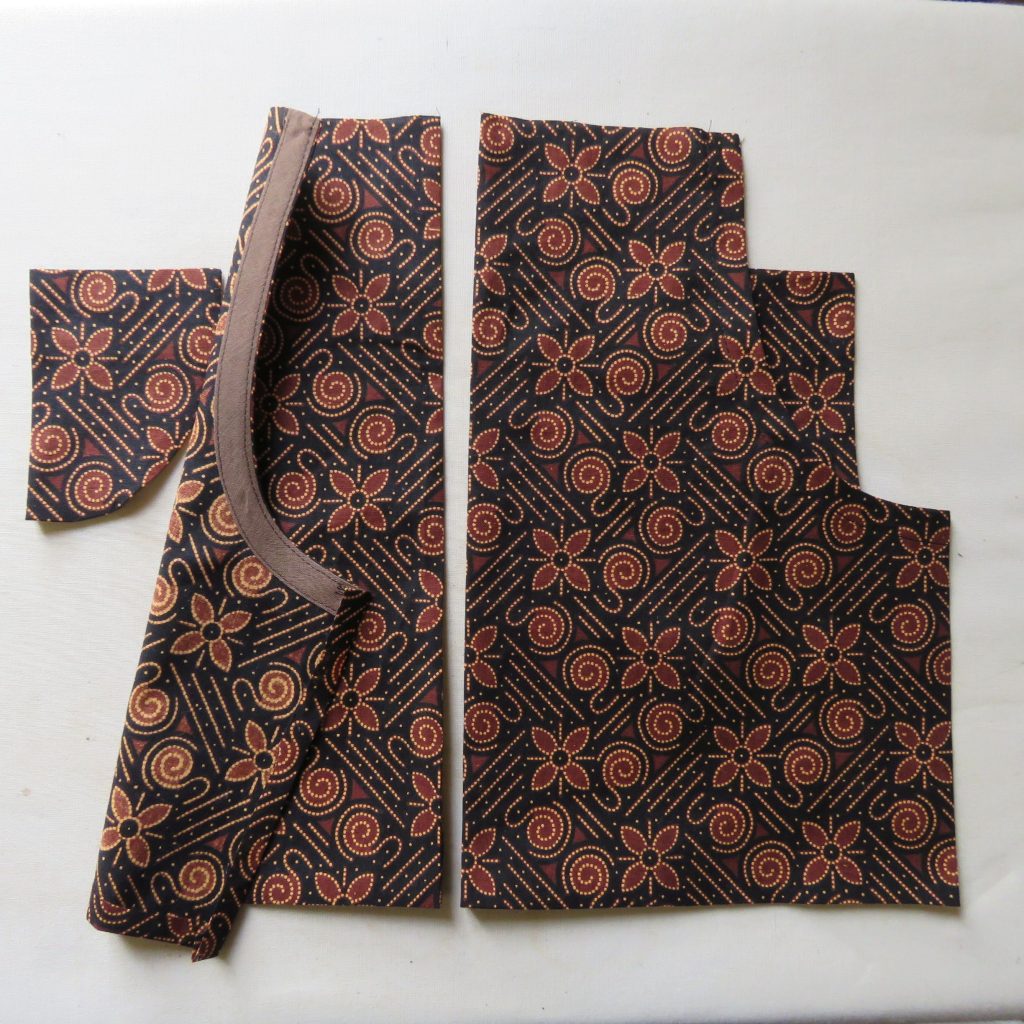
Before we dive in, here’s the image and step-by-step from last week:


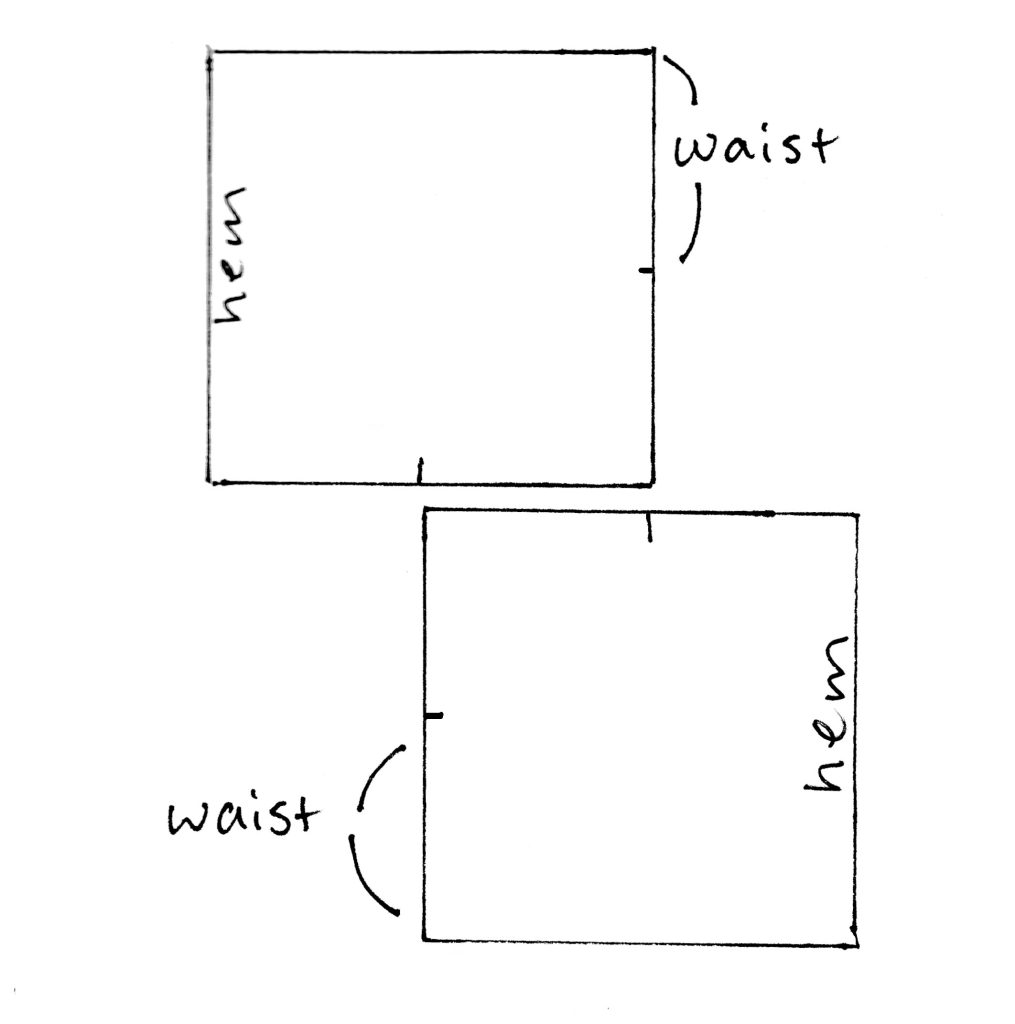
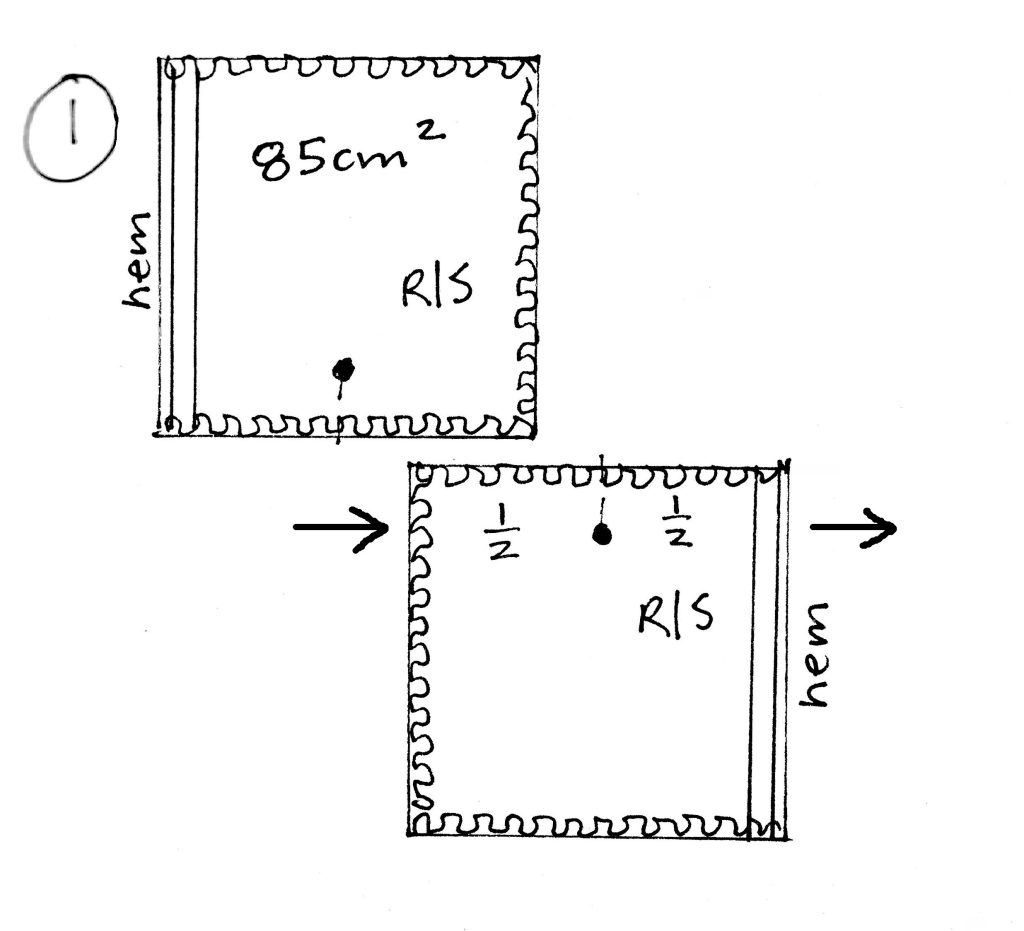
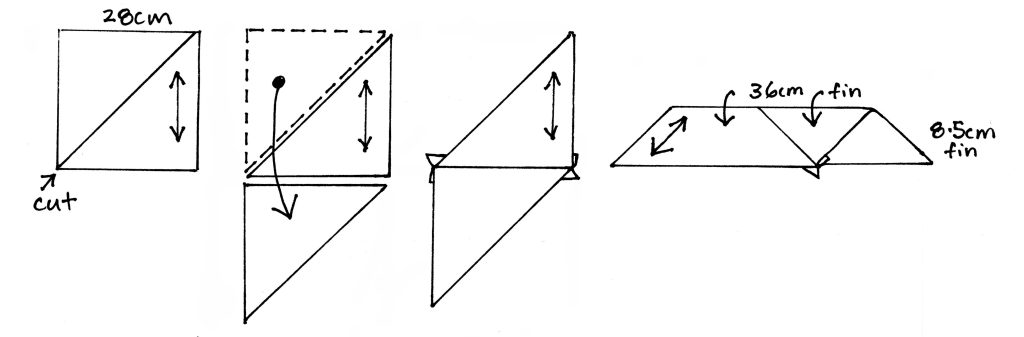
1. Adding leg length
The leg length is the same as the size square, so an 85cm x 85cm square will yield trousers 85cm long.
It’s easy to add or deduct length from the hem provided you mark where to sew the first seam (as it’s no longer in the centre of one side).
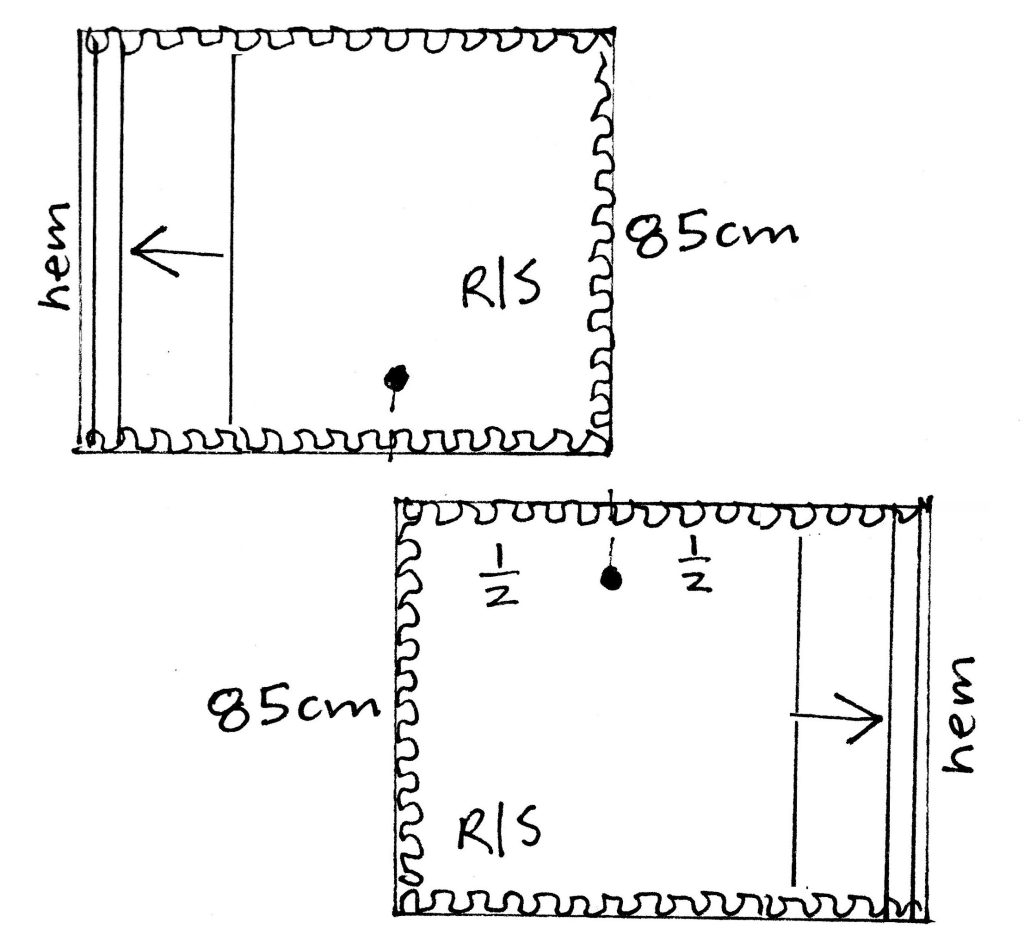
2. Making the waist bigger
I had a wonderful email exchange with during the week with Elke, who’d made these trousers 30 years ago and encountered the same waist issue (and resolved it with a zip like I did).
The waist measurement is dependent on the starting size of the square. An 85cm square will result in an 81cm waist (= 85cm minus 4 x 1cm seam allowances).
However, if you make the square bigger, the leg width gets really wide, and it’s already at what I’d consider maximum wearable width.
Elke suggested making the first seam shorter by sliding the squares along:
By how much? If you reduce the seam length by 5cm total (2.5cm each end), it should give you a 5cm bigger waist. So to fit the trousers over my 40″ hips, I would need to make it 20cm/8″ shorter.
This in turn will make the crotch higher, but how much higher? Not sure because I haven’t tried it, but Elke suggested that a higher crotch could be compensated for by a taller waistband, which would add length to the waist-crotch height.
3. Is the waistband on the bias?
Elke wondered if the waistband was cut on the bias so that it would be elastic. I hadn’t even considered this, as bias cutting for traditional clothes is rarely seen – even binding was cut on the straight grain, not the bias as we do now. Elke noticed that Tilke drew the waistband on a 45 degree angle, yet the other trousers on the same page have a horizontal waistband.

How would they cut this?
If their fabric width was 28cm same as the strips pieced for the trouser legs (although I think it was wider, as it’s a different fabric to match the jacket), it could be cut zero waste a bit like how we might make continuous bias binding.
4. Tapering the leg
Another way to increase the waist without making the legs too wide would be to taper the leg. I haven’t tried this but Old Town England has, and it looks like Viv Westwood has too (another view is here).
It could still be cut zero waste, just with an extra seam on each leg which would be useful for side pockets.
You might need to be careful with how much to taper the leg, as the narrower the ankle is, the greater the looseness in the crotch will be accentuated.
5. What if…?
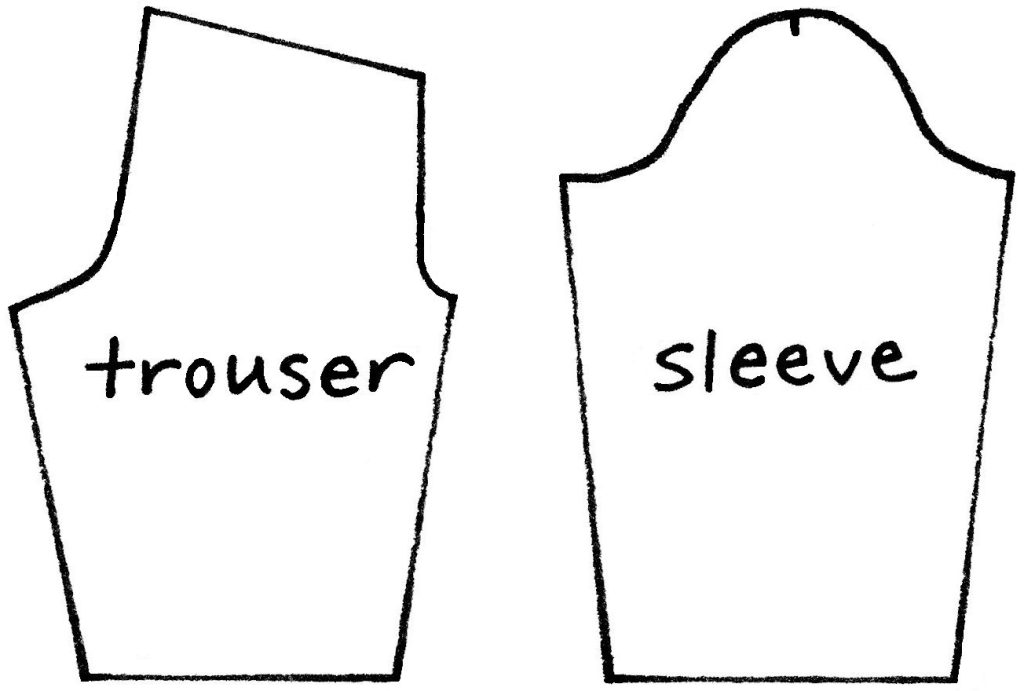
I’m quite taken with the way the fabric wraps around the body with these trousers. Could the same concept be used for a top? Trouser and sleeve shapes have a lot in common – maybe the cutting concept could be transferred from one to the other?
Thanks for reading this far!
Tilke’s book can be viewed online, free, here. It’s in German, and the Chinese trousers are on page 214. An earlier book by Tilke, Oriental Costumes, their Designs and Colours, can be viewed here. It’s in English. Both have beautiful illustrations to enjoy.
Cheers!
I don’t know if I would make these, but what an interesting rabbit hole!
Yep, it sure has been interesting. I might make a pair in black.
Dear Liz,
Thank you very much for sharing these interesting trousers. I live in Berlin and am now very keen to visit the museums to search for them.
I was hoping someone would say that! I would be interested to hear if you find any. I looked online at some Asian clothing collections in other museums but they tend to collect mainly examples of rich embroidery, ceremonial robes etc.
Folkwear’s Japanese Field Clothing pattern has a very wearable pant, made from rectangles (monpe pants). The long triangle cut to taper the leg is reversed and sewn back on at that edge, to form a rudimentary crotch curve. I’ve played around with it over the years … should probably dig it out of the pattern drawer and see what comes out of the sewing machine at the end.
Just looked it up – they do look very wearable. Some time ago I tried Monpe trousers, but they weren’t as fancy as Folkwear’s.
Mentioned them here because the Folkwear trews leave the side seams open above the thigh, so that you can wear the garment with a traditional wrapped waist.
Very simple to stitch them all the way up and do an elastic waist … or insert pockets (and leave one of the pockets partially unsewn to facilitate access that way, á la a circa-1980s technique in rtw AND commercial paper patterns ) … or insert a zip in any of the four seams … or a button placket, etc. etc.
Fairly simple to lengthen the leg. Just start the leg-tapering triangle farther up the side of the leg rectangle.
I’ll shut up, now. (Facing mortality, am often compelled to pass along more information than anyone wants or needs. Apologies!)