Making Max Tilke’s Chinese Trousers
I’ve been thinking about the Chinese trousers in Max Tilke’s Costume Patterns and Designs since I was alerted to an Instagram reel demonstrating their construction. It was just the nudge I needed to try them.
I have the book at home, and looked up the page.
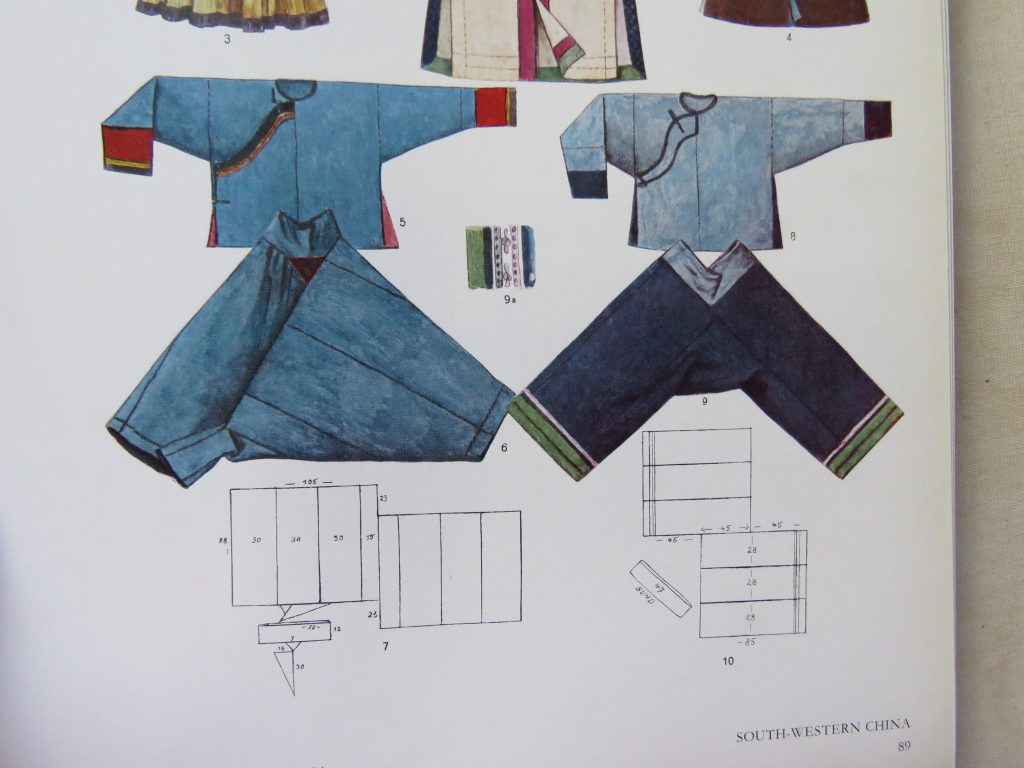
This illustration is also in Zero Waste Fashion Design, by McQuillan/Rissanen.
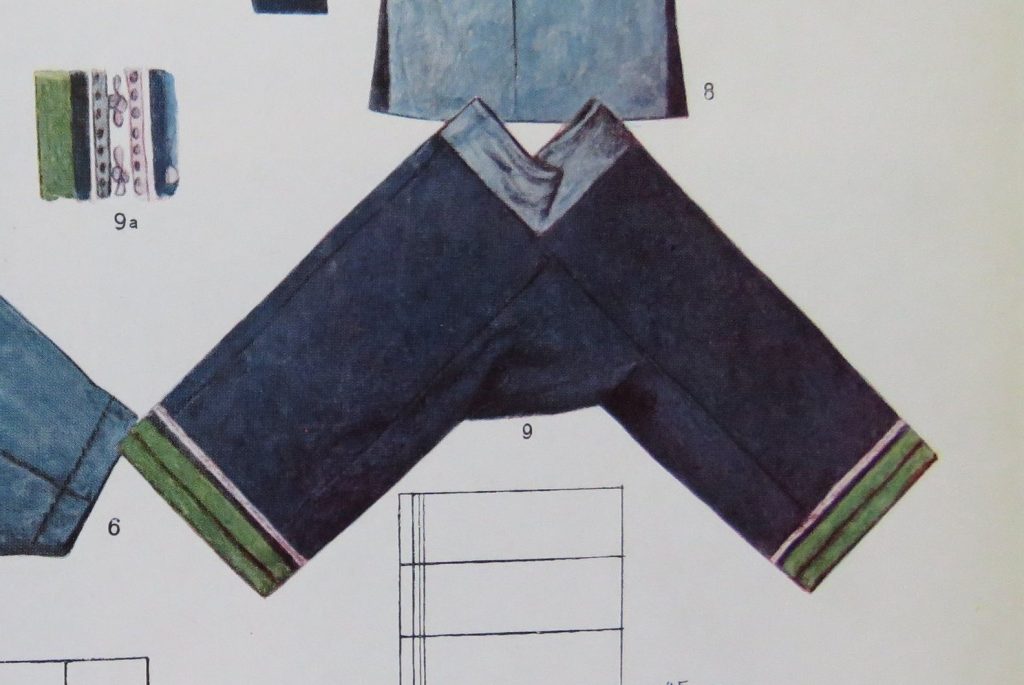
They’re women’s trousers from South Western China (date? not specified) and Max Tilke acknowledges the unusual way they’re constructed.
In spite of my success rate for low-crotch trousers being about 50%, as evidenced in this catalogue of mixed results, I was keen to try them.
I made a sample using paper towel and pins before I committed to fabric.
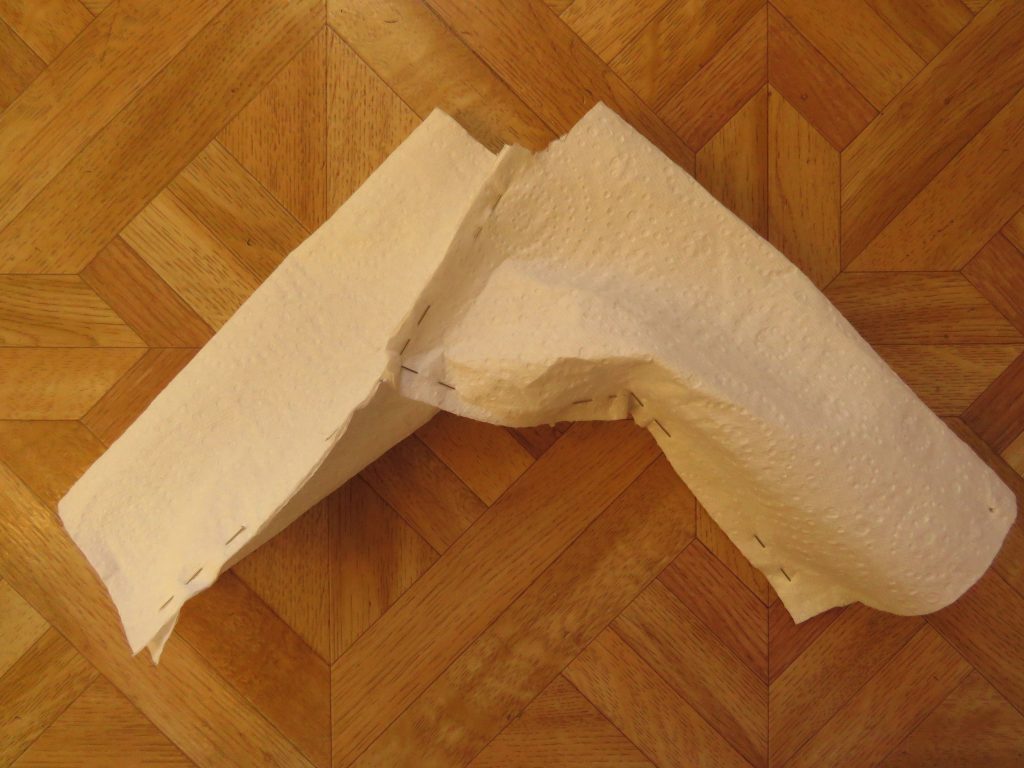
Here’s how I sewed them in fabric, in case you want to try it.

R/S = right side, W/S = wrong side
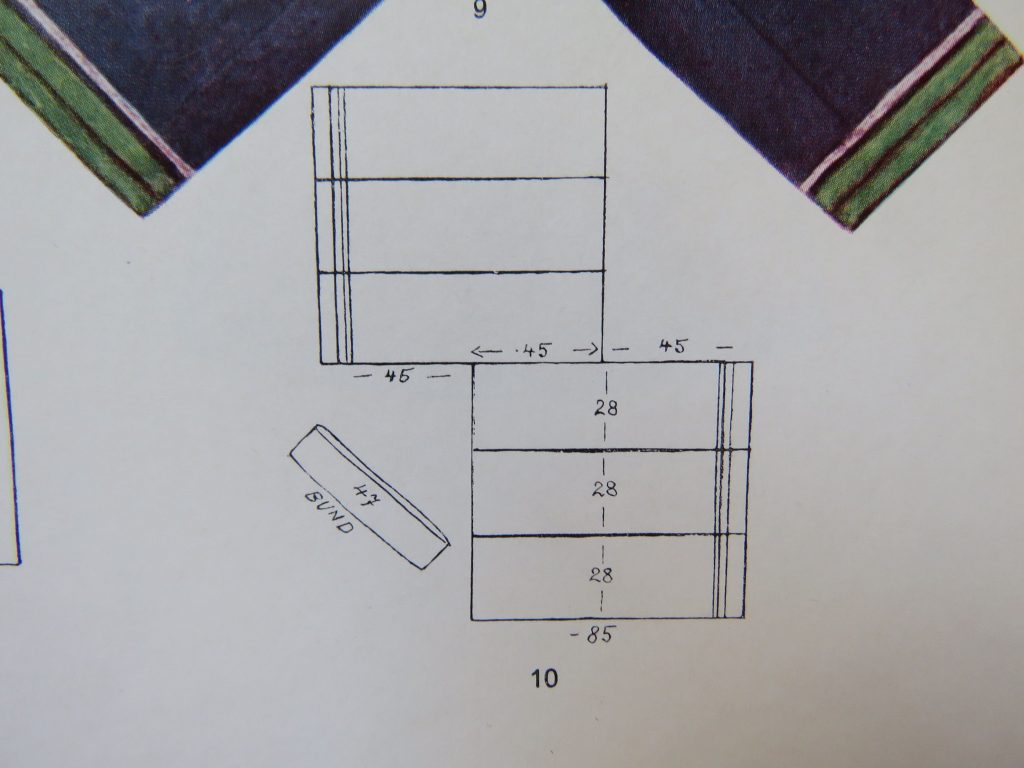
1. Two squares, overlocked around the edges (except the hems which are a border print with a selvedge). Arrange as shown, and mark the half way points with pins.
2. Sew them together with a 1cm seam, stopping 1cm short of each pin.
3. It looks like this now. Press the seam open.
4. Bring the top square down, folding it in half. Sew it to itself, forming one of the trouser legs. Sew the seam up to the previous one in Step 2.
5. Bring the corner point across to the lower square.
6. Stitch, stopping 1cm short of the end.
7. Now repeat the same thing with the lower square. Bring the lower square up, folding it in half, and sew it to itself to form the second leg.
8. Sew the remaining section to the top square, stopping 1cm short of the end.
9. They look like this (inside out). Front and back are the same.
For fabric, I used some brown/black cotton, a present from Sue Stoney. It has a border print, which I thought would be nice at the hem, just like in the illustration. There was enough left after cutting the two squares for a waistband (and maybe pockets of some sort?).
They were very quick to sew, and I got as far as putting them together without a waistband.
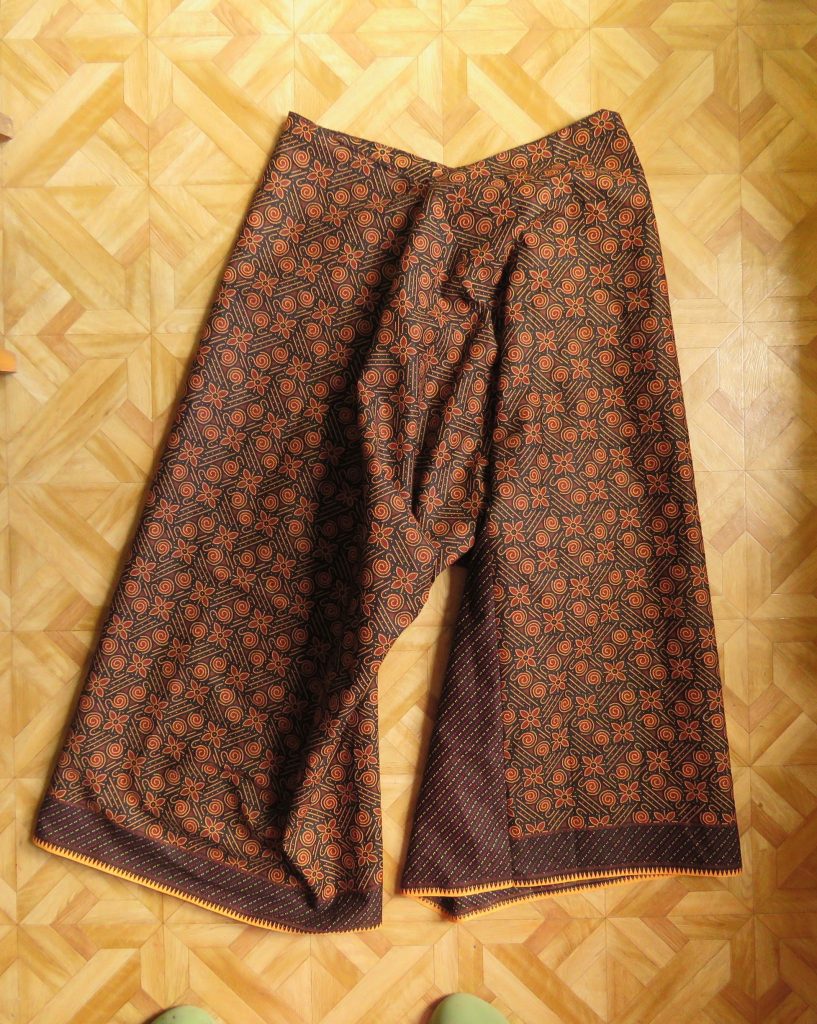
The extra fabric in the crotch doesn’t seem to be too excessive when the trousers are hanging.
Spread out, they don’t lie quite flat and the waist sits in a pronounced V.
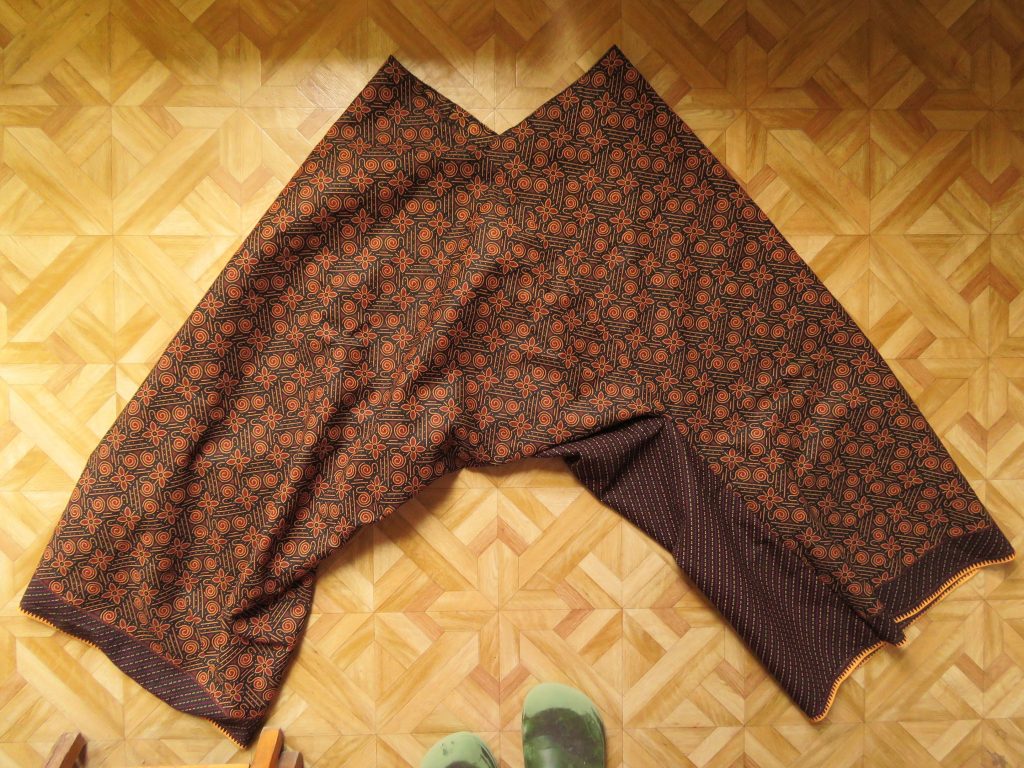
The fabric wasn’t a uniform pattern – it had a panel of contrasting print at one end and I wondered how it would turn out but it looks okay.
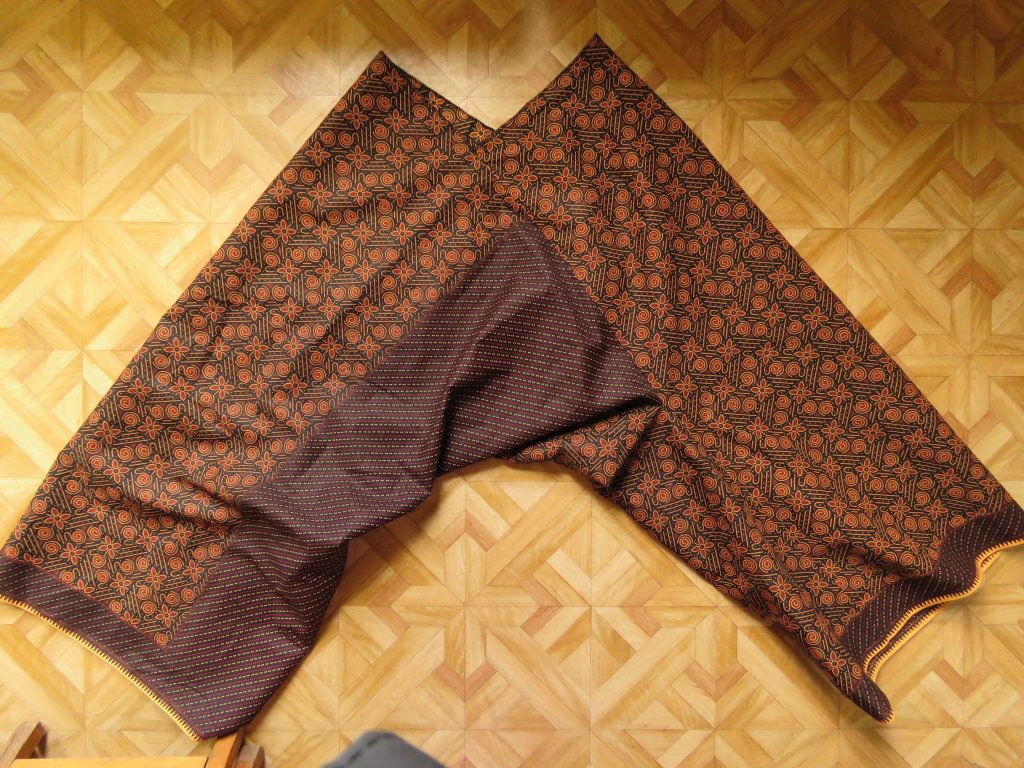
I was actually very excited after sewing these. They were so interesting to make and I like them very much.
The story, however, hits a rut here, because I couldn’t physically get them on without unpicking. The waist measures 32″/81cm which by co-incidence is the same as my waist, but I couldn’t get them on over my bottom (40″/102cm).
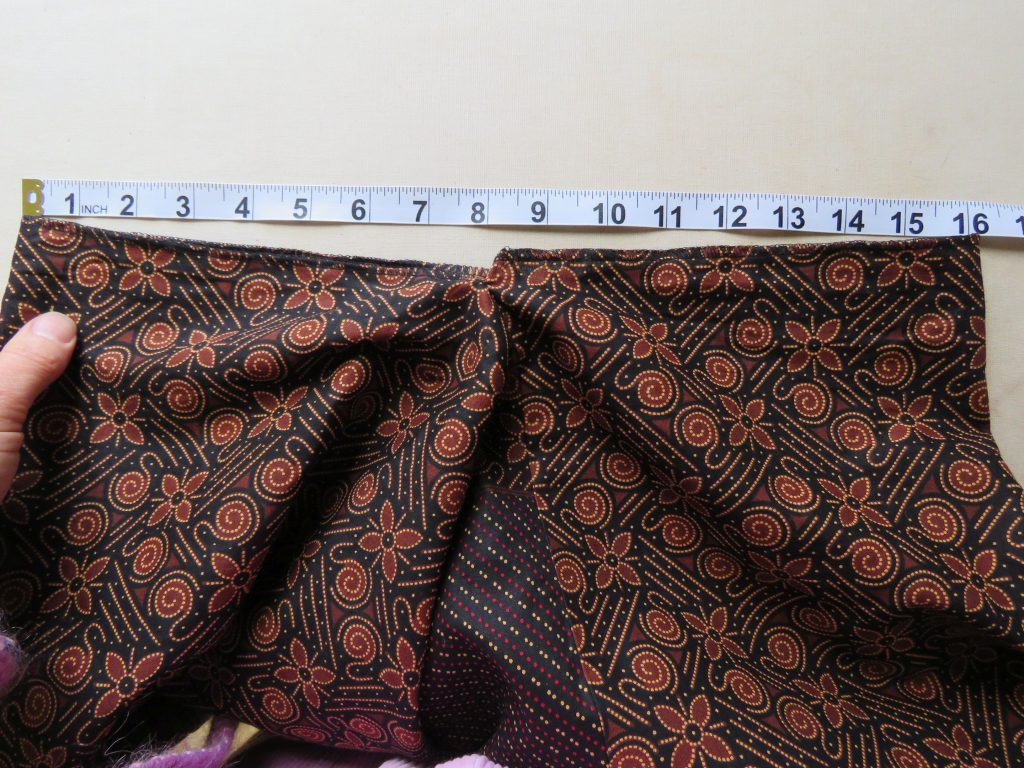
I had sort of assumed the waist would be wide and I would pull them on and tighten with a drawcord or something. So they must have fitted a very tiny woman indeed.
But I think I could make them work by unpicking a seam and inserting an invisible zip or placket, then sewing a regular waistband on. I also have some thoughts about ways this pattern can be changed.
Come back next week for the gripping conclusion!
Cheers!
UPDATE: here they are finished.
Discover more from The Craft of Clothes
Subscribe to get the latest posts sent to your email.
Hi Liz!
That‘s so cool that you are 1. seeing these up 2. explaining how it‘s done and 3. explaining eventual pitfalls…waist vs hip circumference struggle. I look forward to reading the next installment!
I totally did not anticipate them being so small – other traditional trouser patterns I’ve tried have big waists that are drawn in.
The clarity of your diagrams in explaining the topography of construction is So Good! (They made sense without the verbal description)
Very interesting design – I’m on tenterhooks to see what they look like ‘on’!
Last night I couldn’t bear it any longer: I unpicked a section and tried them on. Not bad, and unspeakably cool on my teen of course. They will be a bit more finished off next week.
What a cliffhanger! Those trousers are quite intriguing. I hope you can make them work.
I’m quietly confident, and feel secure knowing that I could always undo them and be left with two very handy squares of fabric for something else.
Agreed, this is a real cliffhanger!
I remember seeing these trousers in Max Tilke’s book and adding them to my future project list. But I realize now that I didn’t understand the clever construction of these trouser – for some reason I thought they were 2 rectangles with a square gusset. Obviously I didn’t understand the cutting diagram. Thanks for sharing your version and also for sharing the Instagram post. Definitely worth a closer look! Thanks for sharing the dimensions too. I too had assumed all the garments in the Tilke book would be large.
I sort of thought the same thing too, as most of the other trousers in the book have a gusset of some type, and most seem to be large with a drawstring waist. I have a bunch of thoughts to share next week!
Comment from Elke, via email:
Your pants look wonderful. As a teenager, I would have freaked out with joy.
Almost 30 years ago, I sewed these pants for myself an had – of course – the same problem. My solution was also a zipper.
I had thought about how the pants could be made wider:
If the side with the Stripe (= lower leg) matches your measurement, you’ll fit into the pants at the top, but the legs will be correspondingly wide. In my case, too wide…
I discovered Max Tilke’s book in the library decades ago and it was love at first sight. His detailed drawings almost allow you to figure out the patterns.
However, I still haven’t figured out exactly how the pants on the left of your currently sewn pants work.
I totally agree with your thoughts on making the pants wider, and think that the legs can easily become far too wide if the square is simply made bigger.
I wondered if it would work to make the waist lower, but I need to finish mine off properly to see. Cutting the waist lower would make the circumference bigger, but it would make the crotch sit higher. That might be OK since it’s pretty low anyway. It would also make the trousers shorter but it’s easy to add length by adjusting the starting square to be a rectangle.
The pattern has been adjusted for a more tapered leg by the same man in the Instagram reel: https://oldtownnews.tumblr.com/post/123283475322/trousers-from-mars-part-2 Viv Westwood also did them with a tapered leg: https://www.instagram.com/p/BTGrfvsASId/ I would bet Zandra Rhodes has tried them too. Rickard Lindqvist has done them https://www.instagram.com/p/DAHJyc9p-2p/ and https://connect.clo-set.com/detail/1b0b3ab2748543caa0a0814528953176 but I’m not sure what he did about the waist. I see he used rectangles.
Max Tilke’s book is indeed superb. I’ve never seen a copy in Australia, but I bought mine online ex-library. It came from a library in Belfast, last borrowed in 1978! I hadn’t really considered how those lighter blue trousers are made, but they might be related to the envelope trousers in this pdf: https://archive.bridgesmathart.org/2007/bridges2007-427.pdf
Many thanks for getting in touch.
Aren’t the light blue trousers the same as the dark blue trouser but with a lower crotch?
I just tried them out in paper. It’s sort of the same but rectangles instead of squares and a triangle at the waist. But it remains to be seen how they work in fabric…