Sewing a perfect bias binding facing (a tutorial)

One of the techniques I used in Zero Waste Sewing was facing an edge using bias binding. Specifically, I used it for necklines, but it also works well for other edges such as armholes and pocket openings. The edge can be straight or curved.
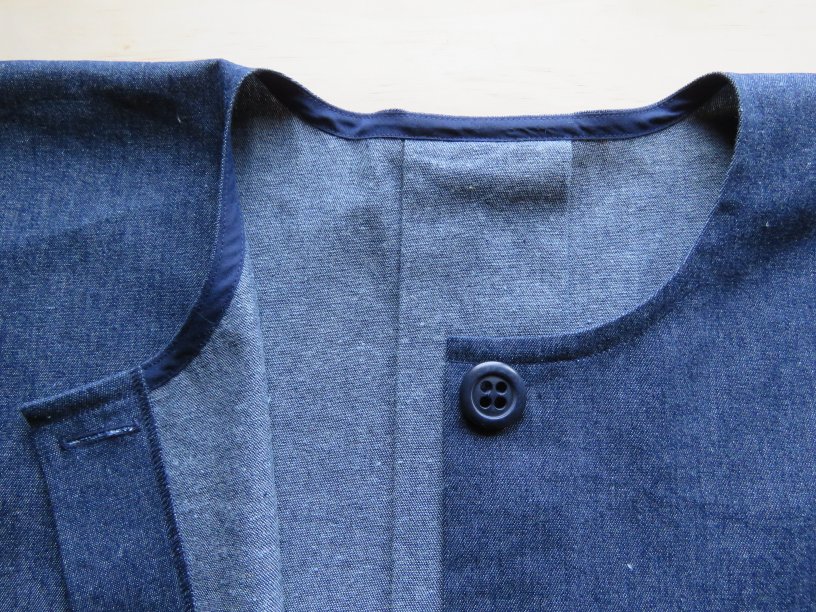
The finished edge looks clean with a single line of visible stitching.
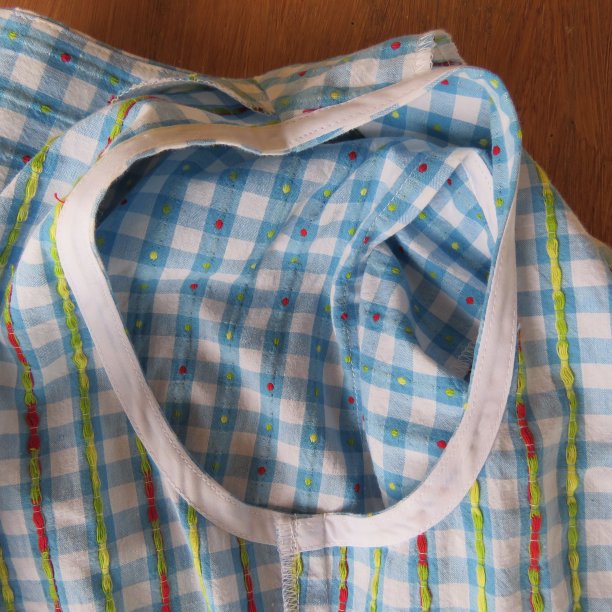
Below is the armhole of a dress – the dress’s side seam was sewn after the bias binding facing was applied.
Bias binding, either purchased or home-made, is a great thing when you’re making zero waste garments because no fashion fabric is required to finish the edge. With zero waste layouts, it’s important to include all the pattern pieces needed to complete the garment (including facings and trims for edges) because you can’t just cut them out later; they need to be in the layout. It doesn’t always work out that way though, and bias binding is your best friend when it doesn’t. Bias binding is also handy for any other type of garment where you’ve run out of fabric.
- Bias binding facings work best on light to medium weight fabrics; for thick fabrics it’s better to use the bias binding as actual binding rather than as a facing.
- You’ll be taking a 5mm seam allowance on the edge.
- It’s easiest to do early on in the garment’s construction because the neckline can be laid flat.
- The key is pressing: press the bias binding into a matching curve first (essential), press after attaching it, then press again after the final row of stitching. You can’t skimp on the pressing!
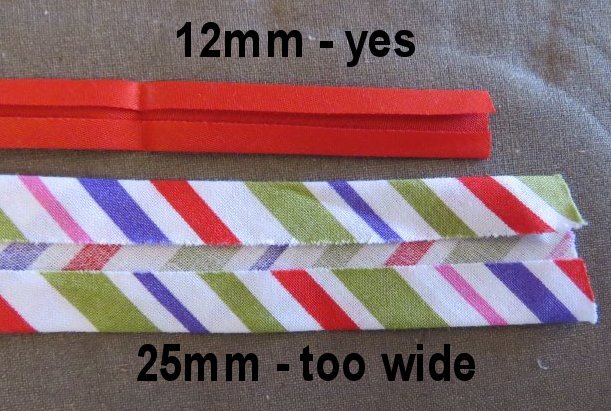
- Use 12mm (1/2″) bias binding; don’t attempt it with 25mm (1″) bias binding because the curves are too tight for such a wide strip.
- The bias binding can be purchased or home-made; I’ve done it with both. It doesn’t have to be the same colour as the garment, but if it’s contrasting, change the colour thread to match.
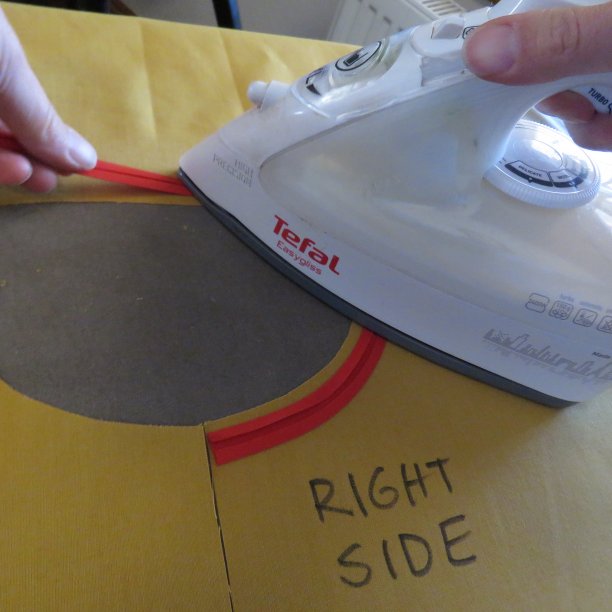
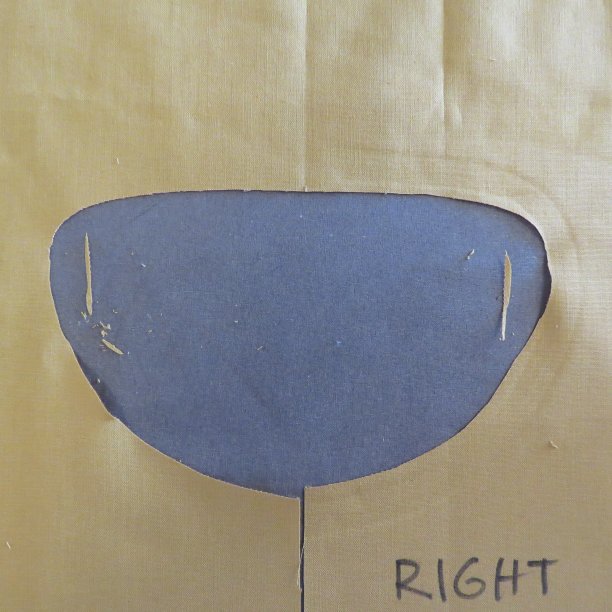
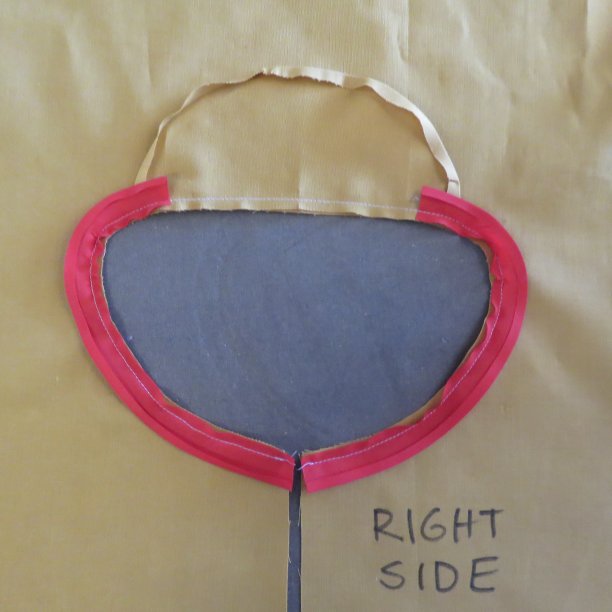
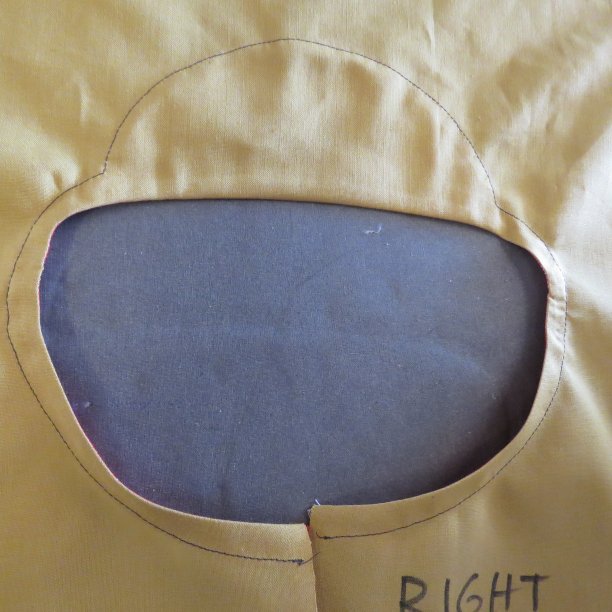
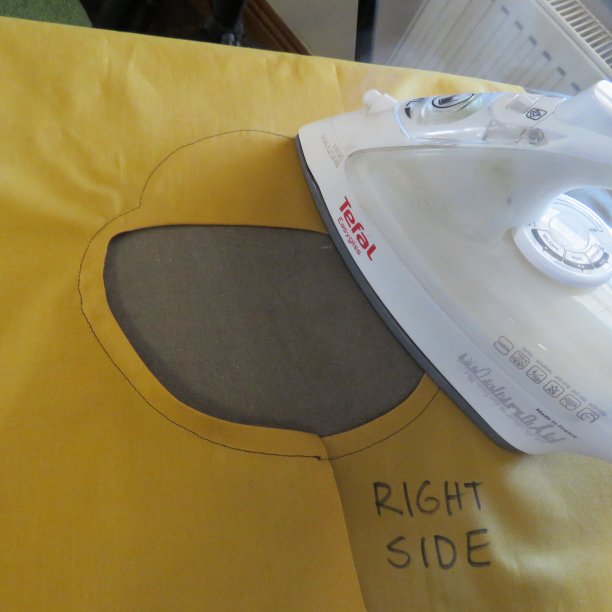
Step 1. At the ironing board, arrange the neckline right side up, flat.
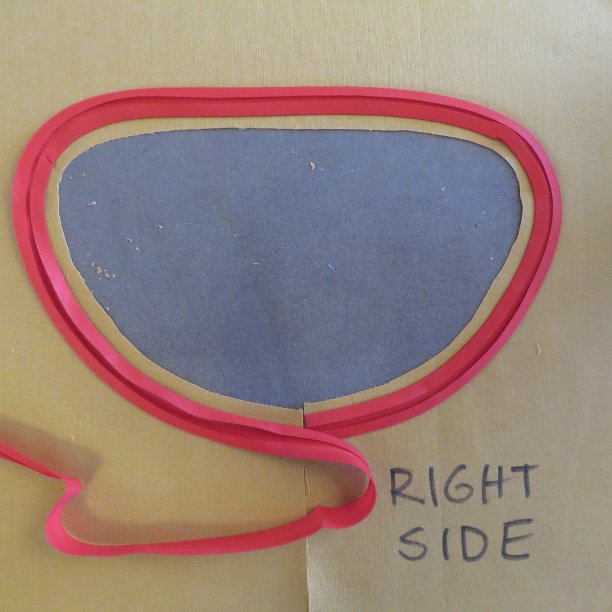
Lay the bias binding around the neck, wrong side up and 5mm from the raw edge. Use a steam iron to stretch/shrink the bias binding to the same curve as the neckline. Press down and use the weight of the iron to hold it as you position the bias binding.
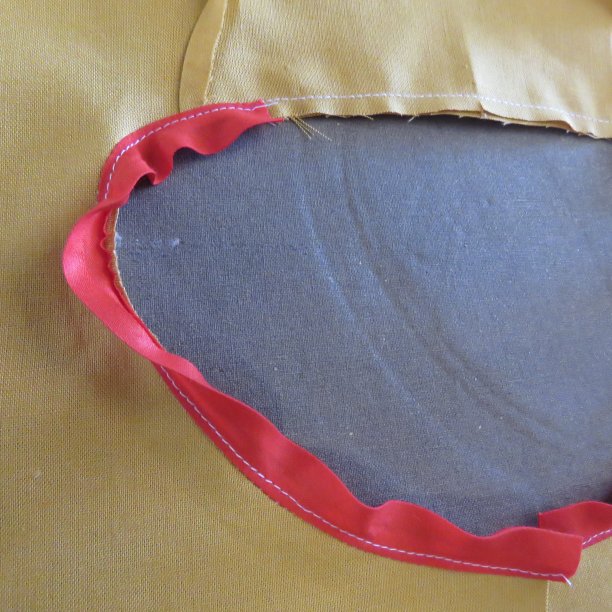
If you can’t shape the bias binding easily around the sides because it’s too curved, trim the edge a little to straighten it off.

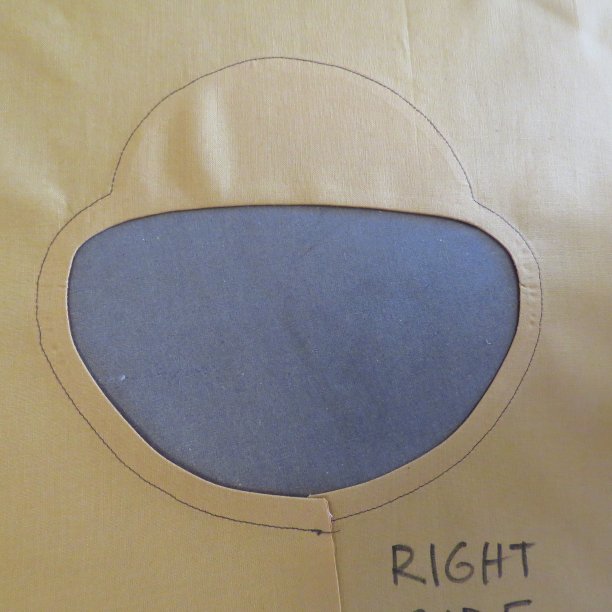
It should look something like this now:
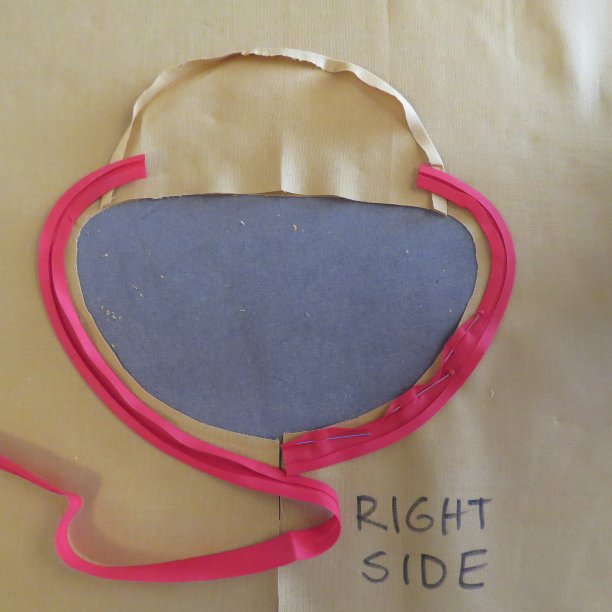
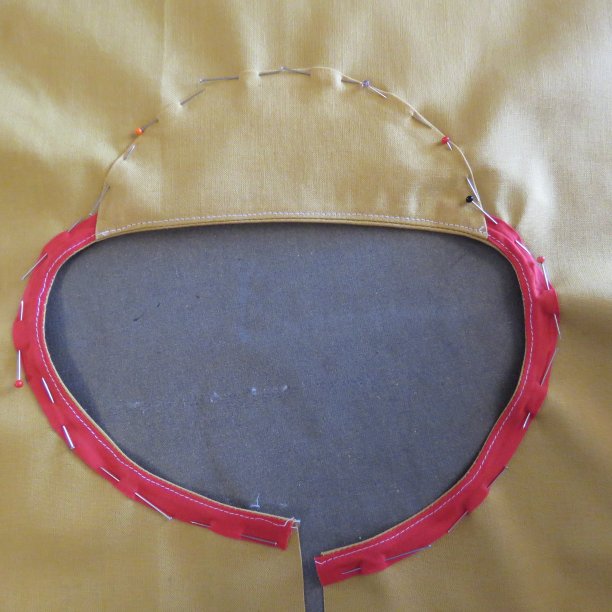
Step 2. Before moving the bias binding, open out the fold and match it to the neckline’s raw edge. Pin in the bias binding’s crease.
If the neckline happens to have a back neck facing, lap the ends of the bias binding over the edges of the facing.
Step 3. Stitch along the crease line where you’ve pinned. Continue the stitching over the back neck facing, if you have one.
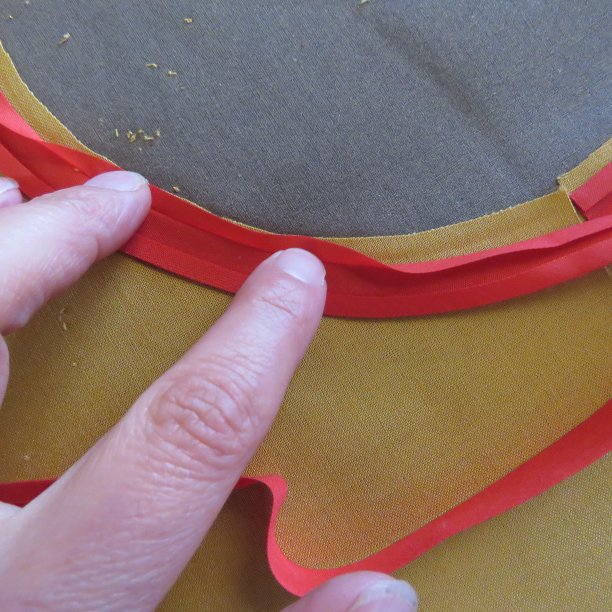
Step 4. Still at the sewing machine, flip the bias binding and the seam allowance away from the garment. Understitch the bias binding.
If there’s a back neck facing, understitch the bias binding first, then separately understitch the facing.
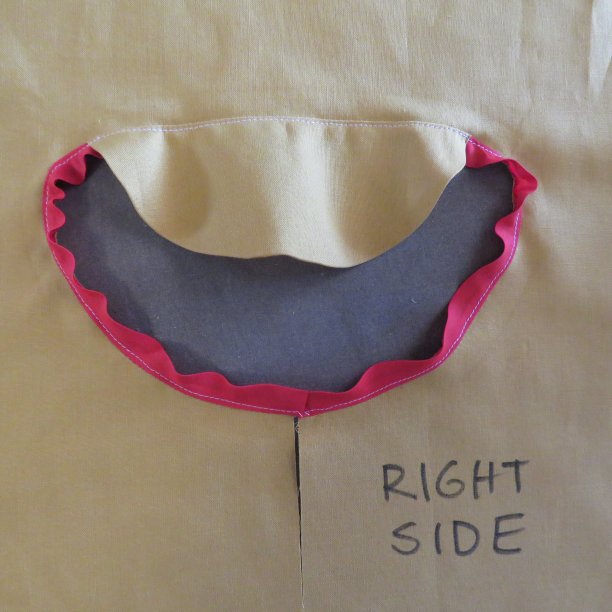
Step 5. Turn the binding (and facing) to the wrong side of the neck, where it will sit flat due to the curved shape you pressed it in. Press.

Step 6. Pin, then stitch in position with the binding side uppermost. Watch the seam guide on the machine so that the stitching for the bias binding is an even distance from the edge (you’ll notice the bias binding is slightly skinnier where you’ve taken it around the curves). If you don’t want a visible line of stitching, this can be sewn invisibly by hand.
If there’s a back neck facing, stitch the whole thing in one fell swoop.
Step 7. Give the whole thing a good, solid press.
Cheers!
What a great tutorial this is! I have used bias binding lots of time but never thought to understitch it. I now know.
Cheers Sue, glad it was useful.
Very neat finish and professional done. Thank you for sharing with us.
Thanks Glennys!
This is a brilliant tutorial. I have found this enormously helpful. Thank you.
Many thanks, Patricia.