How to sew a zip without using pins
Or: Sewing outside of your comfort zone.
Like a sewing challenge? Yes, it’s possible to sew a zip without using any pins, just using your hands, technique and some practice. It’s a massive time saver (factory machinists do it) and it will generally boost your sewing speed and confidence.
Our sewing teacher at TAFE taught us how when I was a fashion student. We were each issued with 2 strips of fabric and a zip and shut in a room for a day to master it. (I’m being dramatic – rather, we had an all-day sewing lesson in an open plan classroom.) A lot of unpicking went on that day! It clicked for me right at the end of the day, and conveniently the whole class had become fast at unpicking.
While I can confidently sew a zip without pins now, I would use pins if the fabric is hard-to-handle, there are checks to match or if I’m just having one of those days.
This tutorial can also be used as a general guide to sewing in a lapped zip (with or without pins – if pins get the job done then use them).
Here’s how to do it:
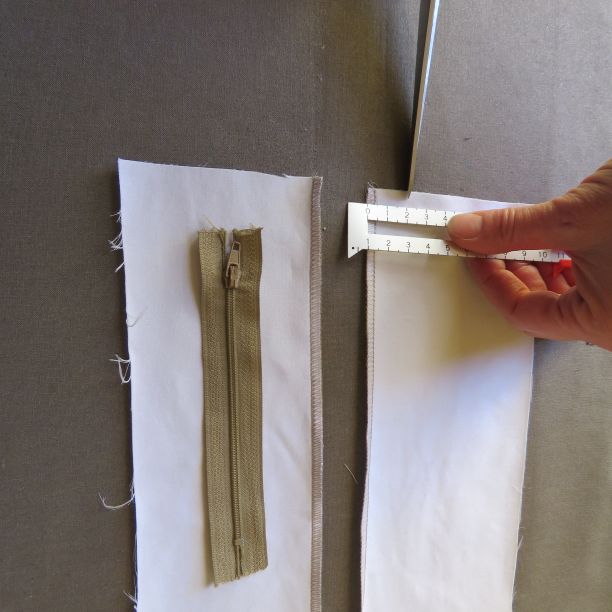
- Overlock the seam allowances before you start. You need a 2cm (3/4″) seam allowance for best results. 1.5cm (5/8″) is okay, but it’s harder to get it neat at the top where the zip pull sits. Snip a tiny 3mm (1/8″) notch in the top to mark the 2cm seam allowance (or 1.5cm if that’s all you have).
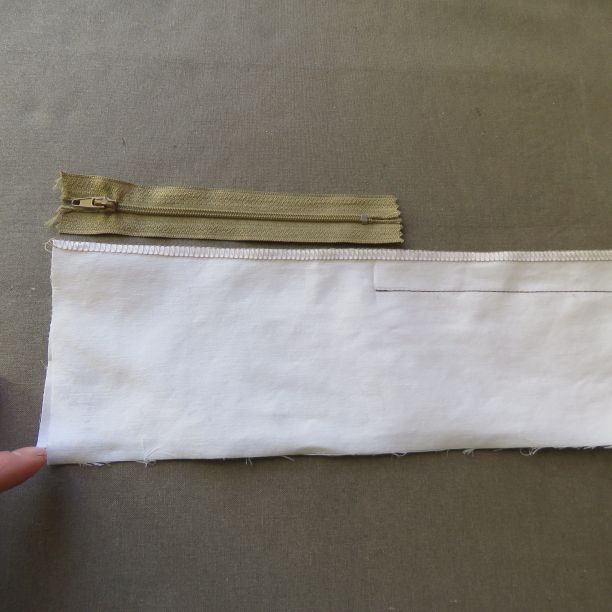
2. Sew the seam below the zip. Start just below the metal tab at the bottom. Remember to leave a seam allowance at the top above the zip to attach a waistband etc.
3. Press the seam open.
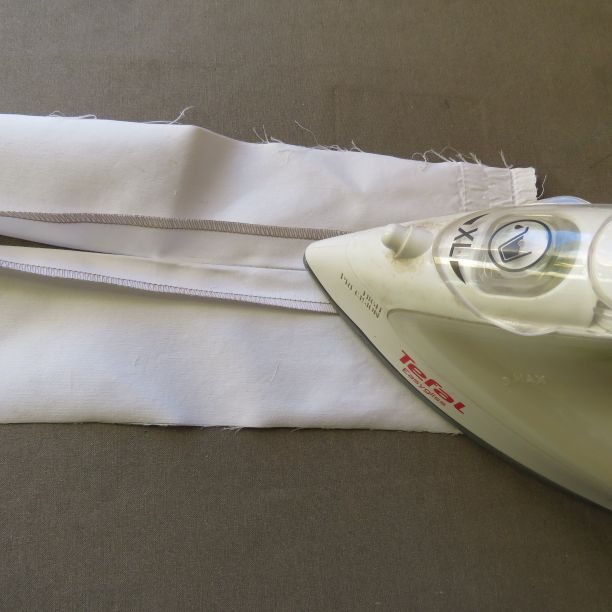
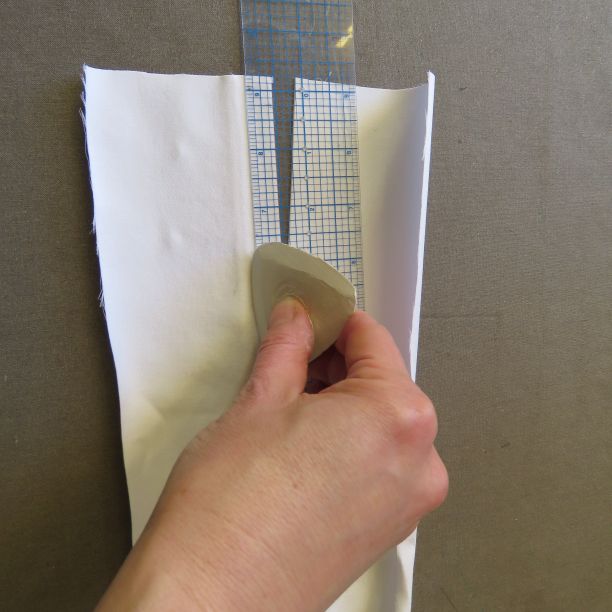
4. In the opening where the zip will go, press the left side under 2cm (3/4″). On the other side, press 3mm (1/8″) less than this. (If you’re working with a 1.5cm seam allowance, obviously you’d make this 1.5cm and 1.2cm)

You’ll have a little 3mm step at the bottom. It’s vital to keep that step when you’re sewing.

If you’re in a hurry (or in a factory), you can just scrape the folded fabric along the edge of the machine table to get the creases, rather than pressing with an iron.
Optional: draw a removable chalk line about 1.2cm (1/2″) from the fold on the left side, to use as a stitching guide. Otherwise, use your calibrated eye to get a straight row when you’re sewing it. Most people prefer the chalk line.
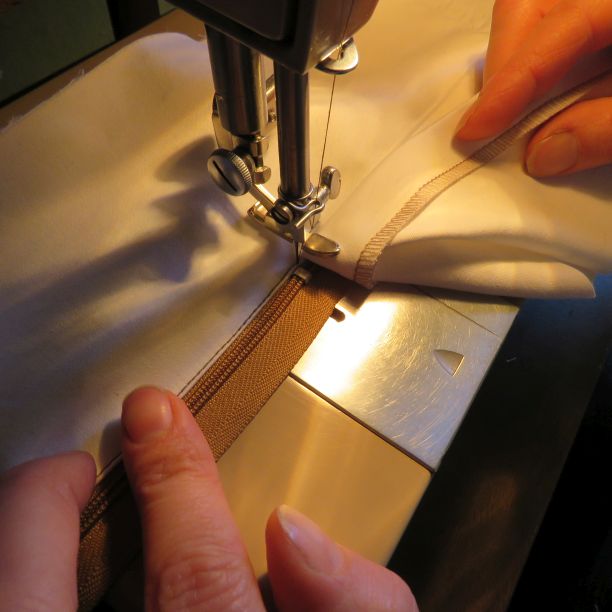
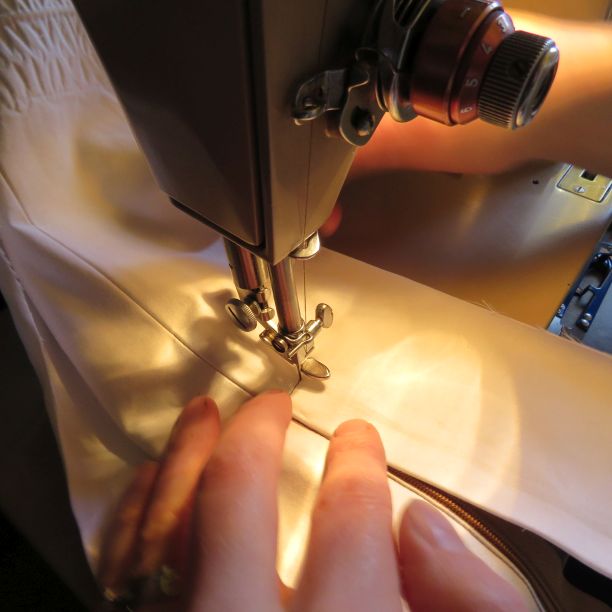
5. Back at the sewing machine: change the machine to a zipper foot, with the needle sitting to the left of the foot. Pop the zip under the fabric, all facing right side up, and begin sewing the right side of the zip. Stitch along the edge of the fold and at the same time hold the zipper tape taut with your left hand and let the fabric “sit easy” on top.
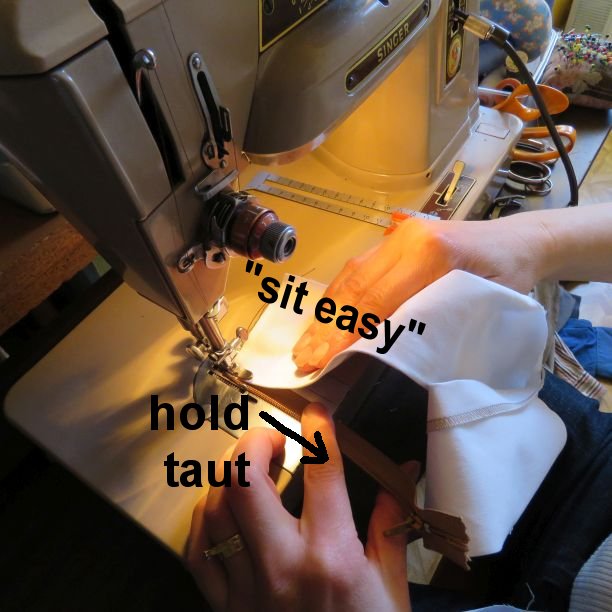
(Why? Well, as the machine sews, it will naturally push the top layer forward and the feed dogs underneath will push the bottom layer backwards. This means the top layer will end up longer, essentially stretching the top layer onto the zip. The zip will not sit flat. We want the opposite to happen: we want the fabric to be eased slightly onto the zip, so to counteract the machine, we are holding the underneath forward and encouraging the top layer backwards.)
I like to sew this bit with the zip unzipped and then zip it up when I’ve nearly reached the bottom. I sew the rest with the zip done up.
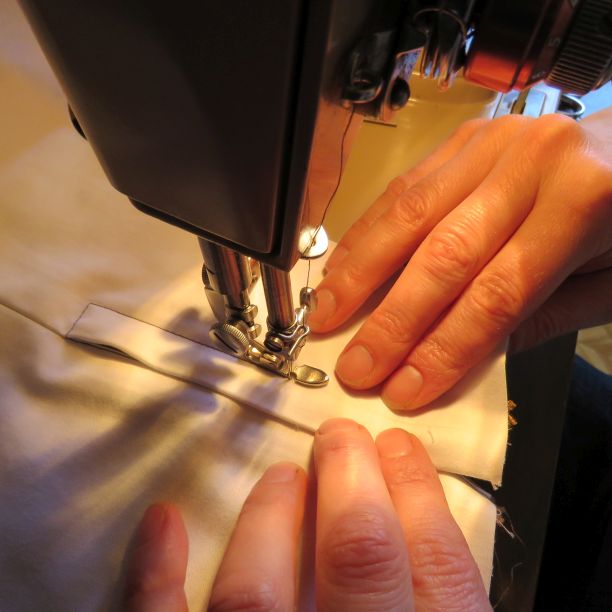
6. As you approach the end of the zip, make sure you keep that little 3mm (1/8″) step you pressed in. Otherwise you’ll see the stitching when the zip is finished.
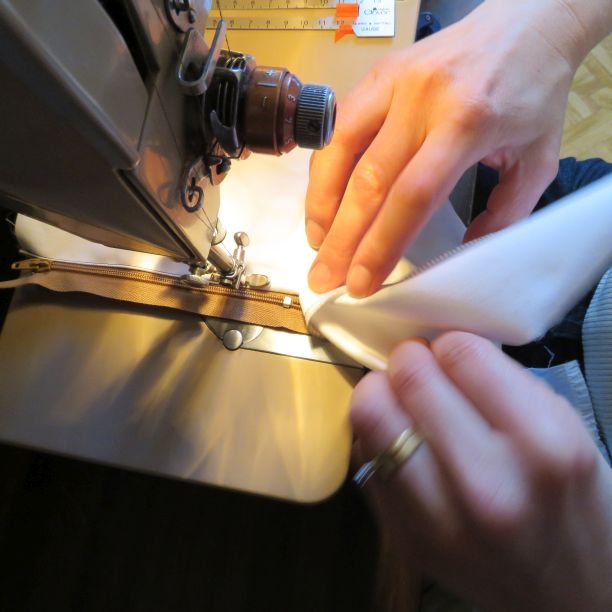
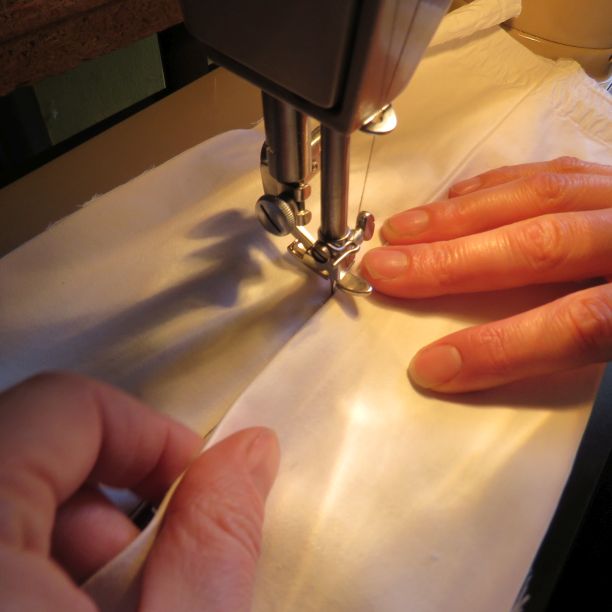
7. Stop sewing with the needle in the fabric, making sure you’ve passed the metal tab at the end.
Lift the presser foot and turn the work 90 degrees anticlockwise.
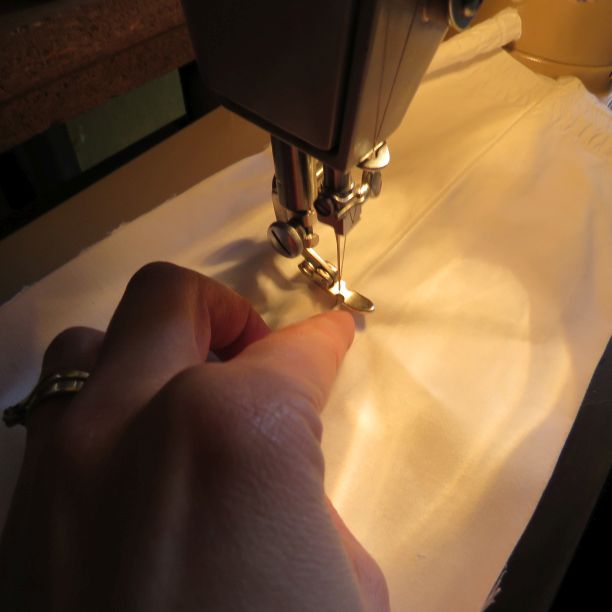
Lift the needle using the hand wheel at the side, arrange the second side of the zip to cover the stitching and….
…then bring the needle down again so it goes through all the layers.
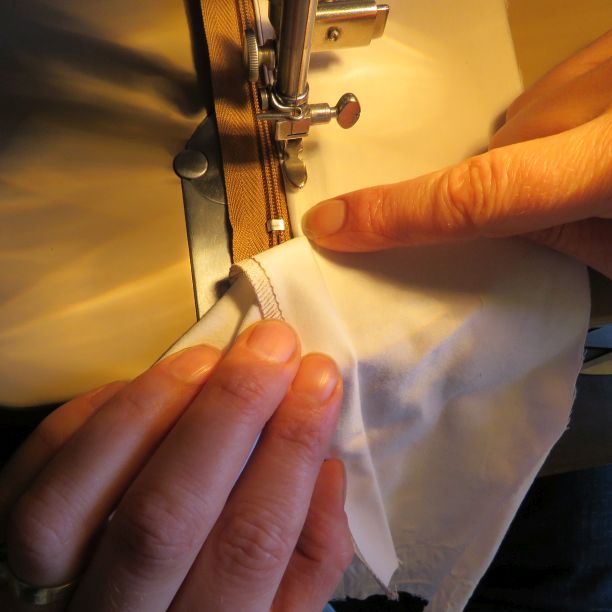
8. Stitch for about 1.2cm-1.5cm. If you only have a 1.5cm seam allowance, keep it at 1.2cm. Lift the foot ready to pivot the fabric.
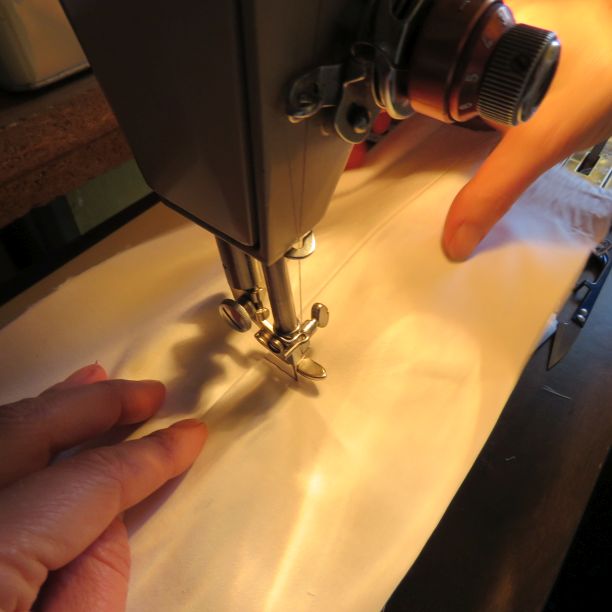
9. Then turn the fabric another 90 degrees anticlockwise and you’re ready to sew the second side.
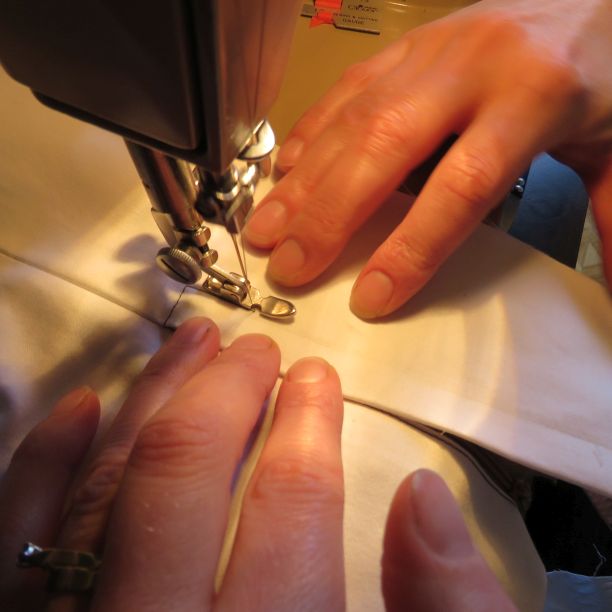
10. The next part is harder. As you sew, you’ll need to encourage the top layer to push backwards, otherwise this side of the zip will end up longer at the top. Position your hands either side of the presser foot to help it along. At the same time you need to sew in a straight line with the folded edge just covering the first line of stitching, but you’ll have the chalk line to guide you here. You can use pins if you need to; the universe will keep turning.
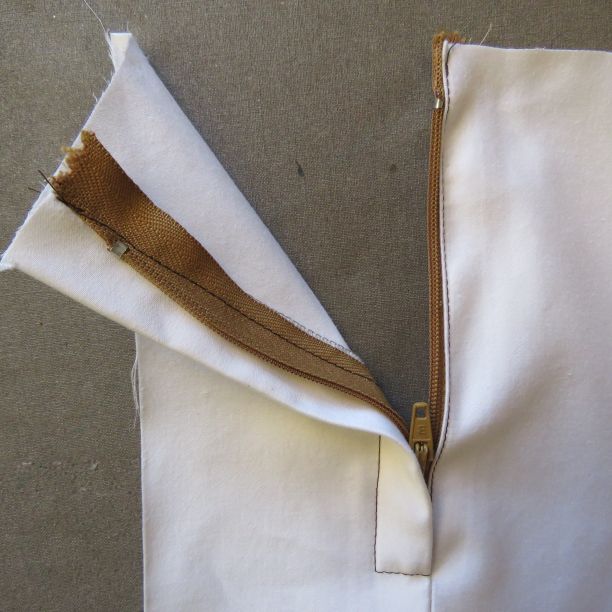
11. When you’re about 4cm (1 1/2″) from the end, open the zip and angle it a few millimetres to the right so that you’ll keep sewing in a straight line but the zipper tape will be tucked under further. This will give more space for the zipper pull to sit when the zip is done up. Unfortunately, those with only 1.5cm seam allowance will have no room to do this.
You can see what this looks like finished on the header photo of this blog post – the side that is open has the zipper tape moved across.
And that’s it! Don’t feel bad if you don’t nail it first go – I sure didn’t!

My favourite 11 year old has produced a video of this tutorial for your viewing pleasure.
Troubleshooting guide
One side of the zip is higher than the other. If it’s only a few millimetres, I say leave it. If it’s more, unpick the second side of the zip and press it to restore the stretched fabric. Pin it carefully and re-sew. As you sew, place each hand either side of the presser foot and try to encourage the top layer backwards, so it doesn’t creep forward again.
Zip doesn’t lie flat. The fabric has been stretched, rather than eased, as you sewed the zip in. If you don’t actively ease the zip and control the fabric as you sew, the fabric will stretch all by itself. To remedy, unpick the zip and see if you can restore the fabric by shrinking it back to size with a steam iron. When the fabric has been restored to its original state, fuse a strip of very light interfacing to each side to stabilize, then sew the zip in again.
Cheers!
Discover more from The Craft of Clothes
Subscribe to get the latest posts sent to your email.