Free pattern: dress-ups cape
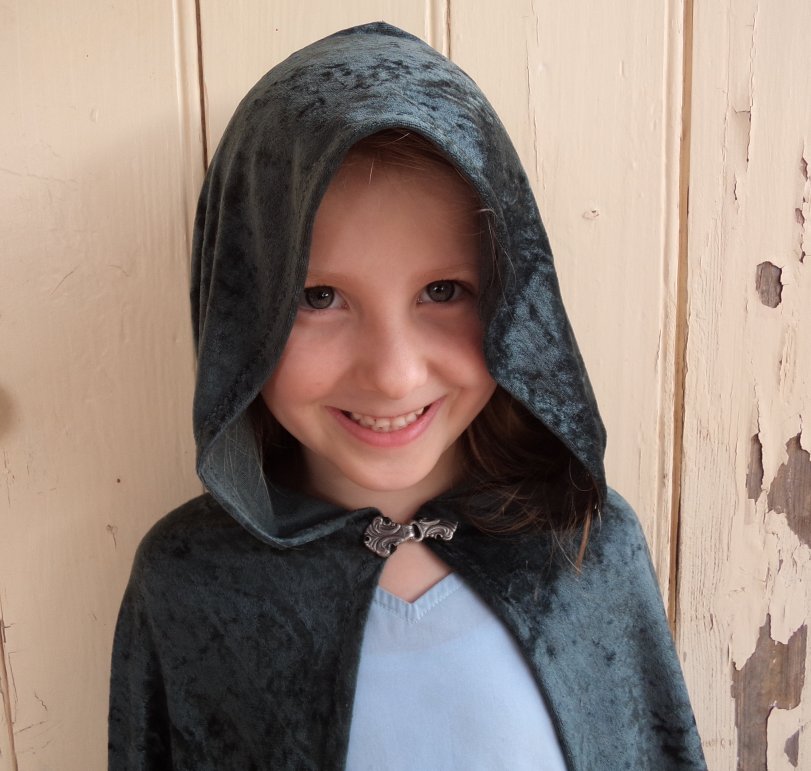
Every dress-ups box needs at least one cape, preferably several, for any fancy dress situation. A cape can outlast those fairy dresses, cowboy vests and Buzz Lightyear suits and still be going strong at fancy dress parties a decade or two later.
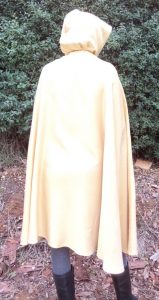
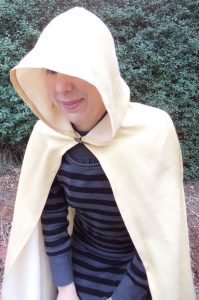
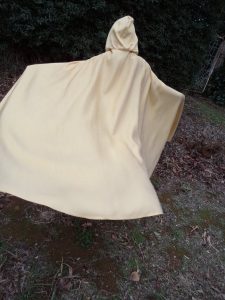
This adult or child-sized cape is a semi circle of fabric with a hood pleated on. The front edges meet edge-to-edge with a single hook at the throat.
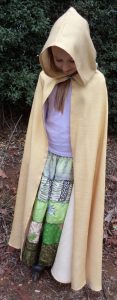
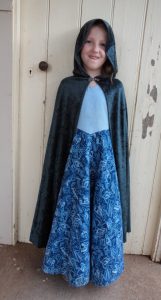
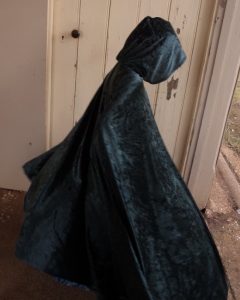
The same adult-sized cape worn by my favourite seven-and-a-half year old. The green one fits her better, but this is ok -just roomier.
The best fabrics are drapey and lightweight. If you choose a thick fabric, your cape may be uncomfortably heavy to wear. Old, full-length curtains can be good (and cheap!). Check that the fabric is wide enough; in fact, your cape length may be determined by your fabric width.
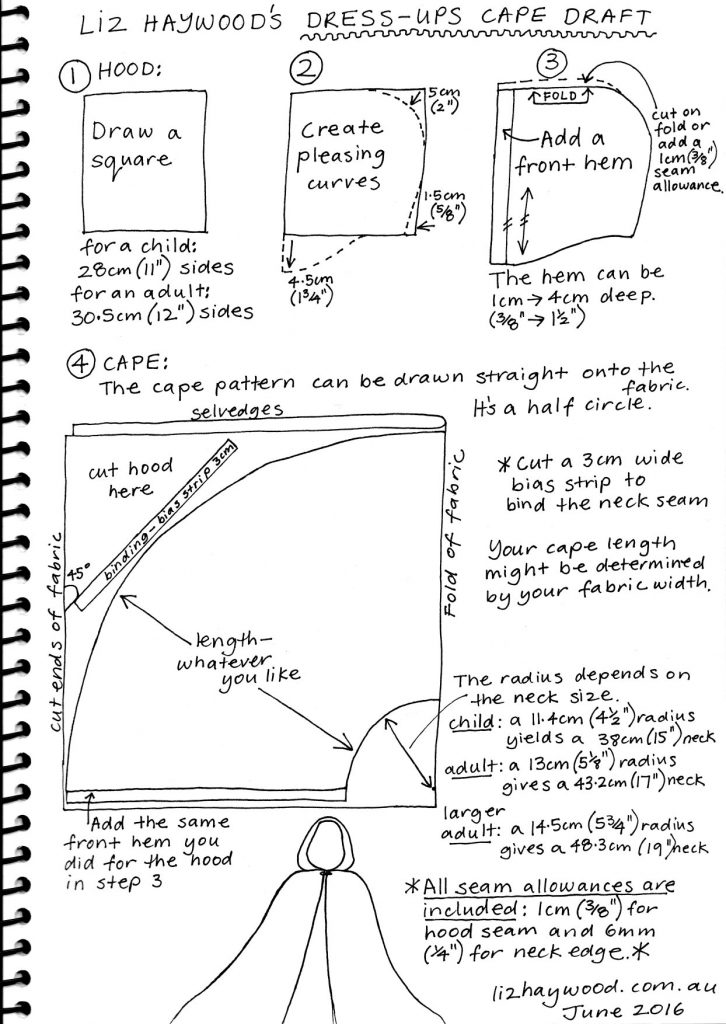
Here’s the step-by-step guide; scroll down to the end for the summary if you want the overview first.
We’ll make a paper pattern for the hood, but the actual cape can be drawn straight onto the fabric. You can make a pattern for it if you wish, but it takes a lot of paper. Note that seam allowances are already included in this draft: 1cm (3/8″) for the hood seam and 6mm (1/4″) for the neck seam.
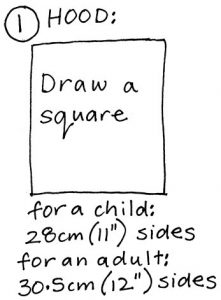
Begin by drawing a square on a piece of paper. If you are an adult with a really big head (or big hair), consider making the square bigger. Also note that an adult hood will fit a child; it will just be roomier.
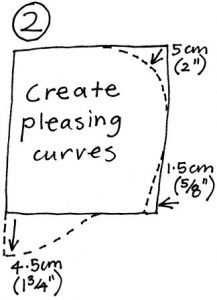
Mark in the measurements as shown, and draw in curved lines. If you don’t recognize the shape yet, the top of the square will be the top of the head, the right side is at the back of the head, the left side will be around the face, and the lower edge is the neck and will be sewn to the cape.
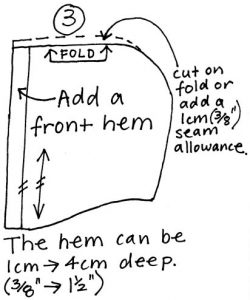
The hood pattern is nearly complete. Add a front hem to the left side as indicated. The green crushed velvet cape has a 1cm hem, and the gold cape has a 2cm hem. Draw in a grainline parallel to the front edge. The top edge should preferably be cut on the fold, so you don’t see a seam line around the face, but you may not have space to do this on your fabric. Instead, add a 1cm seam allowance at the top only and cut 2 of the hood. Hood pattern finished.
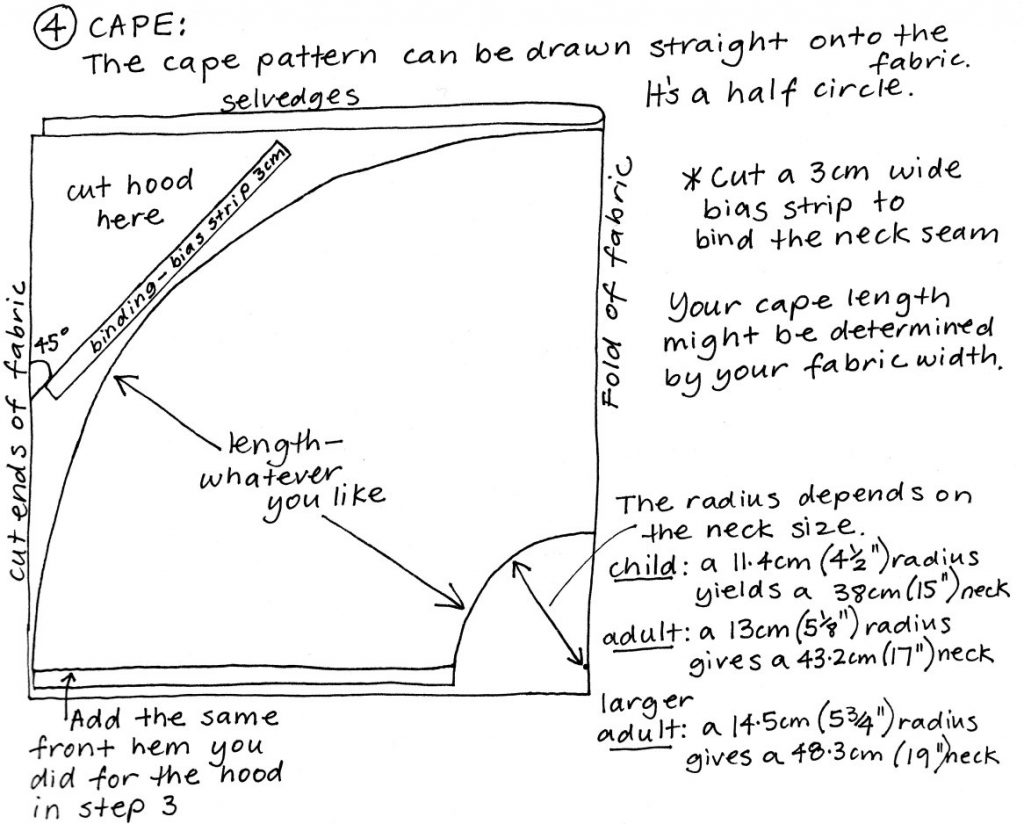
The semi-circular cape pattern is drawn onto the folded fabric. To check your neck size, measure closely around your neck and add 3″. For example, my neck measures 14″, so I’ll cut a cape with a 17″ neck by measuring a 5 1/8″ radius out from the centre. [If your neck size is bigger, like a “larger adult”, an “adult” size hood will still be fine; it will just have less pleats.]
Sewing the cape:
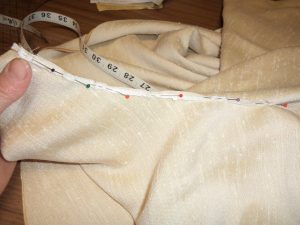
Step 1. Before you handle the cape too much (ideally before you shift the cape off the cutting table), stabilize the neck edge with tape. You can use 6mm cotton tape, but I used a narrow strip cut off the selvedge (you can do this too if the selvedge is good enough). Cut the tape the length of the neck + the hems at each end. Mark the centre so you can match it up. Pin and stitch the tape next to the edge, on the wrong side.
Step 2. Sew the head seam in the hood to create, well, a hood. There’s a 1cm seam allowance. A French seam is best to use for a neat appearance when the hood is back.
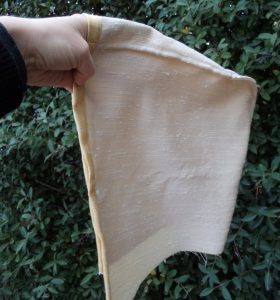
The seamed hood. I’ve gone onto step 3 and hemmed the front edge, too. Note that this hood has a seam at the top of the head -a fold would have looked better but there wasn’t enough fabric. This hood is now ready to attach to the cape.
Step 3. Hem the front edges of the cape and hood.
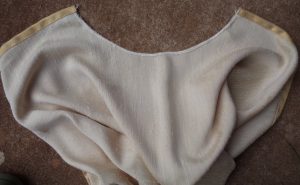
The top edge of the cape with the neck stabilized with tape and the front edges hemmed. It’s ready to be attached to the hood.
Step 4. Pleat the hood onto the cape, with right sides together. Pin the right side of the bias strip onto the wrong side of the hood. At the ends, wrap the bias strip around the layers for about an inch, and sew together. Sew all three layers together with a 6mm seam, sewing with the cape side uppermost. Finish off the binding by folding it over the raw edges and hand sewing it down.
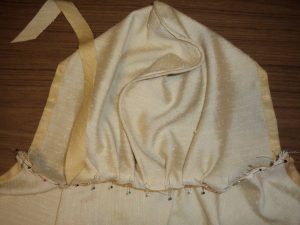
The hood and cape pinned together. The excess fabric in the hood has been pleated evenly before attaching it. The binding strip has been partly pinned on.
Step 5. Hem the cape. The hem needs to be narrow because the edge is curved. If the fabric doesn’t fray you can leave it unhemmed -I did this with the green crushed velour. For the gold cape, I overlocked the edge, turned it up 1cm and machine stitched. You could also babylock the edge.
Step 6. Sew a hook at the throat of the cape to do it up. You could also use a button and loop. If you prefer ties, cut the bias strip for the neck longer to form the ties as well.
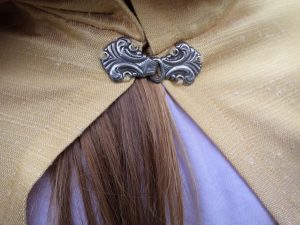
I used a clasp intended for a Scandinavian jumper (that I am never going to get around to knitting).
Summary of sewing order:
- Tape the neck of the cape to stabilize it.
- Sew the head seam of the hood (1cm seam).
- Hem the front edges of the cape and hood.
- Attach hood to cape and bind seam (6mm seam).
- Hem cape.
- Sew hood at throat.
Have fun twirling!

Update: I wore the cape to a Pirates and Princesses fancy dress, not long after. It was a very successful costume.


How much fabric is needed?
The gold one used 2.40m x 1.2m and reaches to my knee (I’m 5’6″). I hope that’s helpful.
Hi, I’m looking to use a 1.5m wide fabric and I’m also 5’6″ like you, but I’d like the cape to come to just above my ankles. Could you help with how many metres of fabric I’d need please? I’d be using the larger adult neck size and I won’t be adding a hood. It’s my first time sewing anything so any help is appreciated!!!
Hi Elizabeth, try 3m of 150cm wide fabric. You’ll end up with a cape about 135.5cm long (maths: 150cm wide fabric minus 14.5cm neck radius = 135.5cm). The wider the fabric you can get, the longer the cape can be – just double the width of the fabric to get the required meterage (eg – if you can get 165cm wide fabric, you’ll need 165 + 165 = 3.30m. This would yield a cape 150.5cm long).
Best wishes with it!
I just made a cloak for my son using your instructions today and it came out great! I’m not sure that I did the neckline right, it is weird on the inside with the hood back. I haven’t sewed anything in years so that’s part of my learning curve. Thank you for making this free pattern available!
Excellent! and Welcome Back to sewing 🙂
Those capes in the photos are still going strong after 5 years; I’m sure your son will use his for a long time.
Bonjour,
Je dois faire ou plutôt j’ai promis de faire une cape médiéval avec capuche pointue. Mais mon gaillard fait 1m80 et aimerais assez bas sous le mollet , le bas droit. Mais j’ai vu laize à 180 cm comment puis je augmenter la dimension ? Et dois t on aussi faire attention au droit fil, au sens du tissu , je suppose. merci
I have to make or rather I promised to make a medieval cape with pointed hood. But my fellow is 1.80m and would like it low enough under the calf, the bottom right. But I saw width at 180 cm how can I increase the size? And do we also have to pay attention to the straight grain, to the direction of the fabric, I suppose. thank you
Pour faire une cape plus longue, vous aurez besoin d’une plus grande longueur de tissu.
La longueur du tissu doit être le double de la largeur.
Si vous utilisez une pièce de 150 cm de large et 3 m de long, cela vous donnera une cape de 135 cm de long qui pourrait être assez longue pour votre personne.
Si vous trouvez du tissu de 180 cm de large, il vous faudra 3,60 m et la cape fera 155 cm de long.
J’espère que je comprends votre situation – meilleurs voeux.
To make a longer cape, you’ll need a longer length of fabric.
The length of the fabric need to be double the width.
If you use a piece 150cm wide and 3m long, it will give you a cape that’s 135cm long which might be long enough for your person.
If you find some fabric that is 180cm wide, you’ll need 3.60m and the cape will be 155cm long.
I hope I’m understanding your situation – best wishes with it.
Brilliant instructions, thank you.
Am adapting for a dinosaur cape for my 3 year old grandson! Adding dinosaur spines down back centre seam.
That sounds wonderful!
Thank you very much for this pattern! It’s very helpful.
No worries, Ashley!
Thank you very much Liz for the pattern and instructions!
I made a hip length cape out of a black cordoroy remnant for grandson aged 7 years for upcoming halloween 2024. I lined it with red remnant at back and purple remnants each side.
Just need a chunky clasp for the stand up collar!
You’re welcome Liz. I’d forgotten Halloween is coming up; your grandson’s costume sounds fab. Should be very dramatic!
Thank you for sharing this, Liz! I made a fun cape for my son’s Halloween costume, and he loves it. And I love that these instructions were free. 🙂
Excellent! I’m sure he will keep on wearing it. My children are now in their teens and the capes still get a wear every now and then.
This post was SO helpful to me, thank you, I made some angel capes for our school nativity based on your sketches which, as a total amateur, made so much more sense to me than all the other millions of patterns I’ve googled!! Thanks again!
Excellent! So happy it worked out well for you, and I hope the nativity’s a hit.
Thank you so very much for sharing!! I am making a cloak for winter use on woodland walks and this fits perfectly. I am using a queen size wool blanket for the fabric. Simple, easy to follow instructions. Was trying to figure out the attachment of the hood which your pattern and photos showed perfectly. Thank you again!
Your winter cloak sounds excellent. Many thanks for coming back to leave a comment, I appreciate it 🙂