Free pattern: pajama pants (or shorts)
Hello All, today here’s a simple draft for a pair of pajama pants. They could also be shorts, three-quarter length, or whatever length you like.
This pattern is very nearly a zero-waste pattern. If your hip measurement is 39″ or less and your fabric width is 150cm, then you’ll have almost no waste at all.
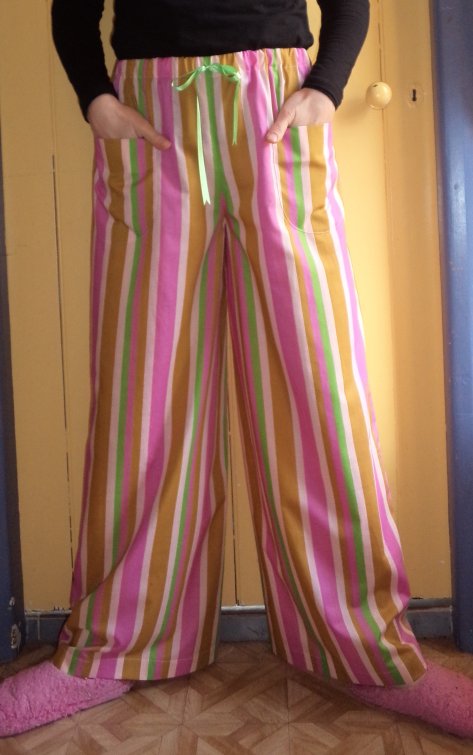
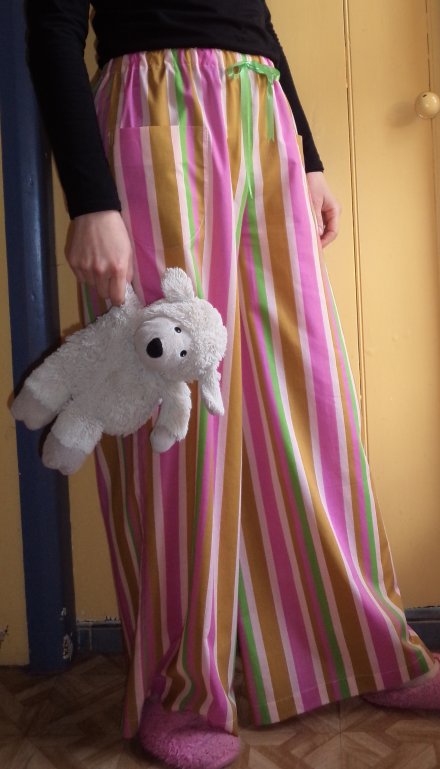
The pajama pants have two rounded patch pockets and an elastic waist. The ribbon bow is there for decoration.

The leg cut is fairly wide and flow-y.
To draft the pattern you’ll need your hip measurement, pants length measurement, a ruler, pencil, L-square and paper. Take your hip measurement around the fullest part of your bum/seat, which is about 20cm (8″) down from your natural waistline.
If you want to make baggier pants, add a couple of inches to your hip measurement. Note, though, that it will make the leg wider too. If you’re not sure, just give yourself big seam allowances on the side seams when you draft the pattern, then you can fine-tune the bagginess when you sew them.
Fabric requirements: For 112cm (45″) wide fabric, you’ll need twice your length. For 150cm (60″) fabric, you’ll also need twice your length unless (as already mentioned) your hip measurement is 39″ or less; in that case only once your length. The striped fabric I used is a lightweight cotton.
Here’s the summary of the draft and sewing instructions, followed by the step-by-step details:

To draft the pattern:

Step 1: Begin with a rectangle. Make the width 3/4 of your hip measurement, but don’t commit to the rectangle’s length yet. My hip measurement is 38″, so the width of my rectangle is 28.5″.
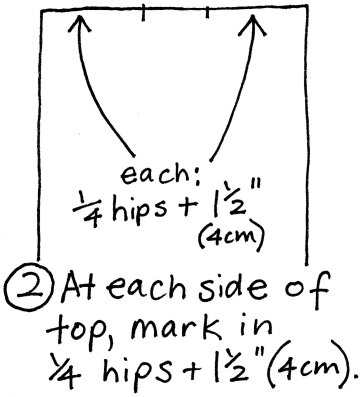
Step 2: Calculate 1/4 of your hip measurement (mine is 9.5″). Add 1.5″ (4cm) and mark in as shown.
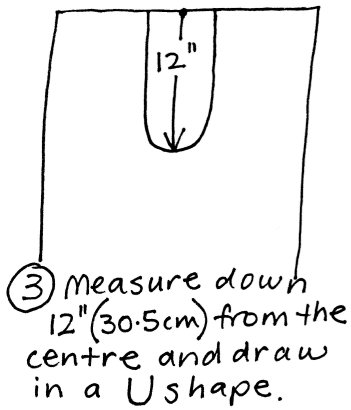
Step 3: Fold the paper in half to draw a symmetrical U shape. This U shape forms the crotch depth, and can be made lower if you find it’s too high when the pants are finished. 12″ suits me (38″ hips), but if you have (40″, 42″, 44″, 46″) hips, try making it (12.25″, 12.5″, 12.75″, 13″). Err on the high side because if it’s too low you can’t make it higher.
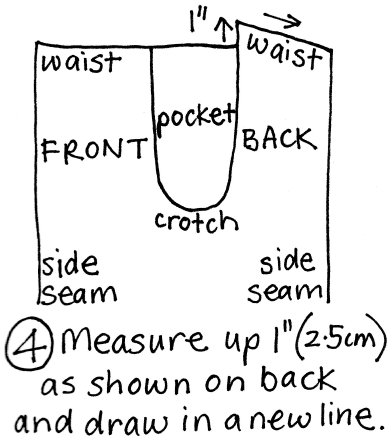
Step 4: Are you starting to see the shape of the pants pattern yet? The front and back are joined at the inside leg, so there’s no inside leg seam. In this step we’re making the centre back waist 1″ higher so it’s more comfortable and we don’t get an eyefull when you bend over!

Step 5: Draw in the final length, allowing for a hem too. I made mine 111cm (43.75″) from top cut edge to bottom cut edge. I took a 1.5″ hem.
To sew:
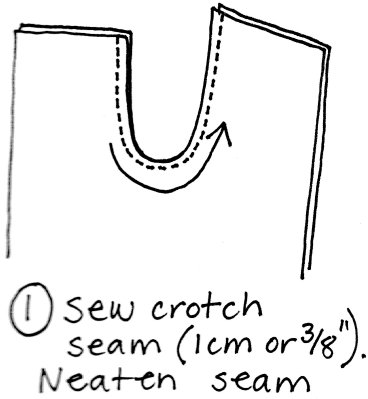
Sewing step 1: This seam can be stitched in a lower U if you find the crotch is too high when the pants are finished.
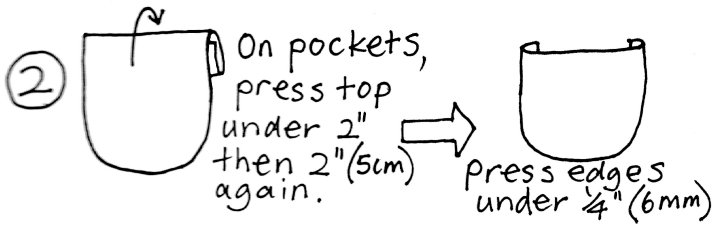
Sewing step 2: The top of the pockets has a double folded hem; this can be stitched or left unstitched. I left mine unstitched.
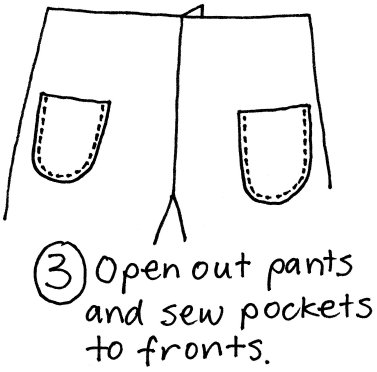
Sewing step 3: I sewed my pockets on 6.25″ down from the top raw edge, and 1″ in from the side raw edge, but of course you can sew yours on wherever you like.
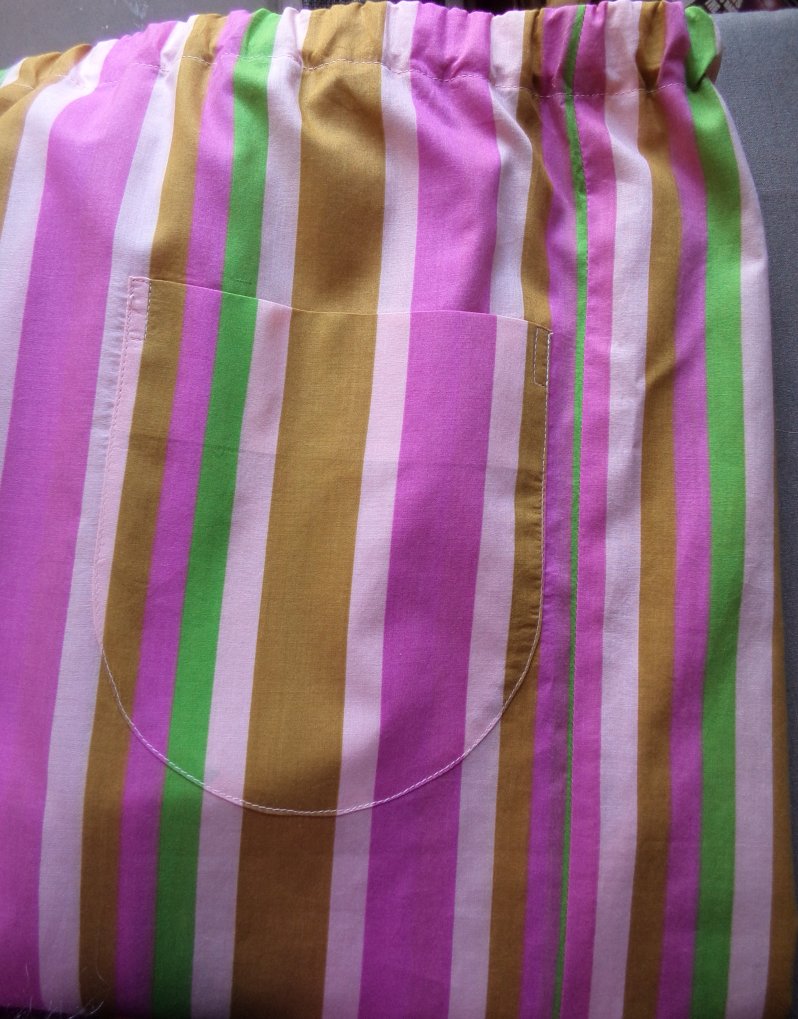
By some miracle, totally unplanned, the stripes matched on each pocket!
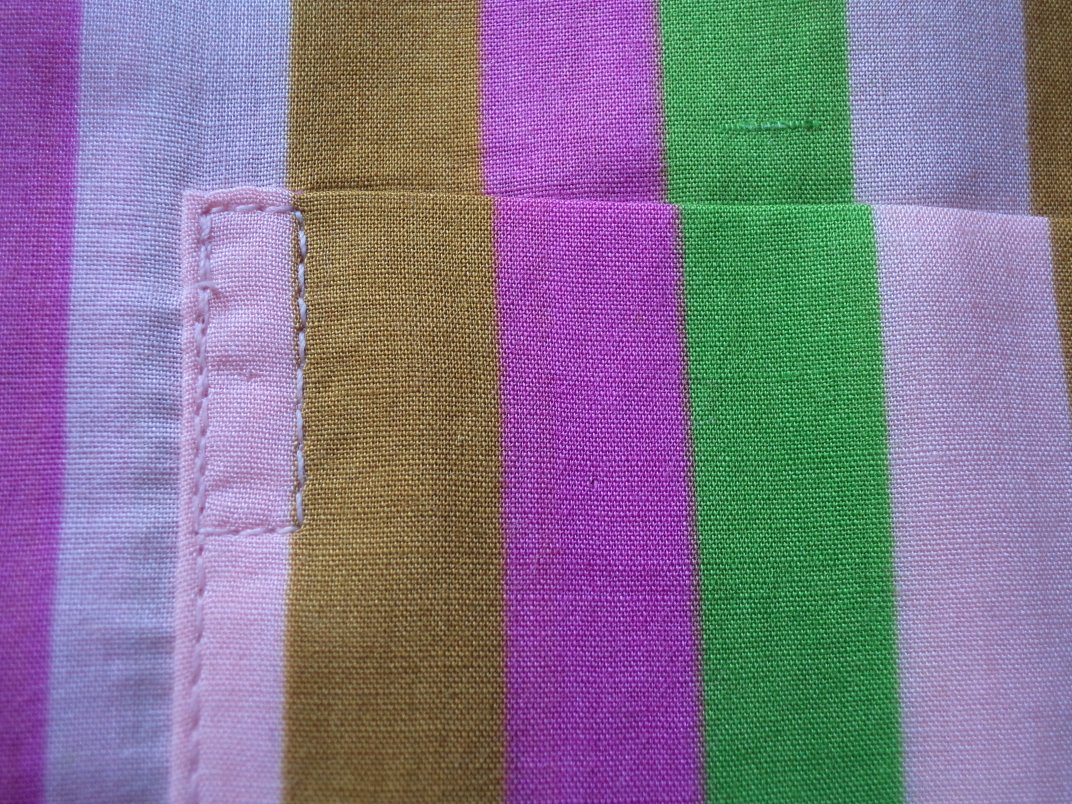
I highly recommend reinforcing the top corners of the pockets with rectangular or triangular stitching.

Sewing step 4: If the fabric is fine, hold the seams taut under the machine as you sew them. This will help them sit flat.
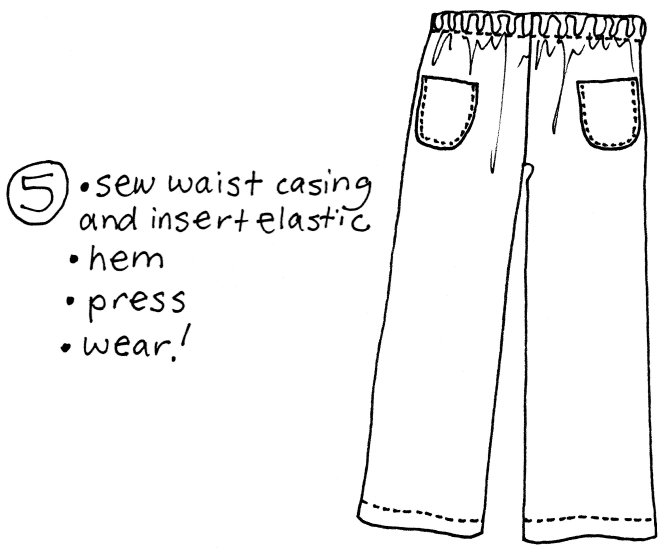
Sewing step 5: The final bits! I added a bow at the centre front. You could also stitch ribbon around the hems, or add some decoration to the pockets.
I hope you enjoy making and wearing these. This week I’m trying out the draft for a children’s pair. [Update: take a look at the children’s draft here]
You might also enjoy another zero waste trousers pattern here.
Cheers!
Thank you so much for simple and excellent pajama pants pattern! I have the fabric ready and know my grandchildren will enjoy wearing their new jammies all winter long. You are a doll for sharing!
You’re welcome Joellen 🙂
Hi Liz! I know this is an older post, but would it be wise to use knit fabric for this? I have some jersey sheets I was gifted (they’re seconds quality, but still tons of yardage available to use!) and all this gorgeous fabric is burning a hole in my fabric box! 😉
I’m also in desperate need of some summer workout/hiking-style shorts. I know with traditional patterns using knit on a woven pattern is a big no-no. Should I just size down a bit? Thanks so much!
Hi Ash, yes, you could use knits for this, and make them a bit smaller width-wise, and cut them with the stretch going around your body. Have you got a pair at home you could measure as a guide? Then you can get an idea of how wide you need them.
Thanks so much, Liz! I will definitely try that. I did dig out an old patched-up pair that I love and actually found the exact material at a fabric store locally called ‘athletic twill’, didn’t know that was a thing, but hopefully, that will sew up nicely this weekend. Although I don’t love working with wovens, hopefully, I can mimic my old beloved pair! Let’s see if my grandmothers’ sewing machine gets a chance this weekend, or maybe sewing by hand in the hammock! 😉
I made myself some shorts using this pattern! 😀
I put the patch pockets on the back instead, and did in-seam pockets (10″ deep, 6½” wide) for the front. I also did a facing on the waist, instead of turning the hem down. Partly because I figured it would be easier than figuring out just how best to turn down a pointed hem, partly for length.
I think for the next ones I do, I’ll move the crotch cutout a little further toward the front to shift the side seams forward and thus move the pocket openings to a slightly more comfortable position. Also may make them a bit longer. I forgot about the 1½ inch removed from the top of the front when doing my measuring. I’d thought I was cutting them slightly below the knee, but instead they’re right at knee length while standing. Shorter sitting.
Very low waste indeed. I used 40″ of 46″ wide fabric, and these are all of my scraps:
(two moon-shaped bits because I adjusted the crotch depth twice)
The in-seam pockets were cut from one of the rectangles left from cutting the width of the shorts, and the facings were cut from the other. The big scrap is what’s left of that second rectangle. (the two longish selvage strips are what’s left of the first)
I later thought of a few ways I could have made even more efficient use of the fabric. I decided to do a facing after I’d cut the main section, but if I had planned it from the start, I could have folded the front piece down instead of cutting it off. I couldn’t us the cut off strips for the facing since I needed 2″ facings, but if I folded instead, I’d be eliminating that ¼” top seam.
Also, if I’d top-and-tailed the back facings instead of doing them from two strips to preserve pattern directionality (which is far less important on a facing than the outside, granted), I could have cut them from 5½” instead of 7″, and also not have created two of those four triangle scraps.
With those two adjustments combined, the large scrap would have been 5½” longer.
Or, potentially, I could have slid the whole pattern down on the fabric 2″ and cut the back facings from that space, so they shared the diagonal cut with the back of the shorts. I’d then have two 2″ wide strips of scrap from the front, and be using 2″ more total length of fabric, but I’d eliminate the triangle scraps altogether, and I wouldn’t cut into the second rectangle from beside the shorts at all. Maybe I’d make bigger pockets, one from each rectangle, instead of both from one rectangle.
They are very cool shorts! I can see your next pair being perfect in fit and more efficient in fabric. Thanks for sharing all the details.
… the html for the image imbeds appears to not be working. darn. and here I thought I was being clever.
Well, it’s the first three pictures and the last one from this post:
https://www.tumblr.com/nonbinary-octopus/779943920072359937/i-realized-that-theres-nothing-stopping-me-from?source=share
thanks so much for posting these instructions, and I did an eight inch rise, and a an extra three inches for the back panel. it turned out great!
Hi Lucia, so happy they worked out well for you, and thanks for giving them a whirl.