When the Right Hem Stitch Matters
I hemmed a wool skirt during the week, and realised at the end I’d used the wrong handstitch. Felt like an idiot (didn’t I write a book on sewing?). Not that anyone passing in the street would notice a skirt’s hem stitch, and I’m sure the universe will keep on turning, but the wearer will know!
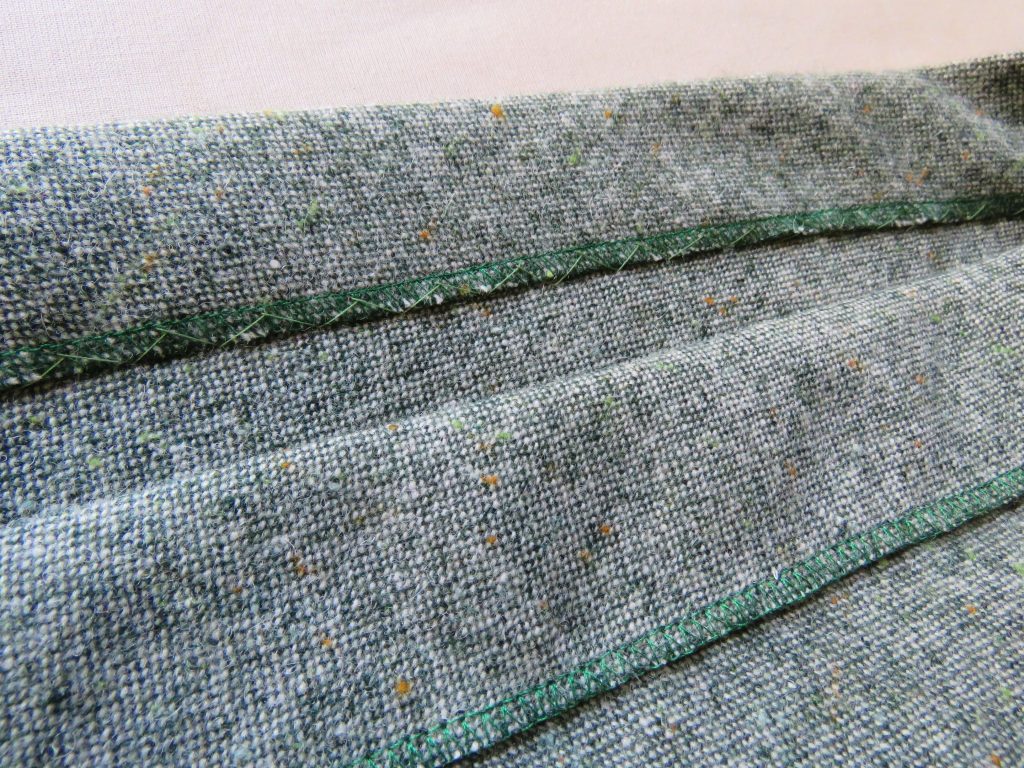
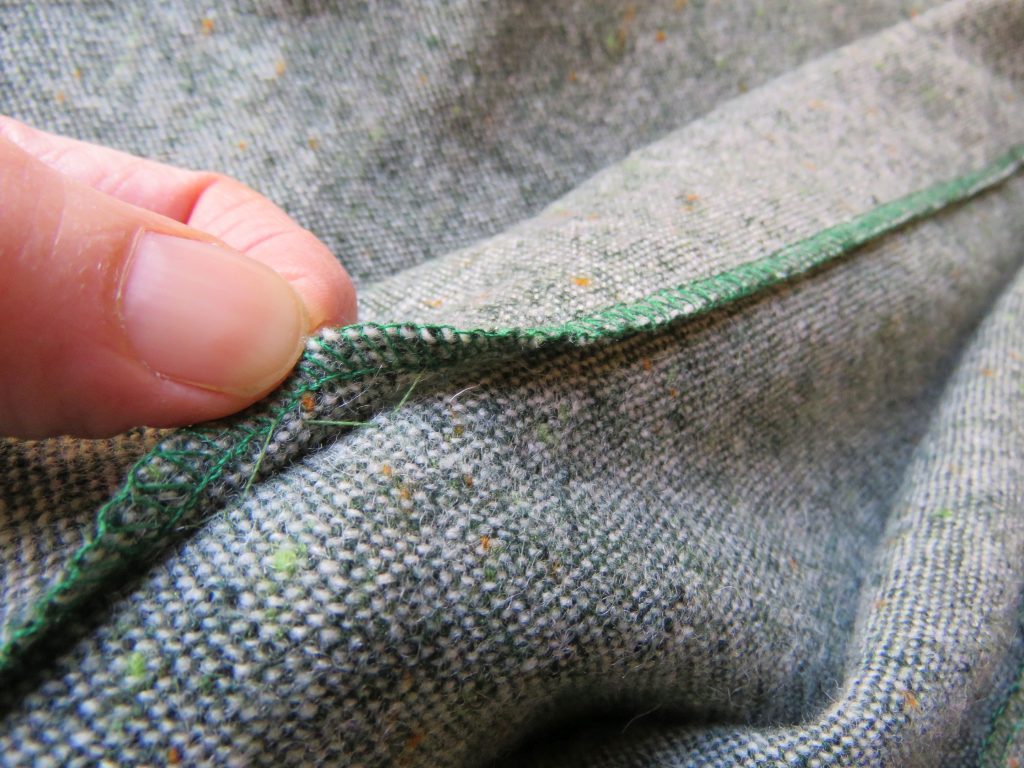
The fabric is wool, kind of thick but not coat weight. I overlocked the raw edge, turned it up once and stitched it with herringbone stitch, my favourite hand stitch.
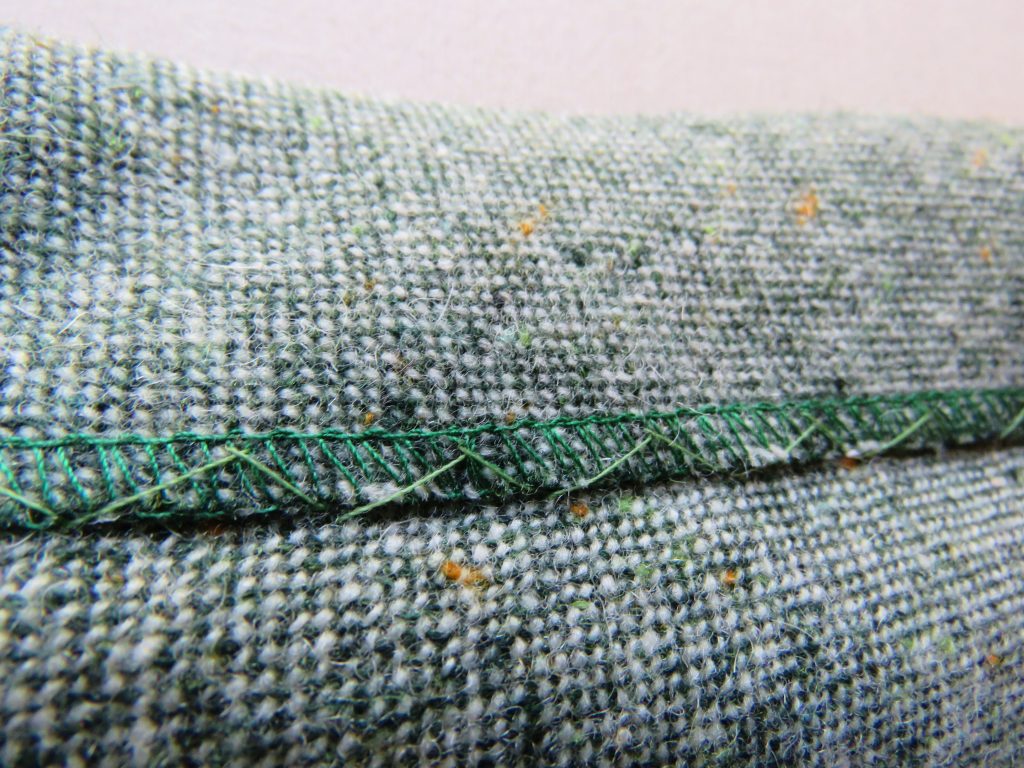
But why was herringbone stitch a bad choice? Herringbone criss-crosses stitches over the raw edge, and presses the edge into the garment. No big deal if the fabric is thin, but with thicker fabrics it creates a ridge on the right side, and is made worse if you put an iron on it.
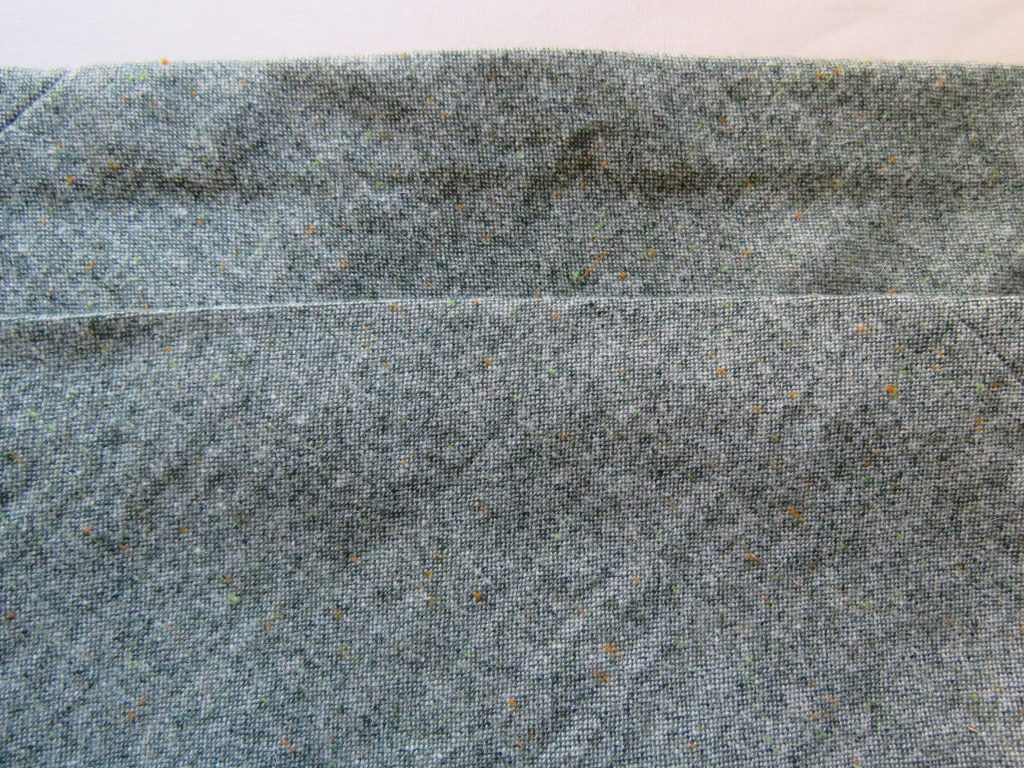
A better choice is blind hem stitch (also known as catch stitch), where the stitching sits between the layers of fabric. I had to do another hem, so I used blind hem stitch.
Can you spot the difference on the right side? It’s subtle but it’s there. The top hem is herringbone stitch and you can see the ridge. Below it is the blind hem stitch, smooth and invisible.
So while both stitches do the job, the fabric decides which looks the best.
How to sew herringbone stitch. It’s one of the few stitches worked from left to right. Take small stitches alternately in the hem and the garment, and make the stitch on the garment side really small, just one thread if you can. Herringbone stitch has a bit of stretch to it, and it’s actually quite a strong stitch. Although the threads seem to be exposed to potential abrasion I’ve never had a problem with it.
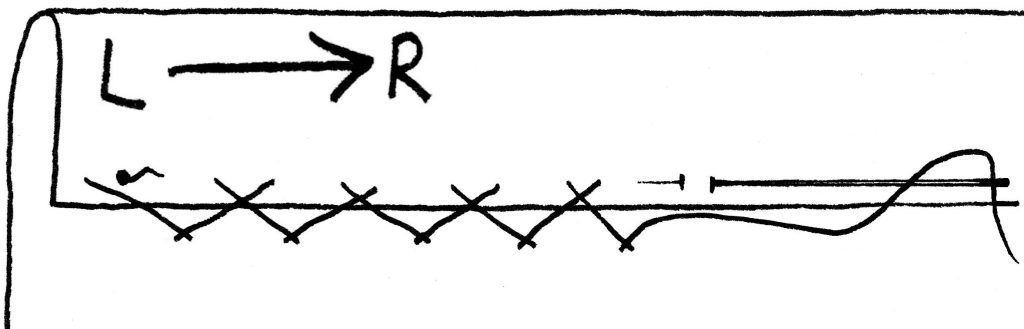
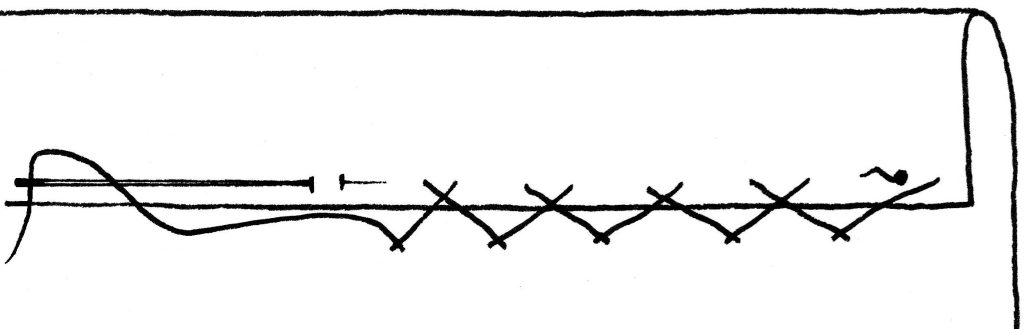
If you’re a left hander, stitch it from right to left.
To sew blind hem stitch, sew from right to left. Fold back the hem edge about 6mm (1/4″) and take alternate stitches between the hem and the garment. Make the garment stitches very small, just one thread if possible. The tension should be loose.
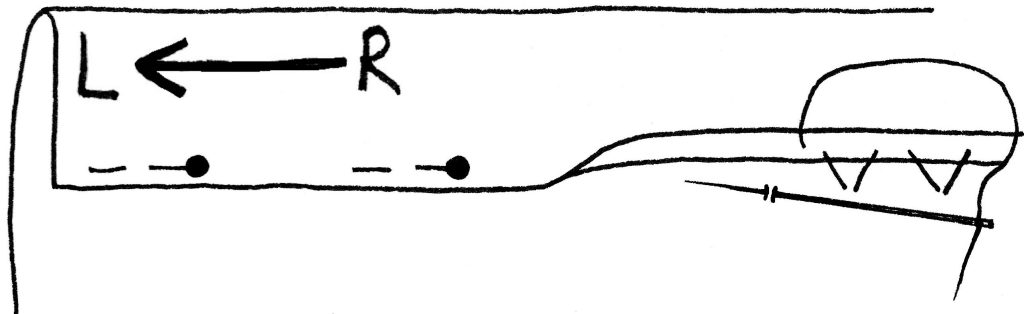
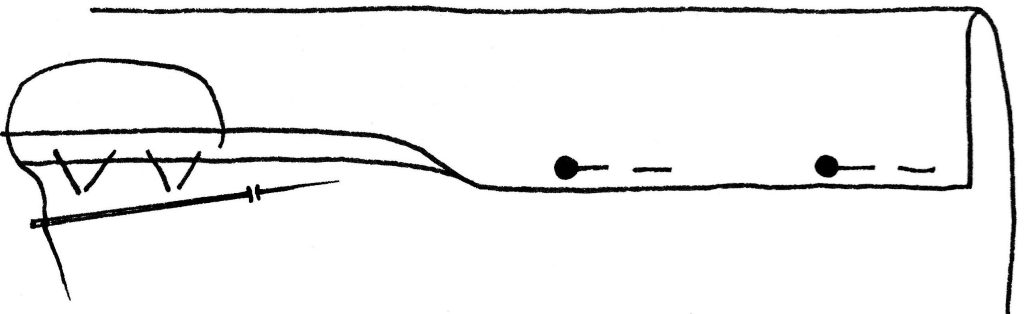
For left handers:
Cheers!
Dear Liz, Thank you so much for this! First of all, I found it hilarious (and reassuring) that the author of a fabulous sewing book would also feel they made a mistake in their sewing. Aand I make this mistake all the time – although I have and regularly read parts of your book! I simply hadn‘t known there was such a difference between the two stitches. So thank you again!
Oh, the mistakes I’ve made! Still, no-one was born knowing how to sew.
On some fabrics there’s quite a big difference between these two stitches.
Cheers!
This post could not have come at a better time for me! I’m at Costume College in Los Angeles this weekend and still need to hem my outfit for tonight’s gala. I’ve been procrastinating because I didn’t know which handstitch to use. Now I do! Thanks, Liz!
My mistake becomes your solution – I love a happy ending! I hope the gala was fun and your costume a big success.
Perfect timing! I found a gorgeous vintage Welsh wool tapestry skirt in my local op shop which I’m altering/remaking (the fabric is in perfect condition but the seams and finishing aren’t). I was going to use herringbone stitch for the hem but now I understand a) it might be a bad idea considering how thick the fabric is, and b) what to do instead. Thank you, Liz.
Vintage Welsh wool tapestry – what a find, and a wonderful opportunity to do some beautiful sewing and hand finishing. Yes, definitely blind hem stitch 🙂
Thank you for explaining this. I now understand why some of my skirts have nicer looking hems than others. I didn’t clue in that my choice of stitch made a difference. I thought it was the fabric, or the stitch size, or the tension, or maybe the thread? … Mystery solved!
I think most of us just use the same stitch for every hem (or a favourite stitch for every hem) but the difference can be quite noticeable. Very happy to solve the mystery 🙂
Great post! My mom taught me to hem with a lock stitch which she learned from her mother and I’ve never done anything else. Good to know I have other options.
Thanks Michelle 🙂 That is very cool that you have hand hemming knowledge passed down – not many people have that.
Wow Liz, I finally feel like I can call myself a sewer! Being short in stature, and all that shortness in my legs (27″ inseam) I have a LOT of experience with hemming garments. Skirts, pants, dresses, sleeves, I know those stitches and am good at them. Me and machines that run on electricity just don’t get along. Thank you so much for sharing your goof! Now I feel like I can do this! 😉
and how in the world can you even handle wool in August anyway?
(P.S. I hope you notice my comment on the Pinafore blog post from ’22)
You are far more experienced at hems than standard-leg-length-me, and you totally are a sewer.
I’m in southern Australia and it’s winter, so wool is very appropriate atm. It’s not always bikinis and sunshine here haha!
Just about to reply to your pinafore comment. Many thanks 🙂
So helpful!! Thank you for sharing and explaining it all. Hooray for finding and using the perfect stitch!
So happy it was helpful. Cheers!
Thanks for the tip, it does look much neater with the blind stitch indeed, I’ll keep it in mind!
Thanks Liseli 🙂