Making the Bias Shift Top
The Bias Shift top is a new pattern by Emily Klug of Goldfinch Textile Studio. It’s a minimal waste top with two options for the hem, round neckline and cap sleeves.
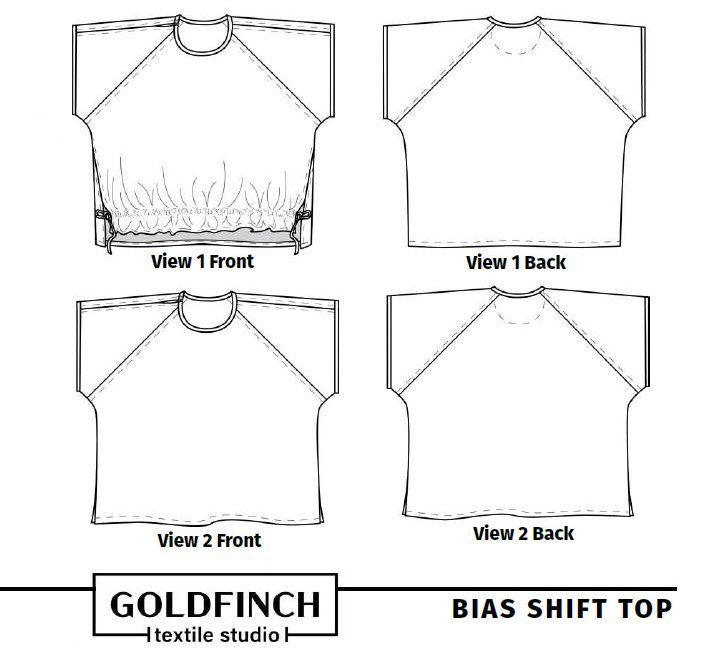
View a selection of tops made by the pattern testers, made in a huge variety of fabrics including stripes, checks and prints.
The pattern comes in 18 sizes, to fit from a 30″/76.2cm bust to a 64″/162.6cm bust, with comprehensive finished garment measurements and a guide to making adjustments. If you’re a large size with a large bust, I predict this pattern will work well for you.
The Bias Shift Top has an unusual and clever construction. The instructions are very thorough indeed, with options for printing out the pattern or drawing it straight onto the fabric. There are a large number of pages for the pattern pieces and sewing which is initially daunting, but if you keep these on-screen and are happy drawing the pattern directly onto the fabric, the single page of neckline templates is the only thing that needs printing.
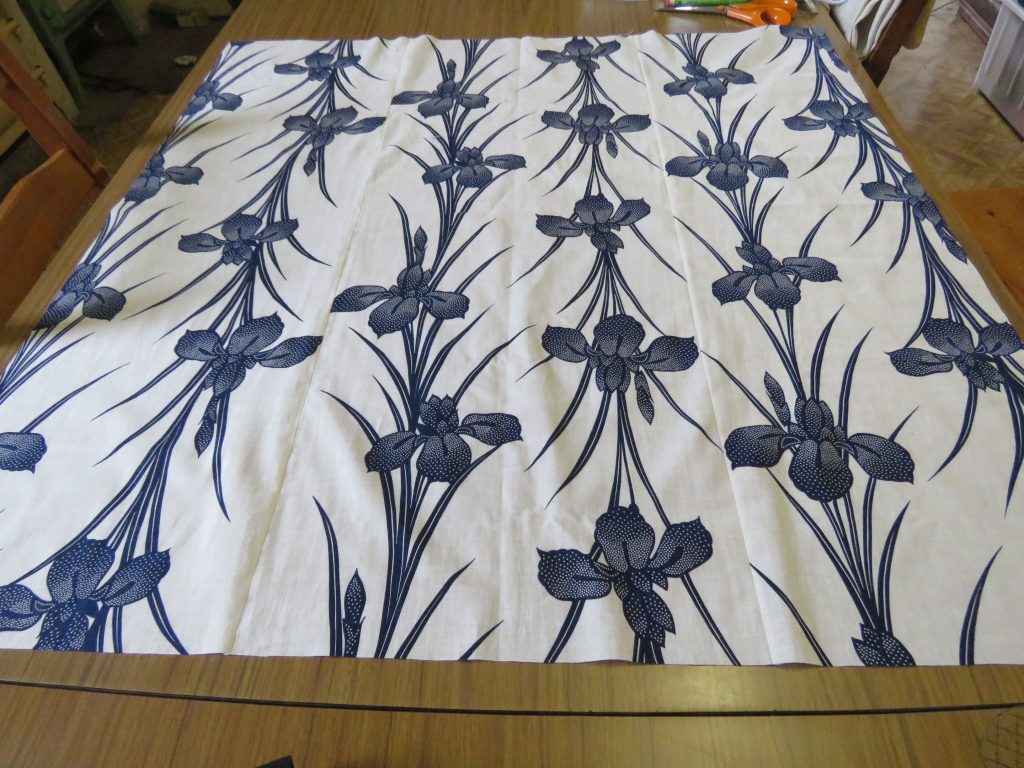
For fabric I chose some Japanese cotton which was given to me (L from Hallet Cove, if you’re reading this I’ve put your stash to very good use). The print is lovely and fresh.
The pattern suggests lightweight woven fabrics with no stretch and good drape, with stable fabrics recommended for easier sewing. As it’s very economical on fabric, if you have a small amount of special fabric, this could be the pattern for it. Mine was cut from a mere 89cm x 89cm.
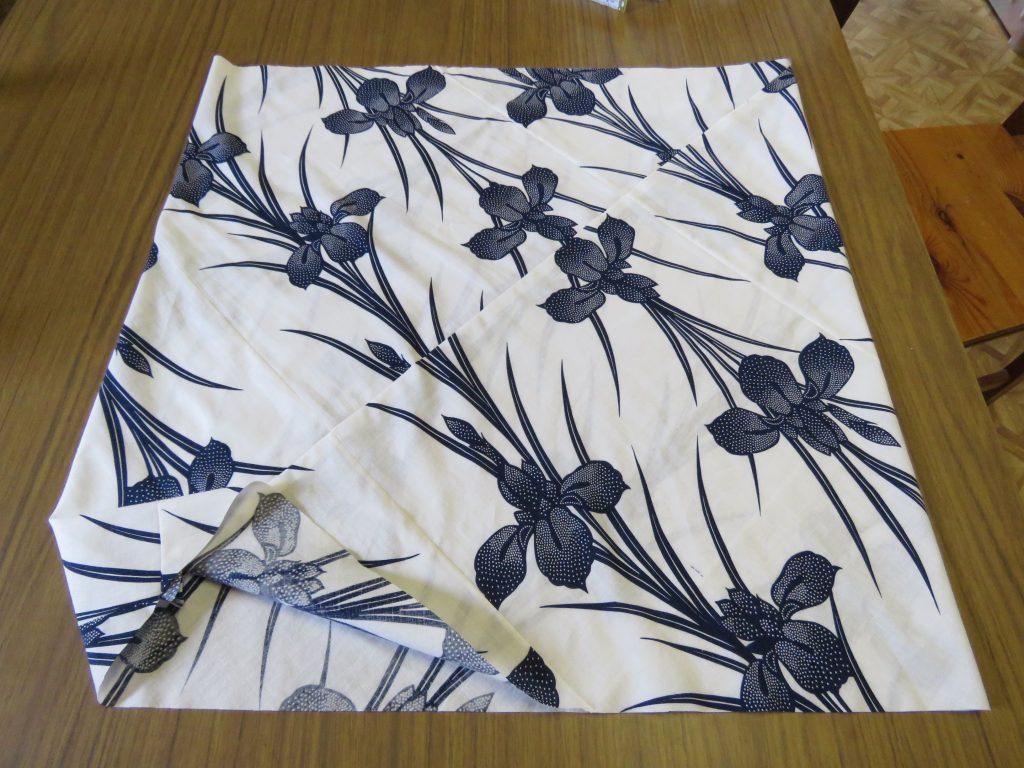
As the Japanese cotton was too narrow (yet plentiful), I joined three pieces to make the correct size.
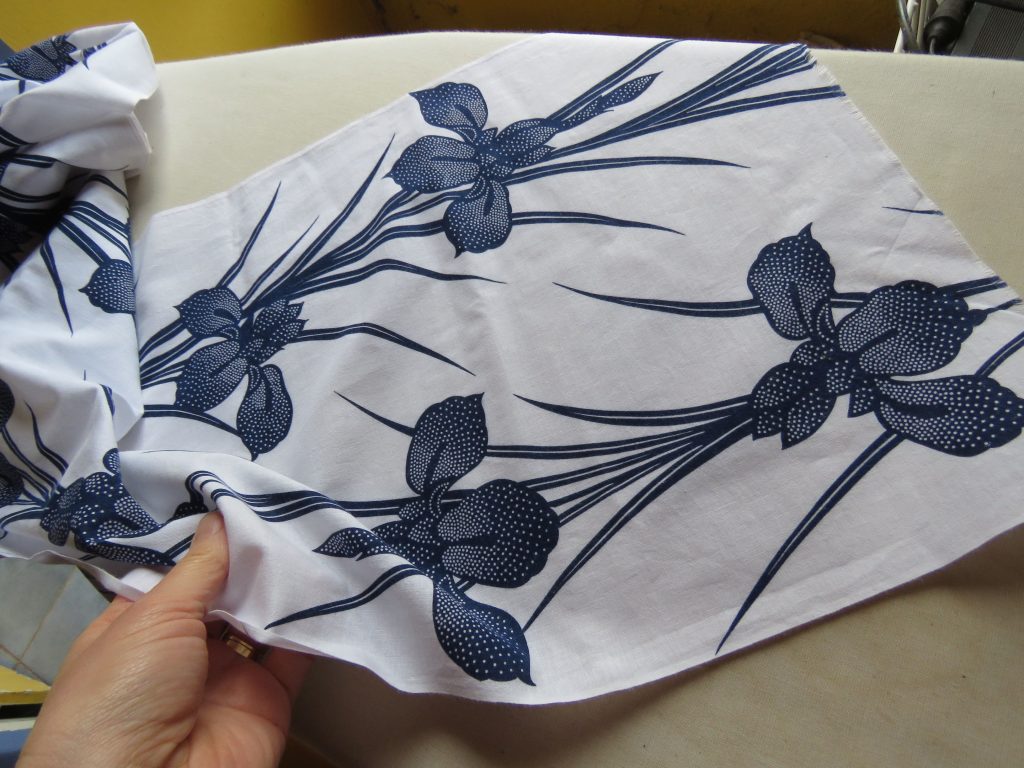
The construction is separated into three phases, and the first is to construct a bias tube from a perfect square. There’s a demo here of the process. Here’s my tube, all pressed and ready to go.
The second phase is to cut the pattern from the bias tube. This can be drafted directly onto the fabric (watch a demo here) which I did, using a template for the neck, or printing out the pdf pattern and laying it on top.
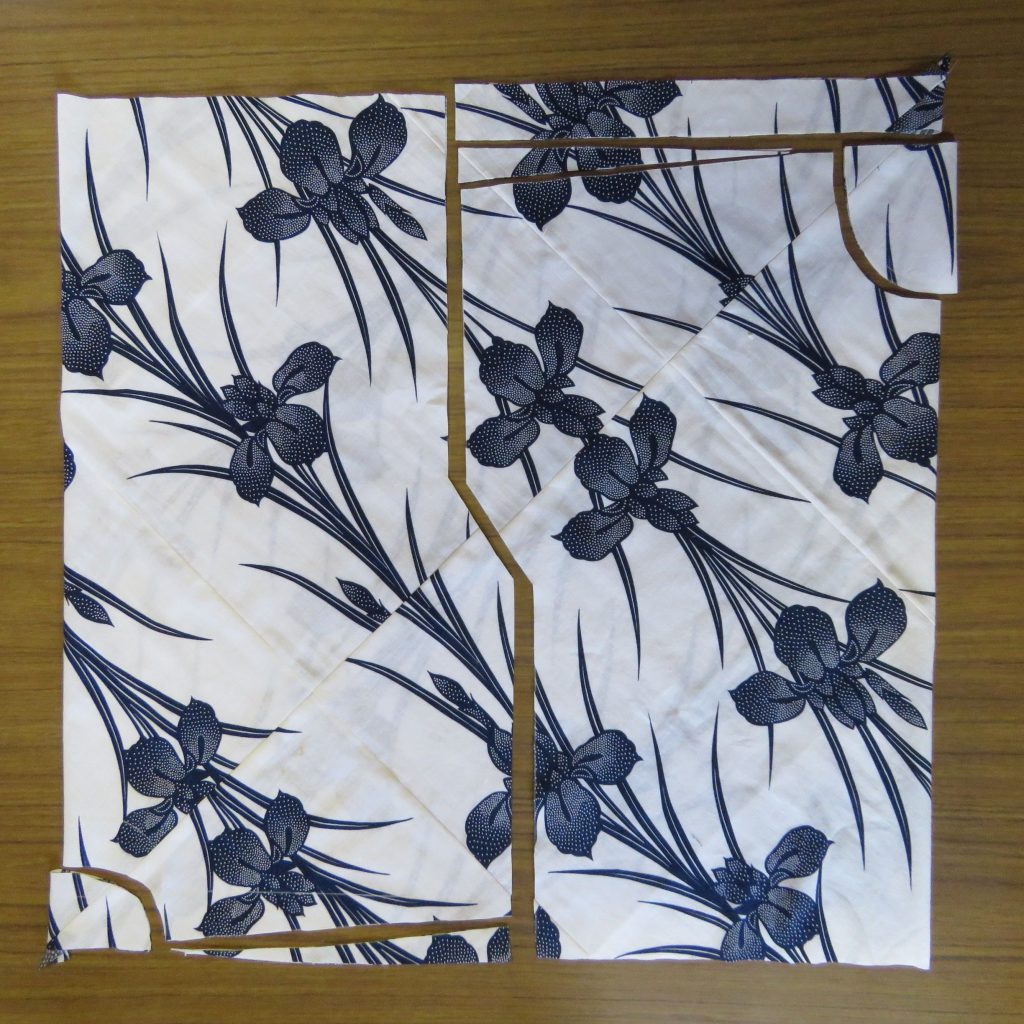
Drafting straight onto the fabric can be confronting if you’re not used to it! But it’s quicker than printing and taping a pdf pattern.
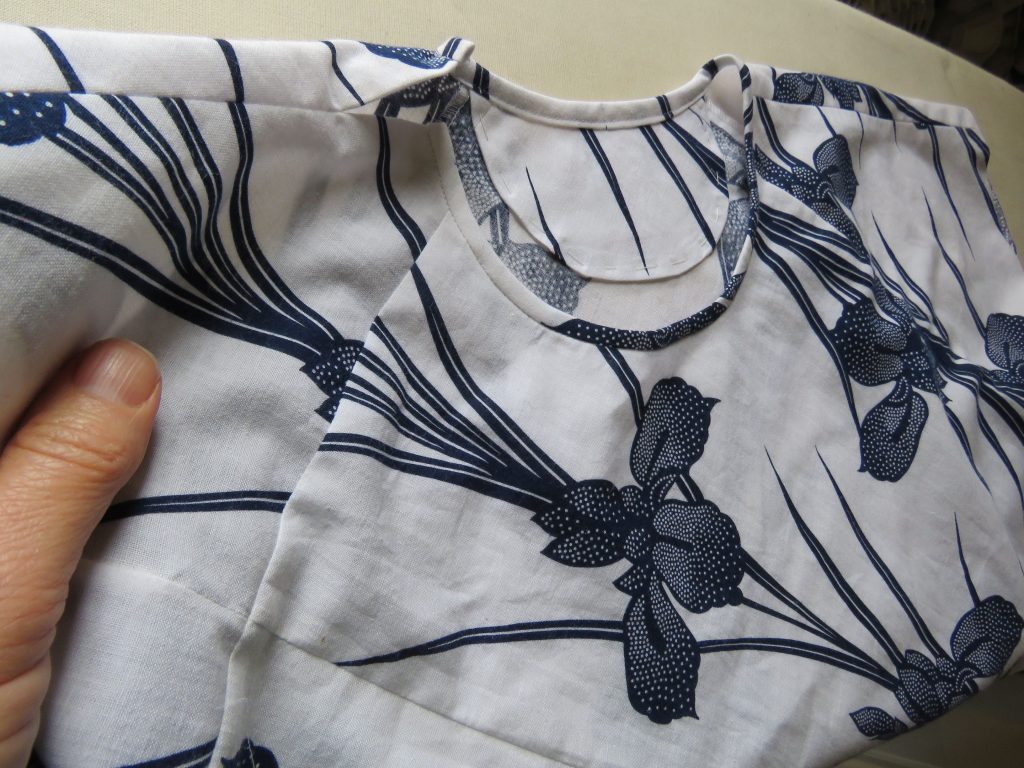
A neat part of this tube construction is that the seams end up looking like raglan seams coming from the neck.
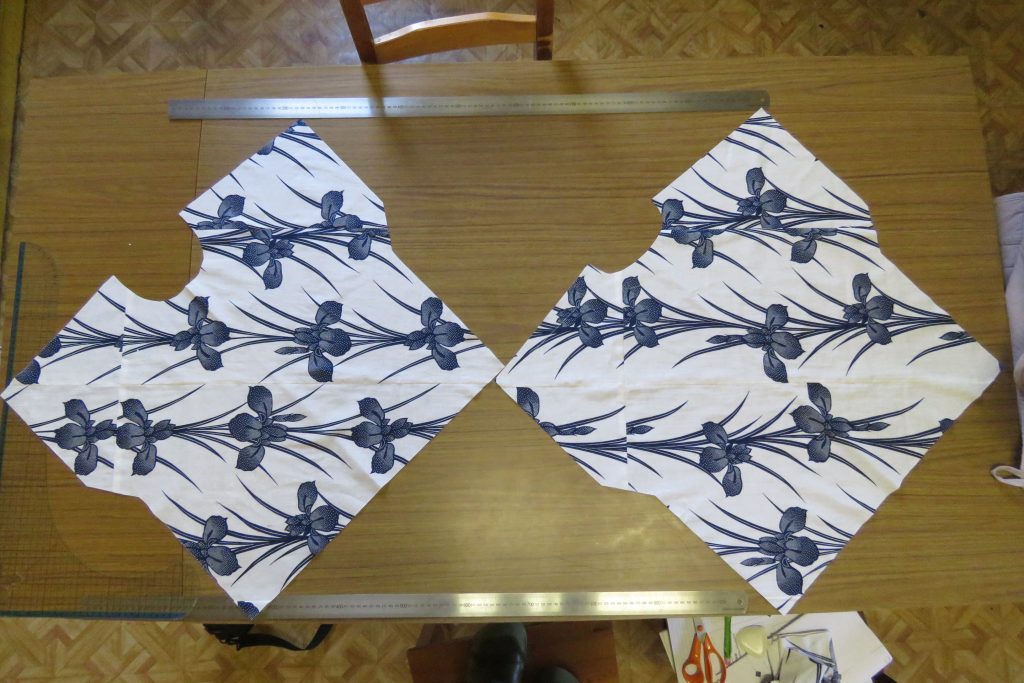
Bias cut is typically quite wasteful of fabric, as the pieces are cut at 45 degrees on the rectangular fabric, leaving triangle-y shapes around the edges. But bias cut zero waste patterns have a huge fabric-saving advantage, and can sometimes be even more economical than non-bias conventional patterns. While I had the pieces flat on the table, I wondered what the fabric yield would be if they were cut conventionally?
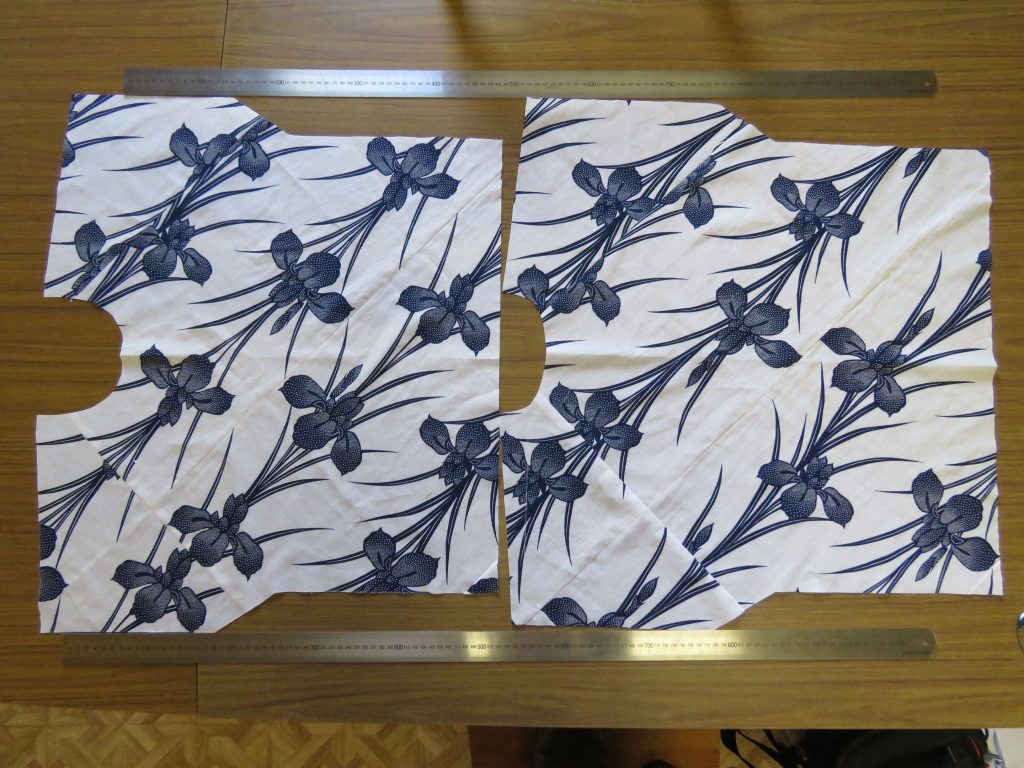
Then it was on with phase three, the sewing.
Emily gives instructions for a beautiful clean finish on the inside as well as the outside, with flat fell seam options. The neckline is bound with a bias strip that’s in the cutting layout, and the sleeves are also bound.
As my fabric is very stable, and I’m an overlocking kinda gal, I overlocked the seams and got as far as the “let’s try it on” stage.

I made size D and have a 35″-ish bust.
I like it very much! As the pattern promised, it does offer “exceptional comfort and movement”.
I’m planning to hand sew the hems, and possibly hem the sleeves the same way rather than bind them.
I intend to make this again, as Emily and I have arranged a pattern swap where we make each other’s new pattern. She got this one finished first, and mine (a skirt) will come out later in the year. I’ve gotten extra fabric to make some bias tops to match with the idea of a two-piece dress.
Come back next week for a finished top and some styling inspo.
Cheers!
Hello Liz,
The top looks wonderful on you and I am so glad you recommend it for plus size with larger busts… I wasn’t sure if it would look on me and now I may just try it! Thank you again for your Monday posts! I look forward to your skirt pattern!!! Best, Giuls
Hi Giuls, happy to be part of your Mondays 🙂
I think this top would work well for large busts as it’s cut on the bias. The photos of the pattern testers are excellent for seeing it on a range of body shapes and sizes.
I noticed the cross body seam in the Insta photo and wondered if you’d been joining strips – I have my answer!
I agree that the detailed, and very useful, measurement, adjustment and ‘how to attack this pattern’ pages can seem daunting. I have learnt to compartmentalise those pages after assessing the situation when I first tried a pattern of Emily’s (Pierce shirt). I see it like skipping the Forward in a book now.
Size D was what I had earmarked, so I’m reassured that that is the one to go with 😉 I had also wondered about hand stitching the hems as it works so nicely on the Sandie shirt. Fabric type will affect whether I do or not.
Hmm, which skirt could that possibly be? 😉
Well spotted on the joining strips. The selvedges on the fabric were so beautifully fine and tight that it was easy.
How handy it is when one of us makes a pattern first! I could probably have made size C but another family member “expressed an interest” in it, and D would fit us both.
I’ve tried both sizes, and going a size up on my second shirt was a perfect choice for me 🙂
Ah Liz the Influencer! I have seen this pattern before and it swished past my frontal lobe, but you caused me to buy it as it’s exactly what I need for a challenge. Thank you for such a comprehensive review.
Just let me loose on TikTok!
You know I only review things I think are good 🙂 I think you will enjoy making this, Sue.
This top looks really nice! Well done for the choice of fabric, it probably looks even better in the biais than it would have looked in the grainline!
I always have a little anxiety about zero waste patterns cut from a square as I’m tall and not that large… I can’t see the way to end up with better than a bag AND my belly button covered.
Thanks Liseli. I agree, it goes very well on the bias and I was pleasantly surprised – it’s sometimes hard to picture how it will turn out.
I understand the square pattern/tall person thing. The pattern has details for making the top longer, although it creates a bit of waste. Drapey-er fabrics would drop more and be longer too.
A little waste is better than not wearing the top, and better than a lot of waste making a top that’s far from zero waste 🙂 Thanks for the tip, it might get on my to do list!
Hello Liz – I love this top, and the Japanese cotton looks like yukata fabric … that would explain the narrow width. I plan to try this with my stash of vintage yukata fabric, and also with vintage kimono silk … thanks for the inspiration, also looking forward to seeing your styling tips for this. Take care!
Thank you Linda. I suspected it was yukata fabric as we have a real yukata (used as a summer dressing gown) in almost identical fabric.
The fabric was an absolute joy to sew and I think this top would be beautiful in silk, too.
A full discoure: I’m completly biased on my opinion for 2 ressons, first one is that I simply love Emily’s patterns, I’m always chalenged by them. Second is that I was a tester for this pattern, and now I love her even more, she was parfect from minute one, so opened to our questions, opinions, and anything… I’ve made myself two shirts so far, first one was out of a very light cotton/poly mix that I had since forever… but it turned not being my cup of tea, so this will probably not be overly used… But number 2 (the one I’ve posted and you cand see on Emily’s photodump), was out of a linnen mix (from the thrift store, so I’m not 100% sure of the content) and I loved so so much…
BUT, now that I’ve seen yours, SO PERFECT, I just need to sew one out of a patterned fabric!!
Thanks for sharing your version, and I can’t wait to see the skirt that you’re planning!
BTW, your ZW beanie pattern is already my fave! It’s winter back home now (Brasil), and I’ve sent the family all sort of colors in 100% mernino lightweight knit (from Discovery Fabrics, just here in BC Vancouver Island)
Yes, no convincing needed here! No-one does easy-wearing, thoughtfully designed patterns like Emily, and she is wonderful to work with. She contributed a designer story to A Year of Zero Waste Sewing and was great.
What a thoughtful idea, sending winter hats off. Thanks for using my pattern.
Spotted the fabric as a yukata print immediately! Nice joining, the bias cut suits the fabric and makes it interesting. Might give it a try myself.
Of course you would spot yukata! Enjoying following your adventures in Japan.