Humpty Dumpty gets BIGGER!
Coming up later this month, I’m presenting a workshop at the Making Zen Online Retreat. This is a free event, and I highly recommend it to you.
Read more and register here for FREE.
The retreat runs from 26th-30th May. If you decide to order a VIP pass, you can start early and view all the workshops from the 12th.
In my workshop, we’re making a toy Humpty Dumpty. It uses a zero waste pattern, and as I guide you through the how-to-make, I talk about the design process and give you sewing tips you can use for other things.
Here’s a little 40 second montage trailer of it.
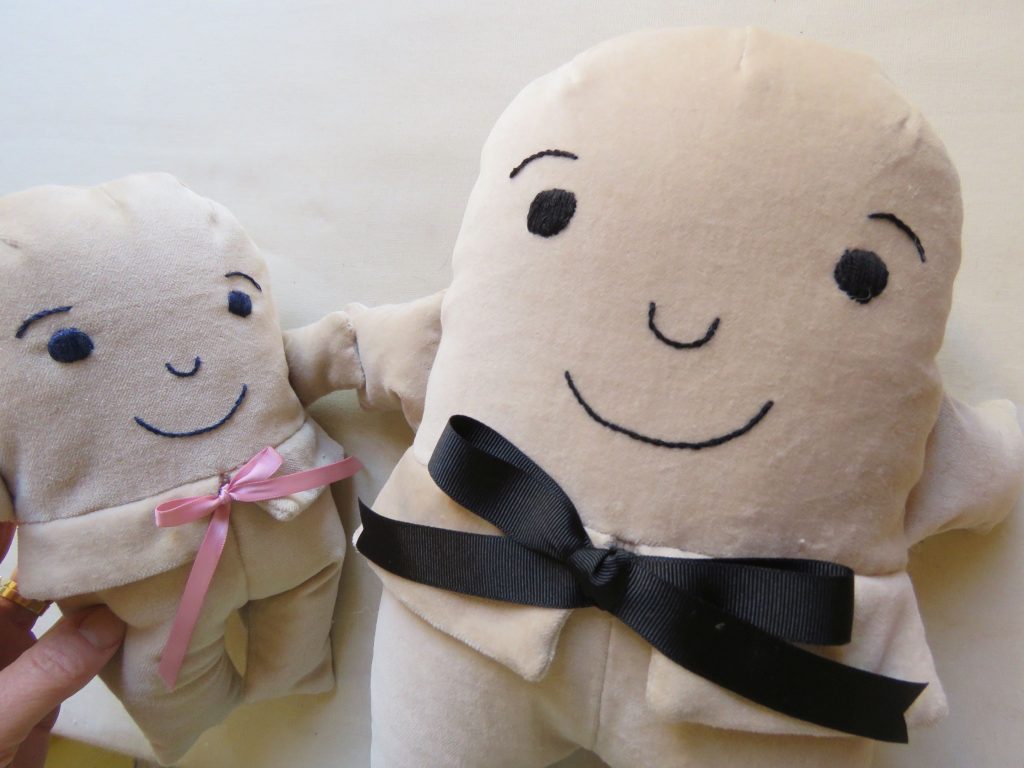
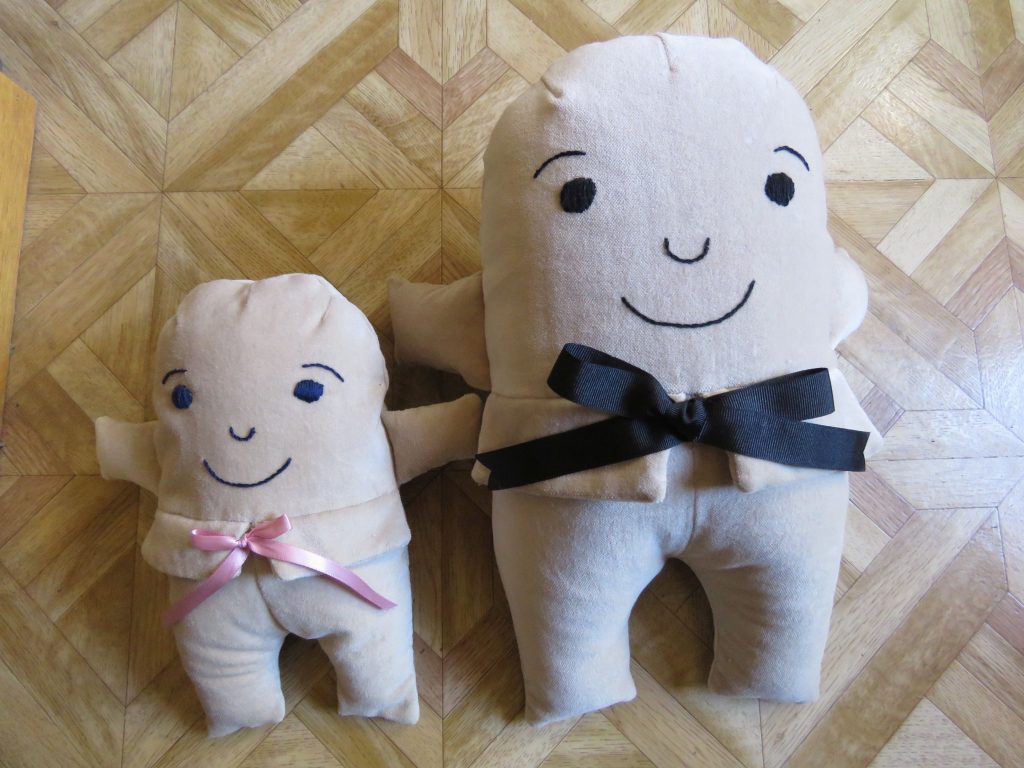
Humpty is fairly small, about 9″/23.5cm tall, and I wondered if he could be made into a cushion by just printing out the pattern bigger. Have you ever done this with a toy pattern?
Mr H went off to the copy shop and got the pattern printed out on A3 paper, which I thought would make it 200% bigger but actually it was only 140% bigger. I was hoping for more cushion-sized. But this turned out to be lucky, as there was just enough beige velveteen left over from the smaller Humpty.
In case you’re planning to do this workshop in a couple of weeks time, here’s a couple of notes to file away. Scroll down to the end for my hot tips for sewing velveteen.
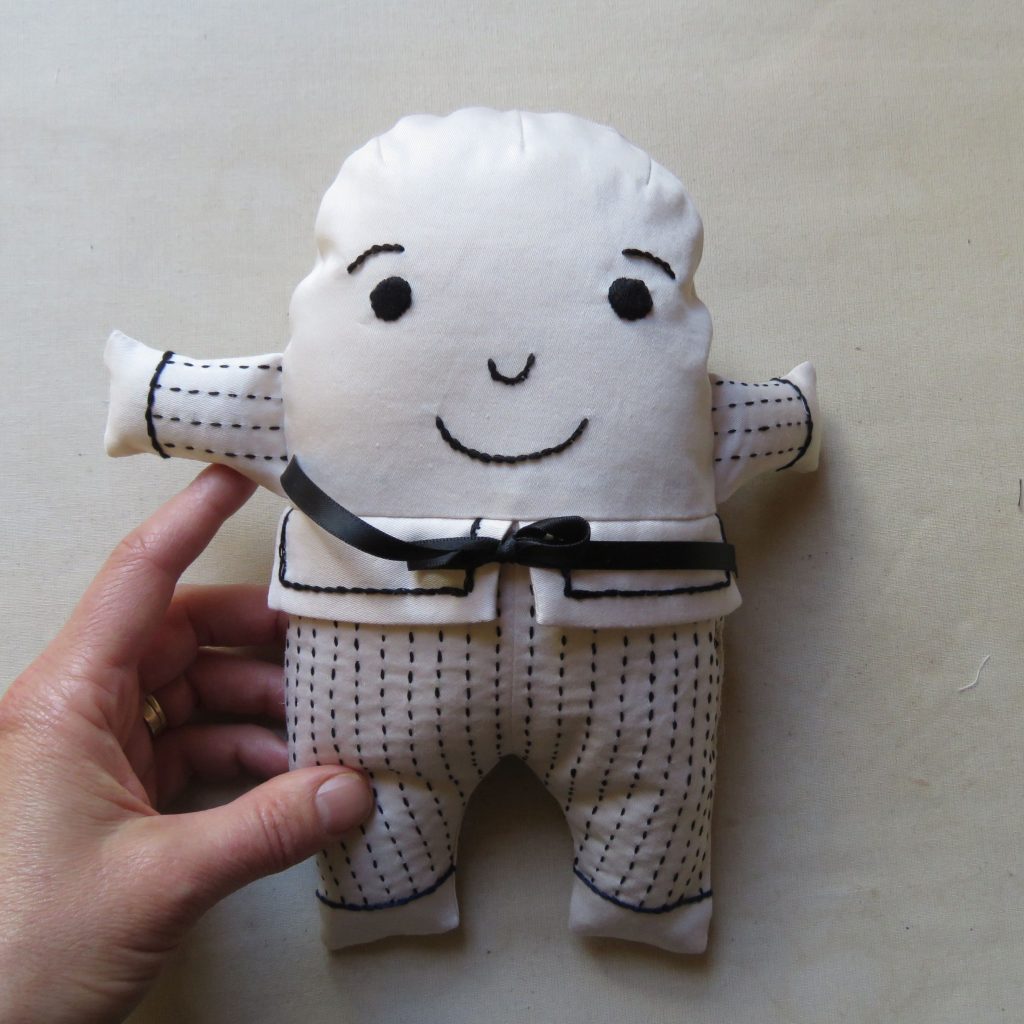
Bigger Humpty Dumpty
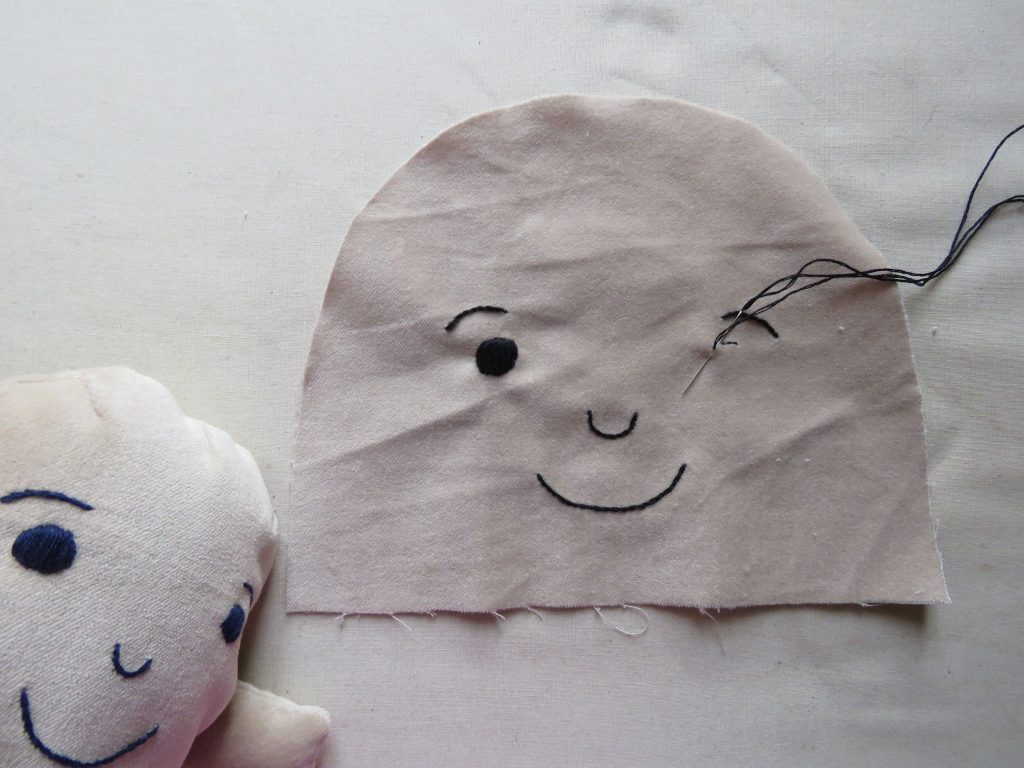
1. Embroider the face using the same stitches and the same number of strands of embroidery floss.
2. Take the same seam allowances as the original pattern. The trousers will end up a couple of mm wider than the head, but that’s OK.
3. When you sew the collars, check them against the width of the head and adjust them to fit.
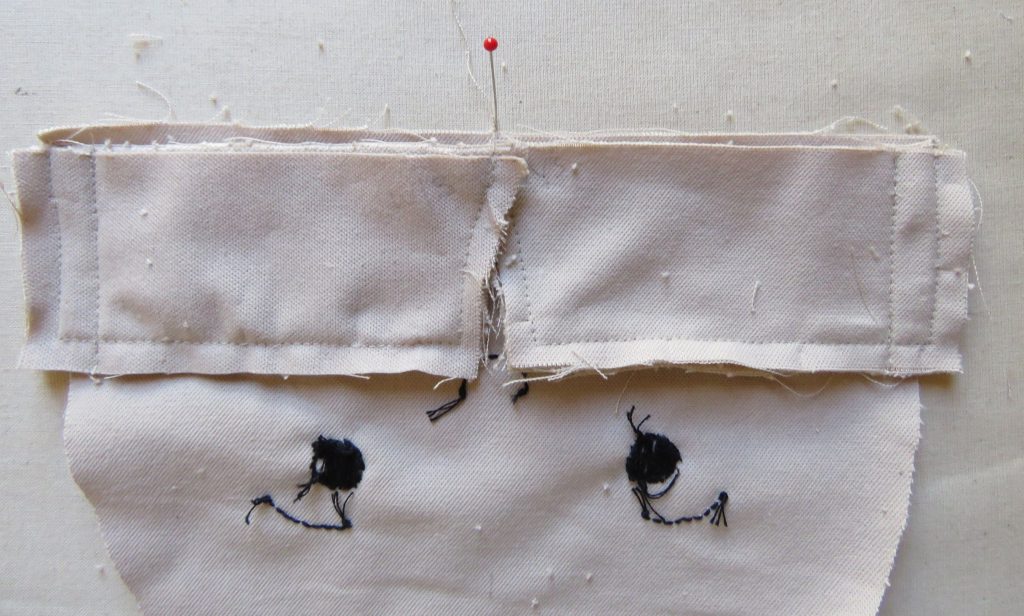
Note that it’s better to have the collars a little narrower than to have them wider.
4. You’ll need more ribbon. I used 1/2″ wide grosgrain, 95cm (37.5″). Grosgrain is easier to tie in a bow than satin ribbon. Recommend sewing it on by hand if you’re using velveteen.

5. Here’s a side-by-side of the A4 and A3 Humpty Dumptys so you can see the size difference.
Three Hot Tips for Sewing Velveteen:
1. Use zillions of pins, in both directions (parallel and perpendicular), to stop the pile from slipping against itself. Expect the pinning to take longer than the sewing. As you sew, only remove the ones you need to, and sew carefully and slowly over the others.

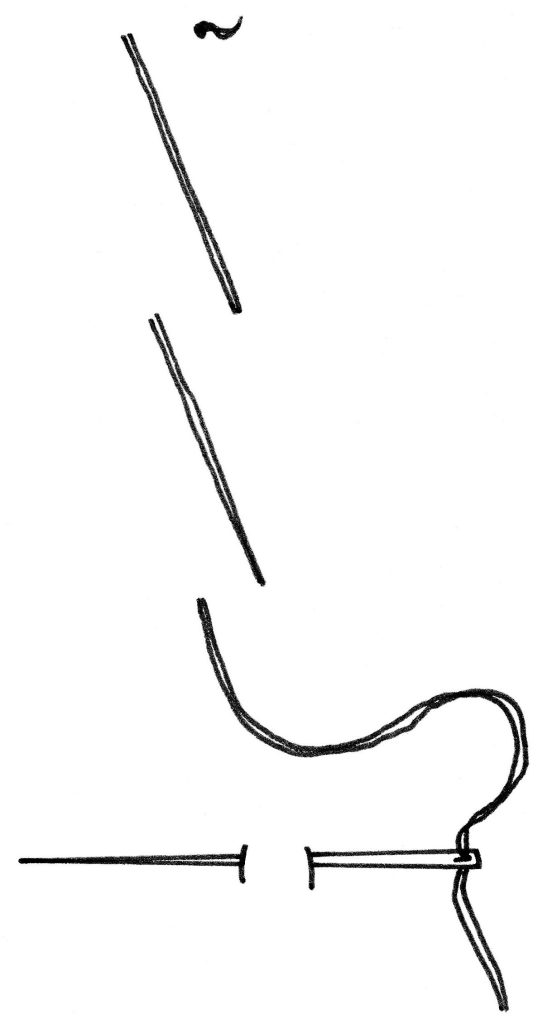
If you’re not adverse to basting, you could baste instead of using pins, but do it like this so it holds the layers in two directions:
2. Steam, don’t press. You can’t really press velveteen or you’ll crush the pile, so instead hold a steam iron just above the surface and give it a few breathy puffs.
3. Aim to start and finish sewing in one session, so you can clean up all the crumbs afterwards. Velveteen sure is messy!
Hope to see you at Making Zen!
Cheers! Liz
Discover more from The Craft of Clothes
Subscribe to get the latest posts sent to your email.
Hi Liz! ” And all the king’s horses and all the king’s men…” Well too bad for the original Humpty Dumpty that Liz Haywood was not around to “put him back together again”! Your Humpty Dumpties are terrific! Thanks for posting!
Many thanks Juliana!
I’d like to make this with a SEN class… are the videos available afterwards?
Could be a good project for it. During the retreat the videos are only up for 24 hours (not sure which day mine will be on), but you’ll get lifetime access with a VIP pass along with lots of extras. The other option is to wait until November when I’ll sell the pattern + video on my own channels.
I adore your Humpty and cannot wait to make him, one for each grandchild, I suspect! Your tips are so helpful, although I’m not sure I’ve got any velveteen in this colour. I might be using calico!
Thank you Sue, you will enjoy making this. I made the first prototype in calico and it was fine.
Basting ( sewing big stitches like pins) doesn’t actually take any longer than pinning – and is quicker to remove.
After doing all that pinning, I agree with you!