How to sew an invisible zip (finally!)

Several people have asked me for a post on how to sew an invisible zip (although this might come too late for them), so here it is.
Firstly, some notes:
- An invisible zip can be almost one of the last things sewn on a garment. Sew the zip in before you sew the rest of the seam it’s inserted into, or leave a generous gap in the seam to insert the zip.
- The seam allowance can be as small as 1cm (3/8″).
- Because invisible zips are sewn in unzipped, you’ll never use the last 2.5cm (1″) of length on the zip because the slider is in the way. Therefore, buy a zip 2.5cm-5cm (1″-2″) longer than the opening.
- While it is possible to sew an invisible zip in using a conventional zipper foot, most people find that a proper, machine brand, invisible zip foot makes the job soooo much easier. The foot has grooves in the sole to help hold the zipper coil open as you sew it. A cheaper alternative is a plastic invisible zip foot that fits some machines, or a roller foot that has attachments to fit any machine. Some people use these very satisfactorily, but see what works best for you.
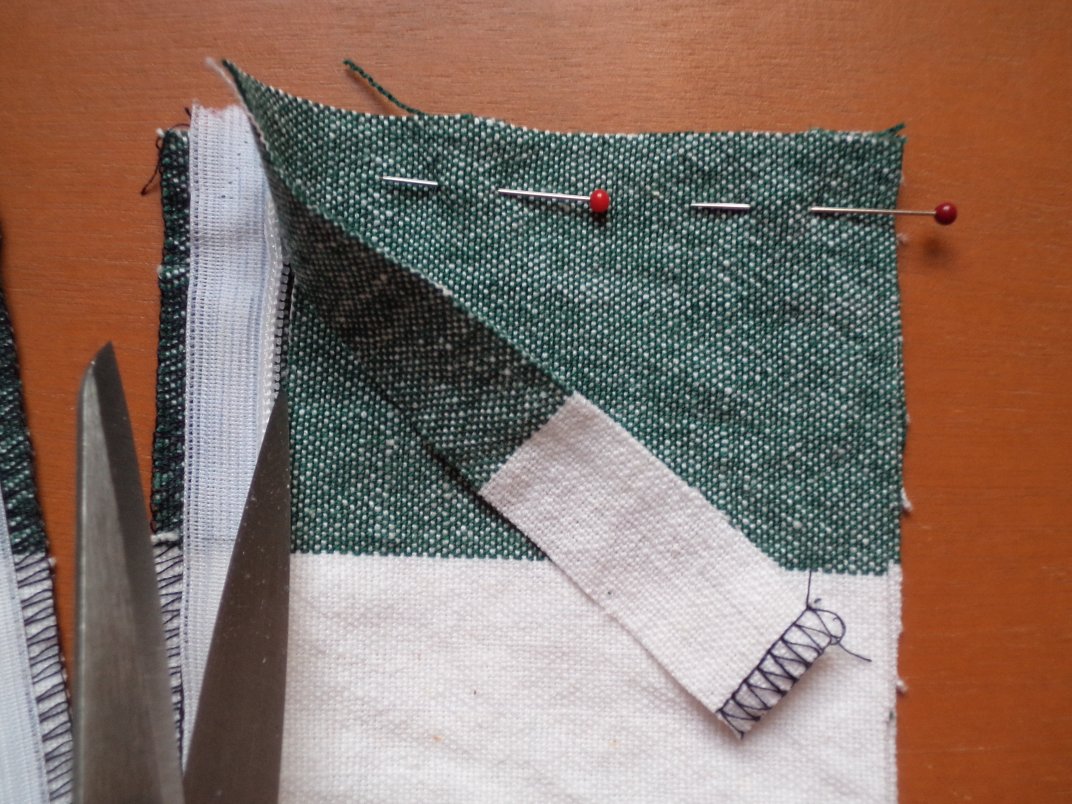
Step 1. Overlock the edges of the fabric. I’ve deliberately chosen a horizontally striped fabric so I can show you how to match stripes and junctions across the zip.
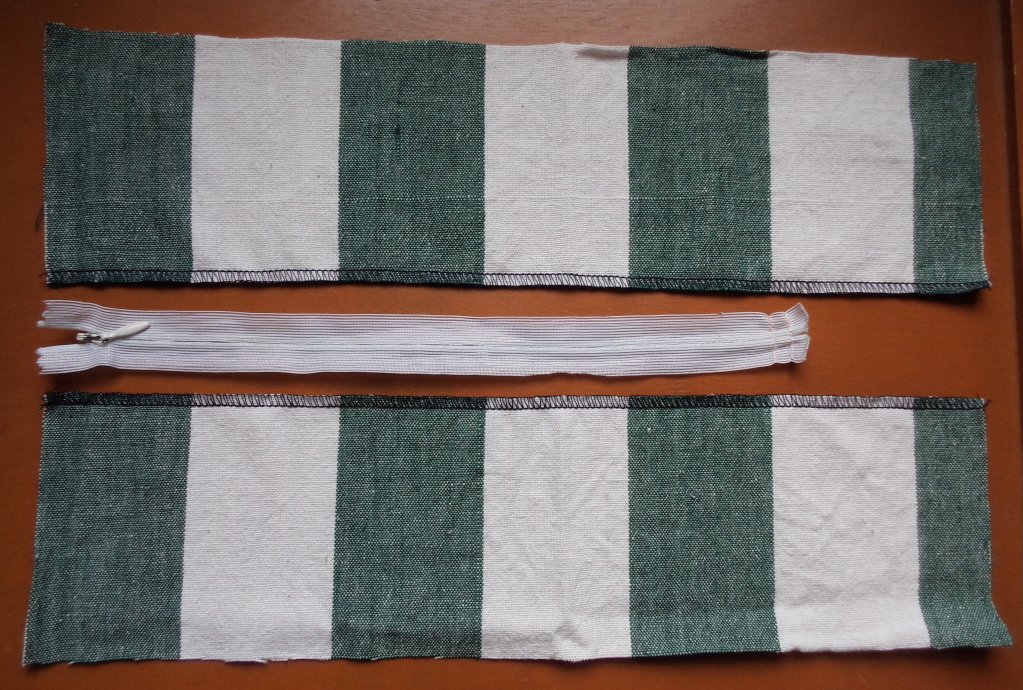
Step 1
You might notice this zip has been shortened by stitching twice across the bottom and cutting off the excess tape. If your zip is only a little bit too long, don’t bother shortening it; just leave the extra length hanging inside the garment and only sew in the length you need.

Step 2. Position the invisible zip on the edge of the garment, right sides together, and pin in position. If you have a 1cm (3/8″) seam allowance, match the edge of the zip to the edge of the fabric. If your seam allowance is 1.5cm (5/8″) like mine is in the photo, you can conveniently place the zip on the edge of the overlocking.
Ensure you leave the correct amount of seam allowance at the top of the zip. If you plan to finish the top with a hook and eye, allow enough room.
You may like to machine baste the zip in along the edge instead of pinning it. I recommend this if this is your first zip; you’ll find it easier.
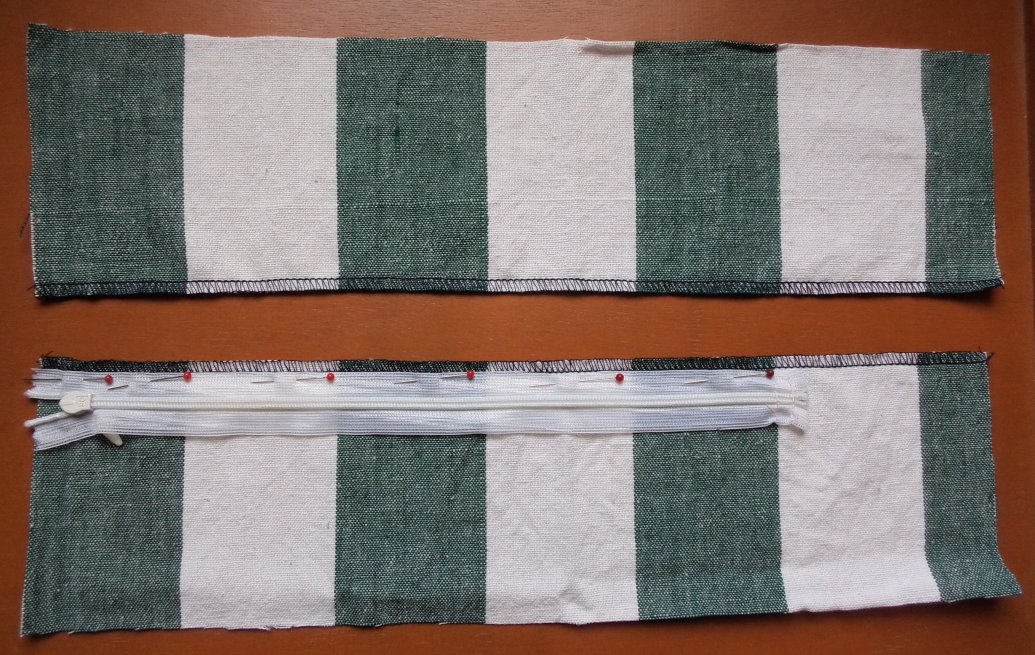
Step 2
Step 3. Fit the invisible zipper foot to your machine. You can see from the photo that I’m using a regular zipper foot (actually it’s a universal zipper foot).
Undo the zip and roll back the coil with your fingertips. Plunge the machine’s needle into the groove, so you’re starting off in the right place. Stitch in the groove as far as you can (until you’ve reached the zip slide) and backstitch securely.
You’ll need to hold the groove open as you stitch. Even if you have a proper invisible zip foot, you’ll still have to guide the machine to stitch in the right place.
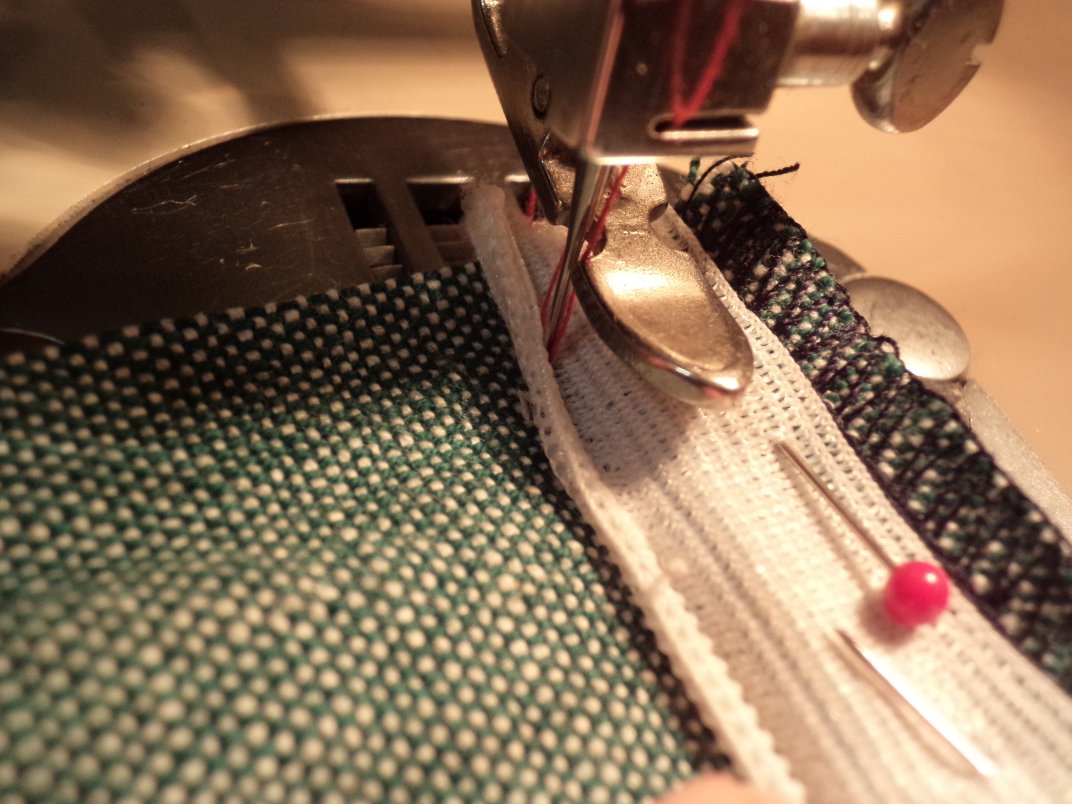
Step 3
Step 4. Do up the zip and mark the exact point where the stitching finishes.
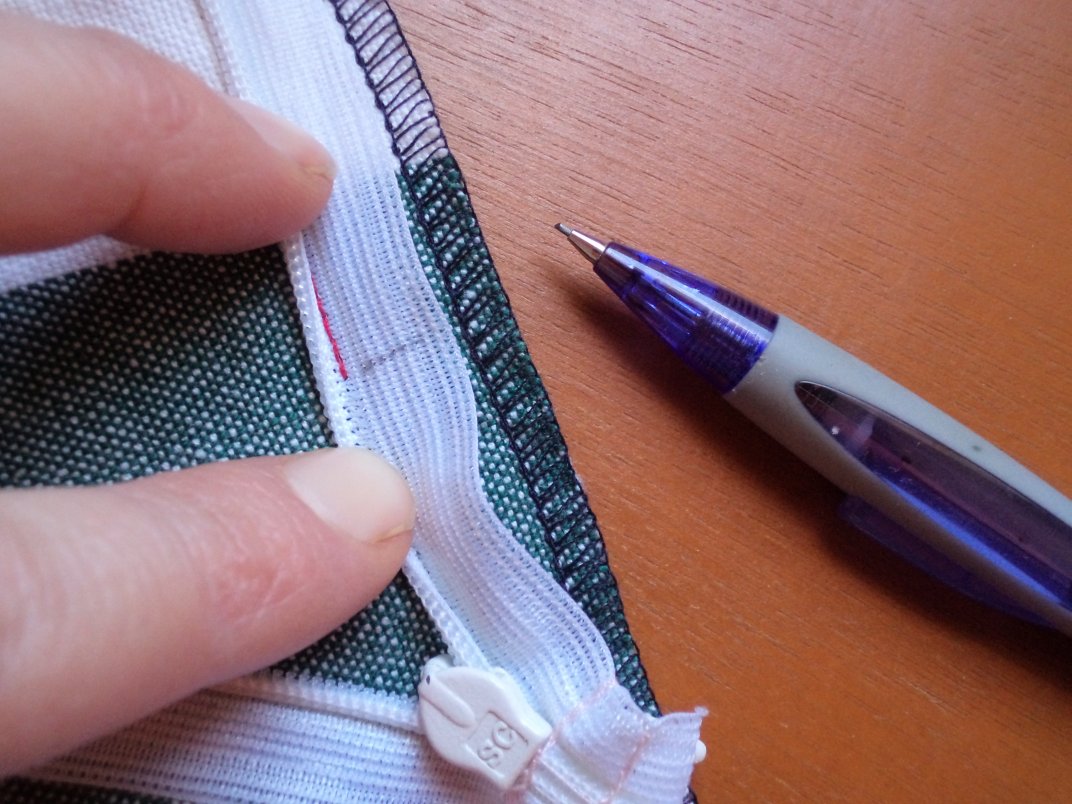
Step 4
Mark the other side of the zip to match. Now when the zip is separated you’ll know where you need to stitch to.
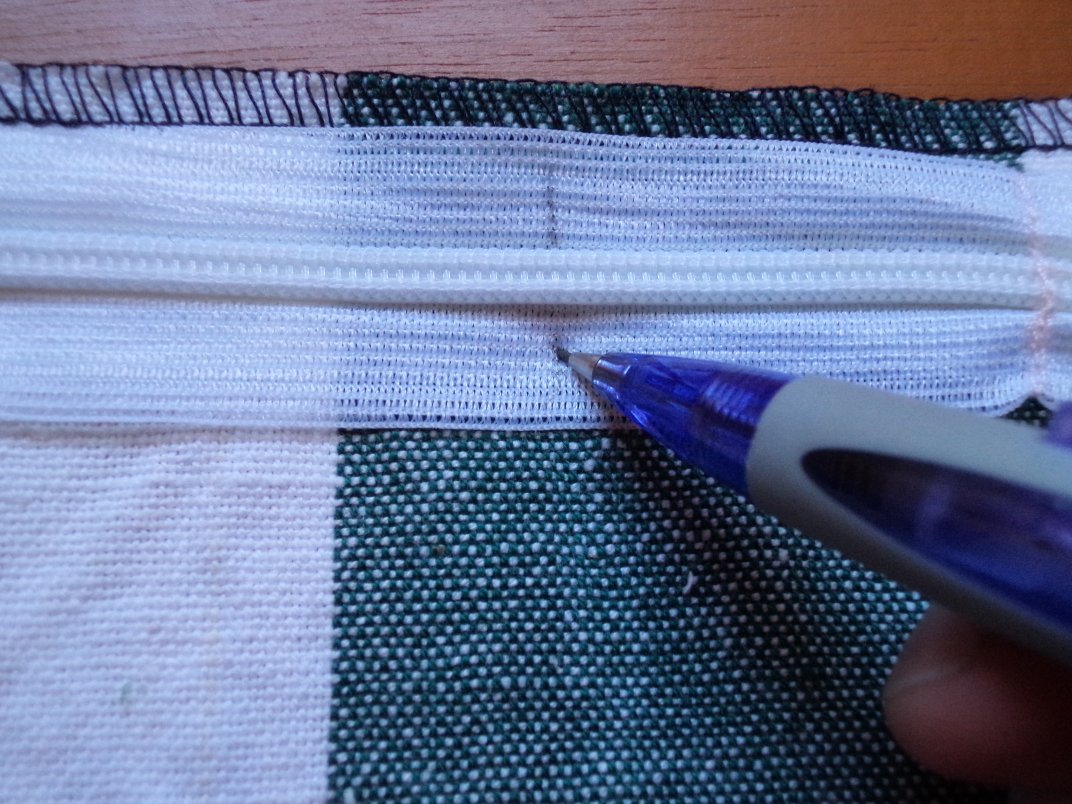
If the zip runs through stripes like mine does, or a seam junction (for example a yoke), mark those points too.
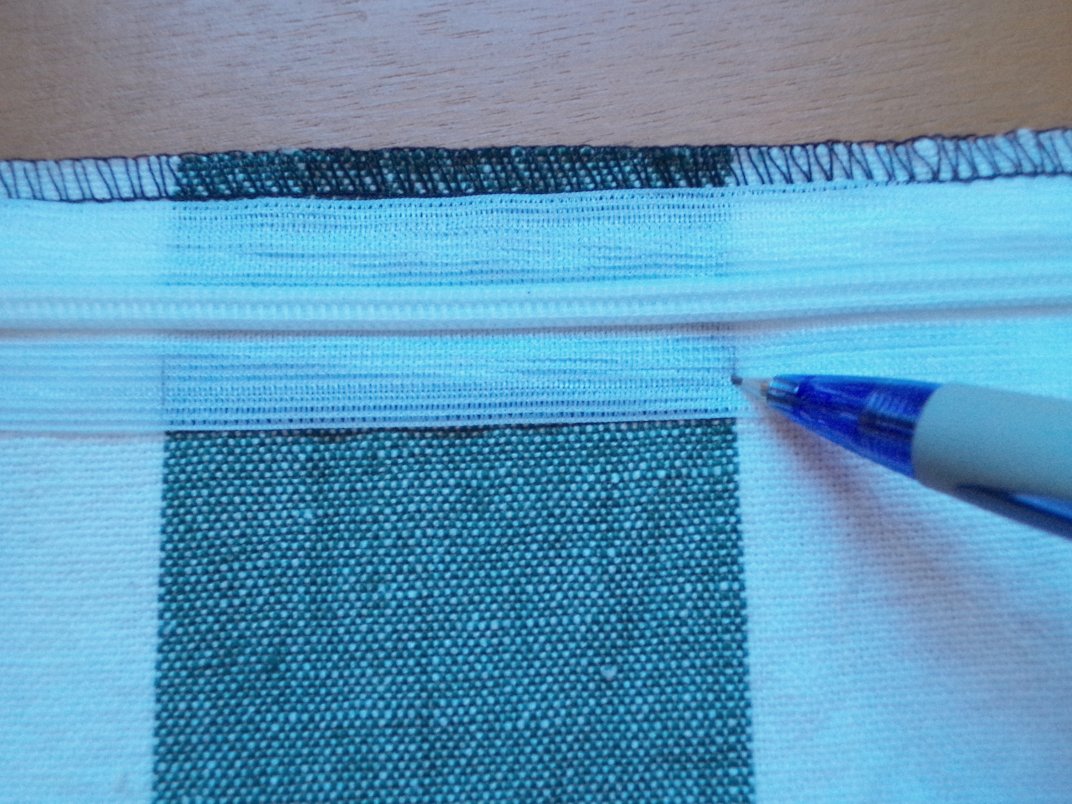
Step 5. Position and pin the second side of the zip, right sides together like before. Note that the garment will now be inside out. Make sure the second side lines up with the first -at the top and bottom of the zip, and at the bottom of the garment.
If you have stripes or a seam junction, position the zip using the marks you made in the previous step.

Step 5
It doesn’t matter whether you sew the second side from the top or the bottom, but the stitching must come to exactly that point you marked. Backstitch securely.

Do up the zip and check that you’ve sewn it correctly:
- You shouldn’t be able to see any of the zip on the right side – it should just look like a seam. If you haven’t stitched close enough to the groove, the situation is easily remedied by sewing another line of stitching in the groove.
- If you can’t do the zip up, it means that you’ve sewn too close to the coil. You only need one stitch out of place for the zip to jam. Unpick the offending section and re-sew it.
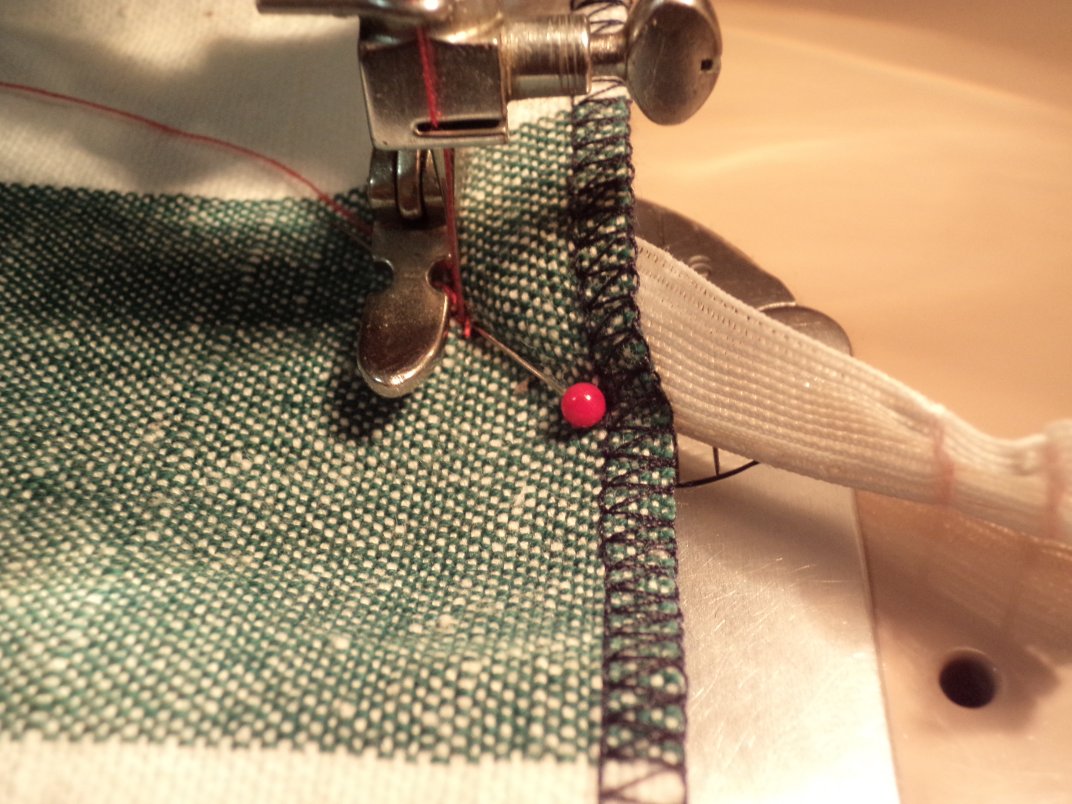
Step 6. Sew the seam below the zip: with the zip done up, match the right sides together below the zip. Take a pin and place it through the very last stitch on each side, keeping the actual zip free.

Step 6
Change the foot on your machine to an ordinary zipper foot. If you’re using a universal foot like me, move the needle so it’s just alongside the foot, not in the semi-circular cut out.
Begin sewing by plunging the machine’s needle through where you put the pin. Whip out the pin, put the machine’s foot down and sew the seam, backstitching at the beginning and taking the correct seam allowance.
This can be a difficult area to get right, because there needs to be a smooth, unnoticeable transition from zip to seam.
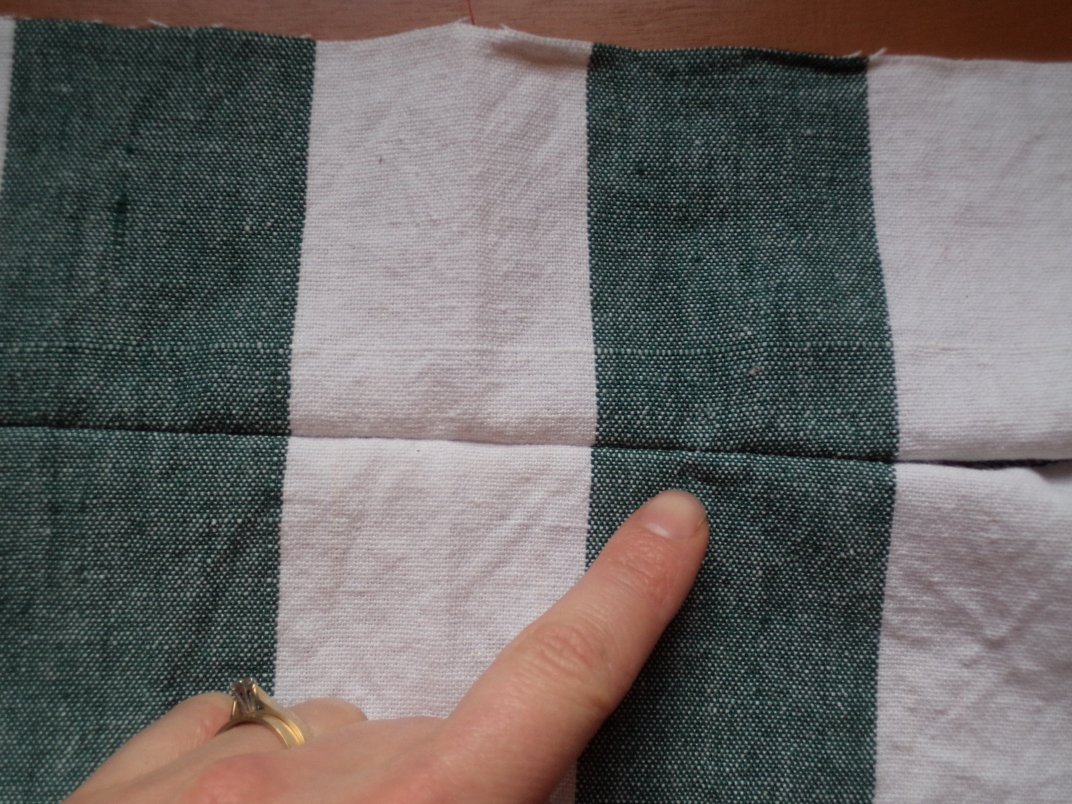
Can you spot the end of the zip?
If your garment has a facing, here’s a neat way to finish the top of the zip:
Step 1. Prepare the facing (interface it, overlock the lower edge, etc) and pin it accurately in position (right sides together) along the top edge. Trim off all the seam allowance next to the zip – in my example it’s 1.5cm (5/8″).
Step 1 Facing
Step 2. Lay the zipper tape on the facing and step it 5mm back from the freshly-cut edge. (If you basted the zip before you sewed it, you’ll need to undo the basting a little way.)
Note that the garment will be longer than the facing at the moment.

Step 2 Facing
Step 3. Sew a line of stitching through the middle of the zipper tape, using a regular zipper foot.
I remember this formula by thinking “half and half”: half a centimetre over, stitching through half the zip tape.

Step 3 Facing
Step 4. Push the seam towards the facing. Fold vertically along the coil of the zip, wrapping the garment around the facing. The seam should lie on the facing. Don’t catch the facing in as you fold.
The facing and garment should be the same length now along the top edge.

Step 4 Facing
Step 5. Stitch the top edge through all layers. Diagonally trim the corner a little.

Step 5 Facing
Sew both sides like this. If one side turns out a little higher than the other, there’s no need to unpick – just sew another line of stitching lower to make them the same.
If the garment has a lining as well as (or instead of) a facing, stitch the lining to the entire length of the zip tape, tapering to nothing at the bottom.
And that’s it! I hope you have success.
More sewing directions for zips, including fly fronts, dress zips, open ended zips and lots more can be found in The Dressmaker’s Companion, due out on the 1st of September 2017.
Cheers!